Manual 0-2962 4-1 OPERATION
SECTION 4:
OPERATION
4.01 Introduction
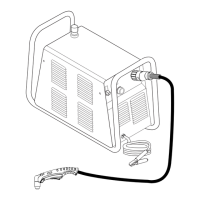
This section provides a description of the SL60 and SL100
Torch Assemblies followed by operating procedures.
4.02 Functional Overview
The Torch is designed to operate with various Power Sup-
plies to provide a plasma cutting system which can cut
most metals. With gouging torch parts the torch can be
used for plasma arc gouging.
NOTE
Refer to Appendix Pages for additional informa-
tion as related to the Power Supply used.
4.03 Getting Started
Follow this procedure at the beginning of each shift:
WARNING
Disconnect primary power at the source before as-
sembling or disassembling power supply, torch
parts, or torch and leads assemblies.
A. Torch Parts
Check the torch for proper assembly. Install proper
torch parts for the desired application (refer to Sec-
tion 4.04, Torch Parts Selection).
B. Input Power
Check the power source for proper input voltage.
Close main disconnect switch or plug unit in to sup-
ply primary power to the system.
C. Work Cable
Check for a solid cable connection to the workpiece.
D. Gas Supply
Select desired single gas supply. Make sure gas
sources meet requirements (see Note). Check con-
nections and turn gas supply on.
NOTE
Refer to Appendix Pages for additional informa-
tion as related to the Power Supply used.
E. Power On
Place the ON - OFF Switch on the Power Supply to the ON
position. If the RUN - SET - LATCH , RUN - SET or RUN -
RAPID AUTO RESTART - SET Switch is in SET position,
gas will flow. If the switch is in RUN position there will be
no gas flow.
F. RUN - SET - LATCH , RUN - SET or RUN -
RAPID AUTO RESTART Switch
If the RUN - SET - LATCH , RUN - SET or RUN - RAPID
AUTO RESTART - SET switch is in SET position, gas will
flow. If the switch is in RUN position there will be no
gas flow.
G. Current Output Level
At the Power Supply, set the desired current output
level. For drag cutting set the control at 40 amps or
less only.
WARNING
Maximum current is 60 Amps for SL60 Torches,
or 100 Amps for SL100 Torches. Operation of this
torch at higher outputs may damage the torch, the
leads, the components, or the Power Supply. DO
NOT operate the SL60 torch at more than 60 Amps,
or the SL100 torch at more than 100 Amps.
H. Pressure Settings
Place the RUN - SET - LATCH , RUN - SET or RUN -
RAPID AUTO RESTART - SET switch to the SET position.
Adjust the gas pressure control on the Power Supply
for the proper gas pressure. Refer to Appendix Pages
for gas pressure and other specifics.
I. Ready for Operation
Return the RUN - SET - LATCH , RUN - SET or RUN -
RAPID AUTO RESTART - SET switch to RUN position.
NOTES
For general cutting, use the RUN position which
provides normal torch operation where the torch
switch must be held throughout the main arc trans-
fer.
For specific applications, use the LATCH position
where the torch switch can be released after the main
arc transfer. The torch remains activated until the
main arc breaks from the workpiece.
Refer to Appendix 1 for a typical detailed block
diagram of Sequence of Operation.
The system is now ready for operation.
 Loading...