Thermo Scientific APEX User’s Guide Page 145
Rejects Menu—Page 6
This menu allows you to set up a time (a time interval, in seconds) during which a
package rejected by your reject-2 device must pass the photo eye monitoring your
reject-2 bin, allowing the reject to be confirmed. Thus, in order for this function to work
you must do the following.
• Make sure that your reject-2 device is downstream of your reject-1 device. In a
typical conveyor application, this means the reject-1 device is used to reject
contaminated packages and the reject-2 device is used for AuditCheck and/or
QAT rejects.
• Set up a photo eye to monitor packages entering the reject-2 bin.
• Physically attach the photo eye to one of the detector’s input terminals (Inputs
1–6). For detailed instructions on doing this, see the “Inputs” section of the
manual.
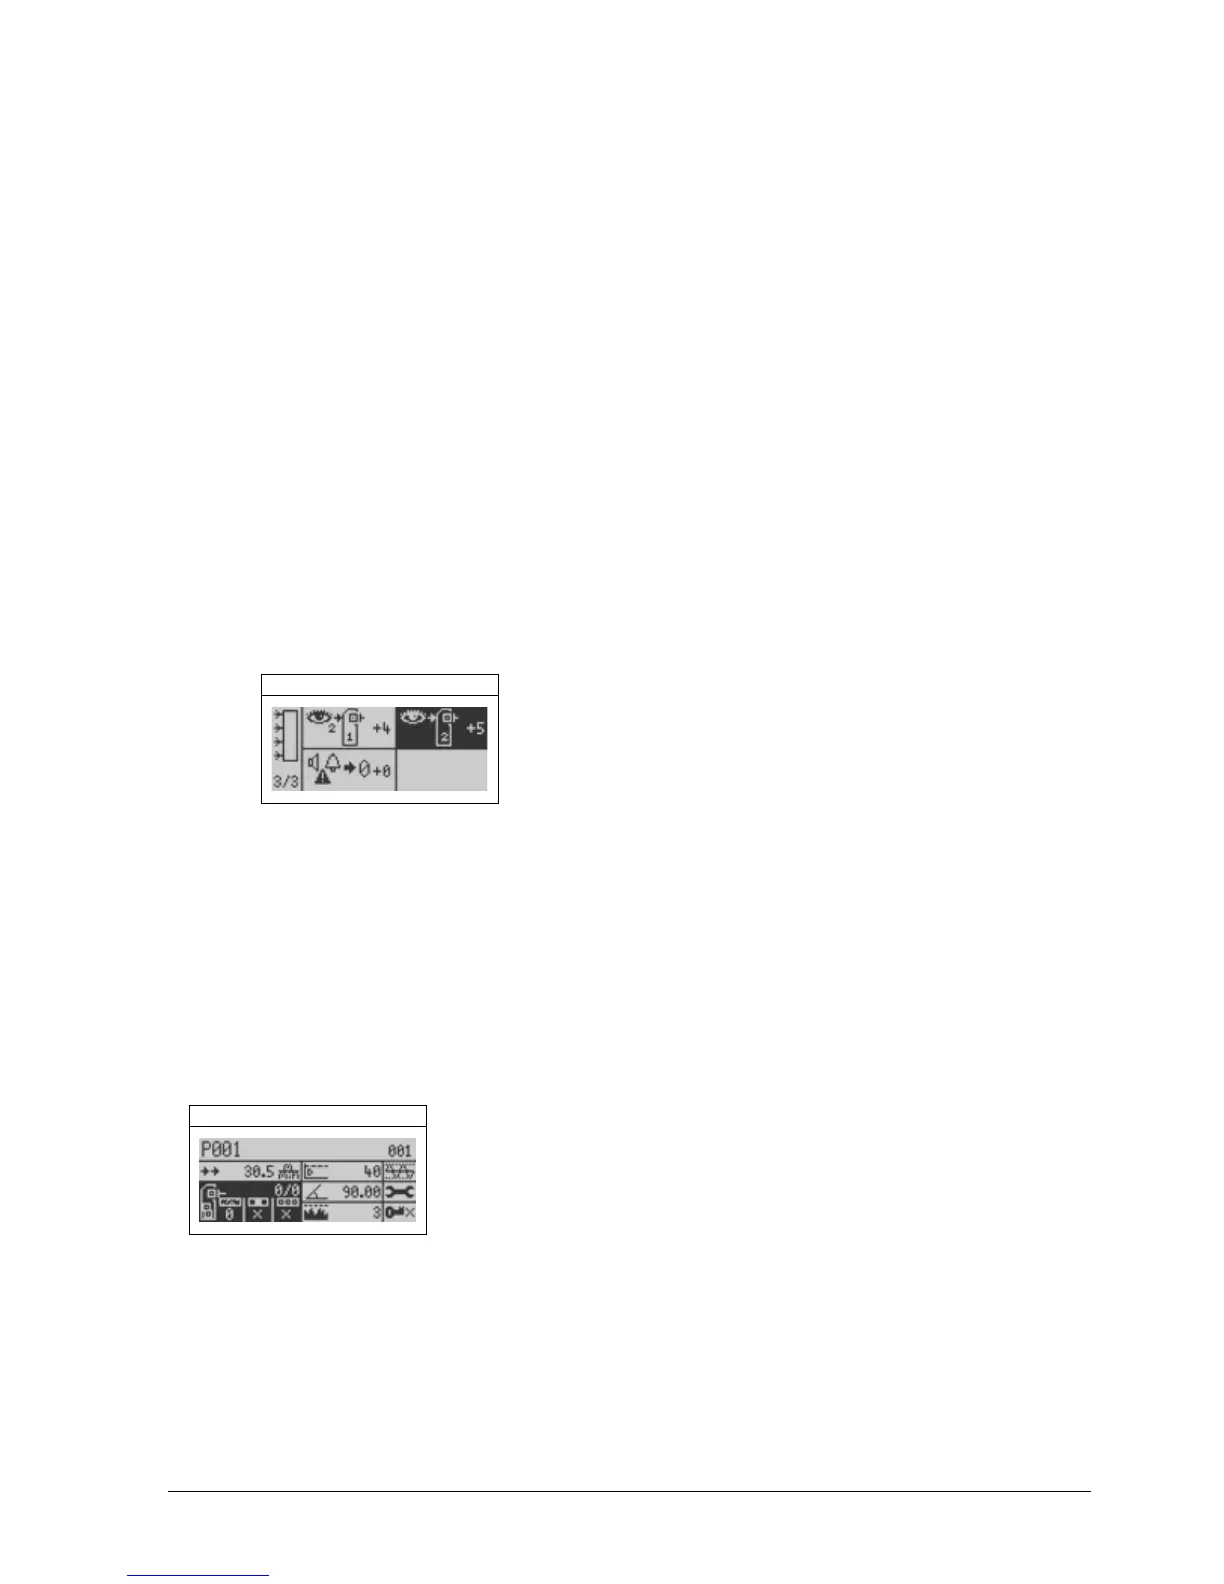
• Tell the APEX which Input (1–6) is being used (that is, make the logical
assignment) and set up the appropriate polarity for the signal from the reject-2
photo eye. For detailed instructions on doing this, see the “Inputs” section of the
manual. The example below shows that we have assigned our reject-2 photo eye
to Input 5 with a positive polarity.
Reject 2 Confirm Input
• Enter a reject-confirm time for your reject-2 device. (Described below.)
• Calibrate the system. (Described below.)
Entering a Reject-Confirm Time for the Reject-2 Device
To enter a reject-confirm time for your reject-2 device, do the following.
1) From the Main Menu, navigate to the rejects menu.
Reject Totals
(continued…)
 Loading...