Chapter 3 | Replacing parts
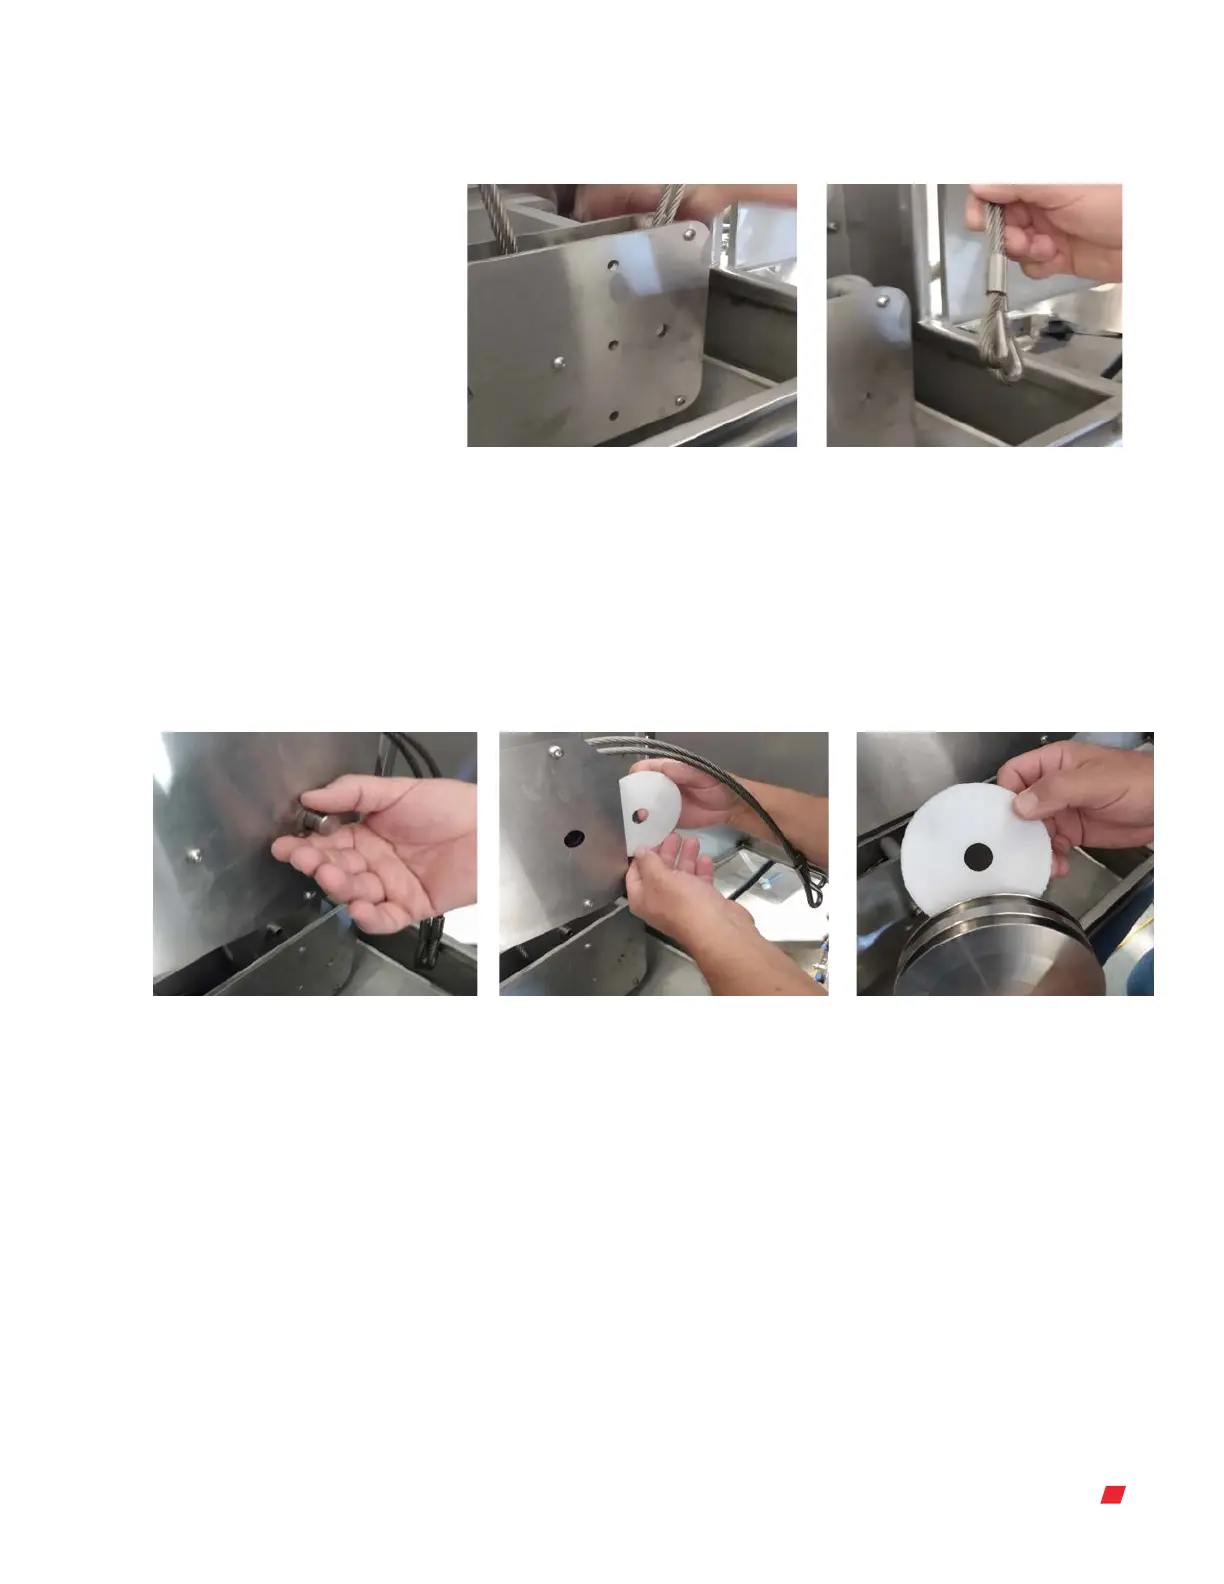
2. Pull pin out to remove the end of the cables (Figures 3.64 and 3.65).
Figure 3.64. Removing the pin from the
pulley assembly.
Figure 3.65. Removing the end of the
cables from the pulley assembly.
Note: It is recommended to replace each pulley one at a time to make it easier to
replace the cables correctly. Begin with the pin on the far right and work your way to
the left.
3. Remove the c-clip and pin (Figure 3.66) to remove the individual pulleys and two
spacers (Figures 3.67 and 3.68).
Figure 3.66. Removing the c-clip and pin. Figure 3.67. Removing the front spacer
from the pulley.
Figure 3.68. Removing the back spacer
and pulley from the pulley assembly.
4. After you have removed the pulley, replace the new pulley and spacers into the pulley
assembly (Figure 3.69).
Thermo Scientific 40DynaDrive S.U.B. Service Guide





 To Next Page