Engine Maintenance
Engine Safety
• Shut of f the engine before checking the oil or
adding oil to the crankcase.
• Do not change the engine governor setting or
overspeed the engine.
• Keep your hands, feet, face, clothing, and other
body parts away from the muf er and other hot
surfaces.
Servicing the Air Cleaner
Service Interval : Every 250 hours —Replace the
primary air lter and check the
condition of the safety lter (more
often in dirty or dusty conditions).
Every 500 hours —Replace the safety air lter
(more often in dirty or dusty conditions).
Removing the Filters
1. Park the machine on a level surface, engage
the parking brake (if applicable), and lower the
grinder .
2. Shut of f the engine and remove the key .
3. Release the latches on the air cleaner and pull
the air-cleaner cover of f the air-cleaner body
( Figure 27 ).
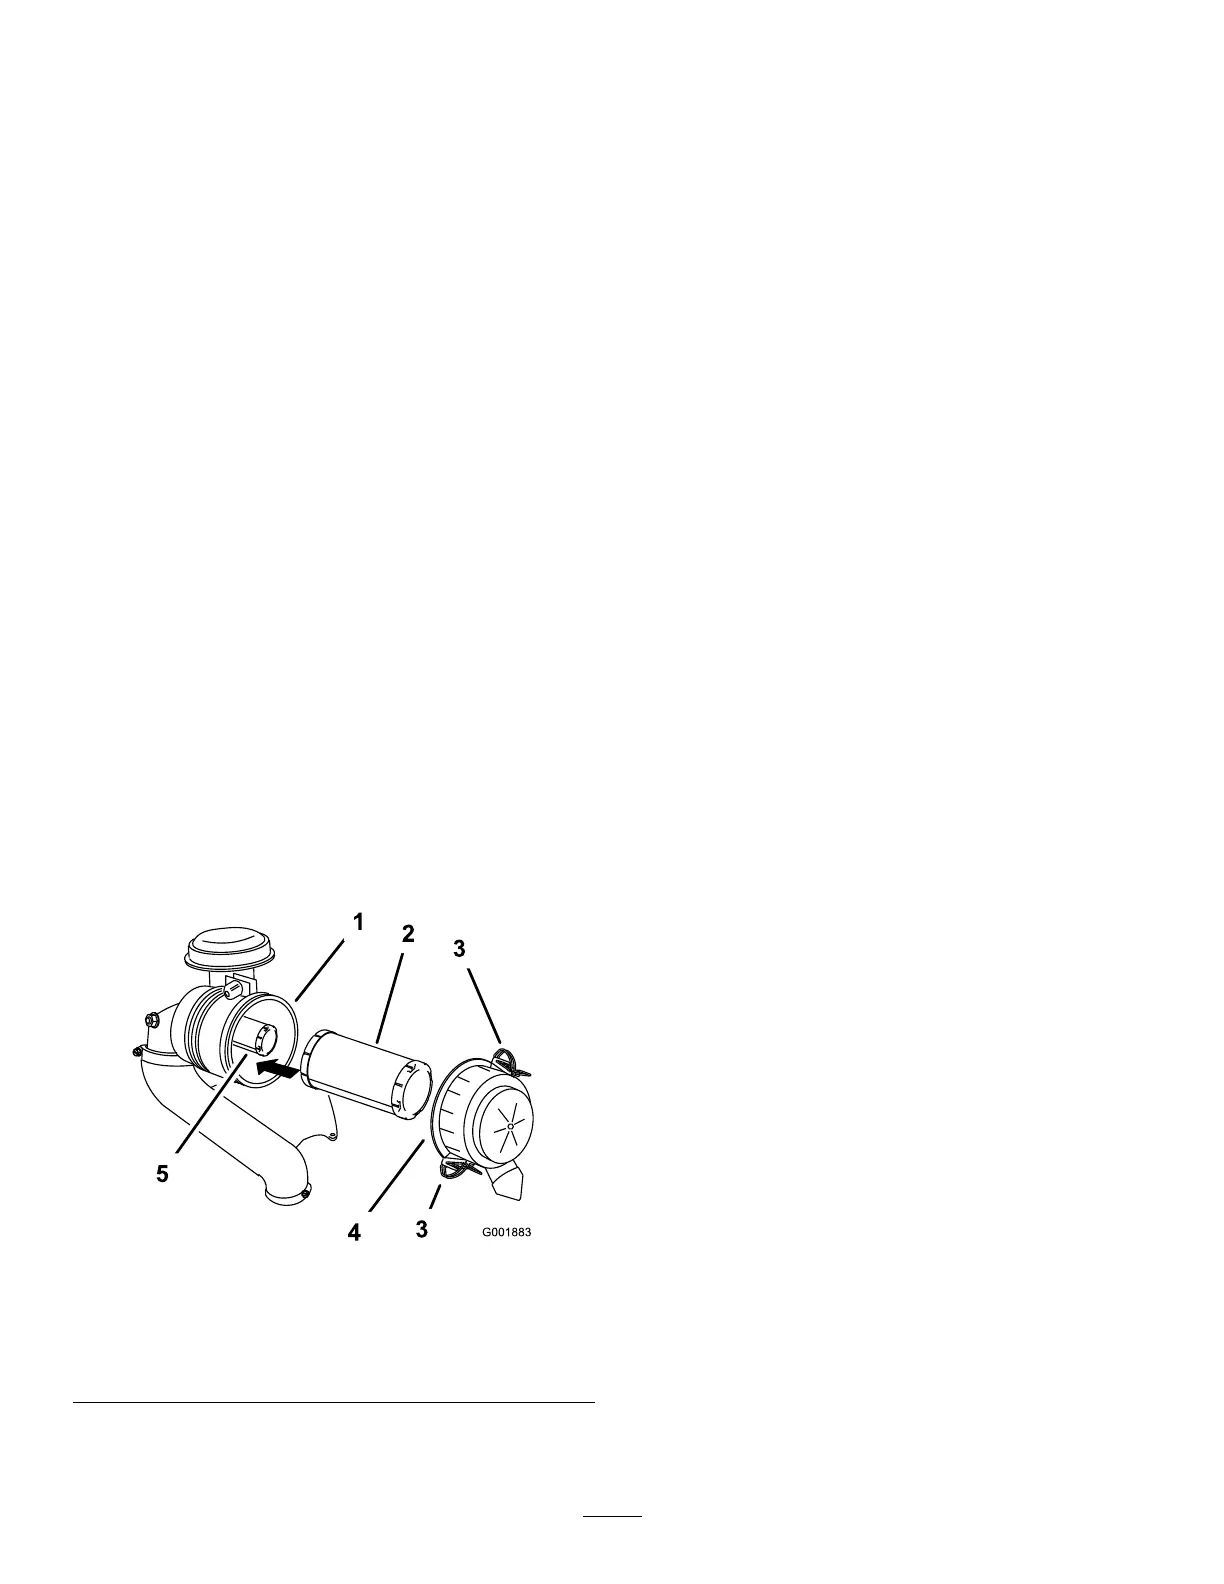
g001883
Figure 27
1. Air-cleaner body 4. Air-cleaner cover
2. Primary lter 5. Safety lter
3. Latch
4. Clean the inside of the air-cleaner cover with
compressed air .
5. Gently slide the primary lter out of the
air-cleaner body ( Figure 27 ).
Note: A void knocking the lter into the side of
the body .
6. Remove the safety lter only if you intend to
replace it.
Important: Do not attempt to clean the
safety lter . If the safety lter is dirty , then
the primary lter is damaged. Replace both
lters.
Servicing the Primary Filter
Inspect the primary lter for damage by looking into
the lter while shining a bright light on the outside of
the lter .
Note: Holes in the lter appear as bright spots. If
the lter is dirty , bent, or damaged, replace it. Do not
clean the primary lter .
Servicing the Safety Filter
Replace the safety lter; never clean it.
Important: Do not attempt to clean the safety
lter . If the safety lter is dirty , then the primary
lter is damaged. Replace both lters.
Installing the Filters
Important: T o prevent engine damage, always
operate the engine with both air lters and the
cover installed.
1. If installing new lters, check each lter for
shipping damage.
Note: Do not use a damaged lter .
2. If you are replacing the safety lter , carefully
slide it into the lter body ( Figure 27 ).
3. Carefully slide the primary lter over the safety
lter ( Figure 27 ).
Note: Ensure that the primary lter is fully
seated by pushing on its outer rim while installing
it.
Important: Do not press on the soft inside
area of the lter .
4. Install the air-cleaner cover with the side
indicated as up facing upward and secure the
latches ( Figure 27 ).
23