Checking and Greasing the Road
Wheels
Service Interval : Every 250 hours
1. Park the machine on a level surface, engage
the parking brake (if applicable), and lower the
grinder .
2. Shut of f the engine and remove the key .
3. Remove the tracks; refer to Replacing the
T racks ( page 32 ) .
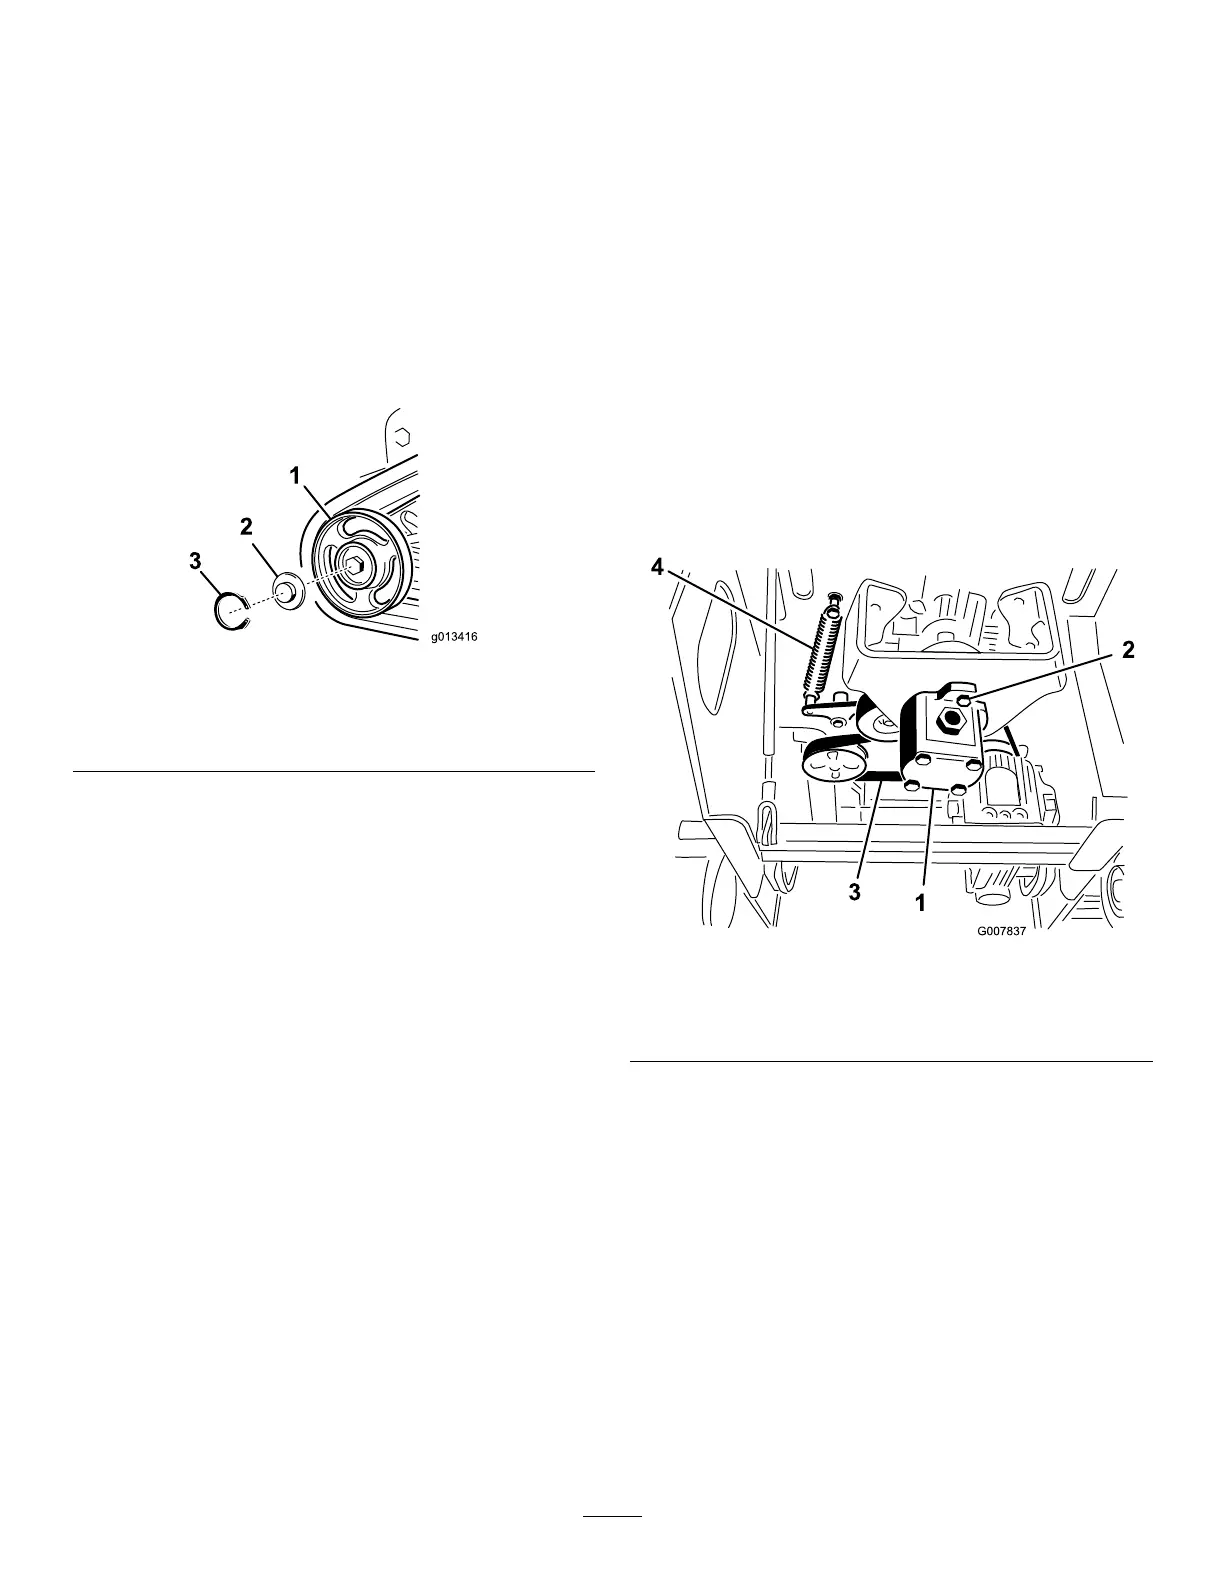
4. Remove the snap ring and cap from a road
wheel ( Figure 46 ).
g013416
Figure 46
1. Road wheel
3. Snap ring
2. Road wheel cap
5. Check the grease under the cap and around
the gasket ( Figure 46 ). If it is dirty , gritty , or
depleted, clean out all of the grease, replace the
gasket, and add new grease.
6. Ensure that the road wheel turns smoothly on the
bearing. If it is frozen, contact your Authorized
Service Dealer to replace the road wheel.
7. Place the greased road wheel cap over the bolt
head ( Figure 46 ).
8. Secure the road wheel cap with the snap ring
( Figure 46 ).
9. Repeat steps 4 through 8 for all 12 road wheels.
10. Install the tracks; refer to Replacing the T racks
( page 32 ) .
Belt Maintenance
Replacing the Pump-Drive
Belt
If the pump drive belt begins to squeal or is cracked,
worn, or frayed, replace it. Contact your Authorized
Service Dealer for a replacement belt.
1. Park the machine on a level surface, engage
the parking brake (if applicable), and lower the
grinder .
2. Shut of f the engine and remove the key .
3. Raise the back of the machine and support it
on jack stands.
4. Remove the bottom shield; refer to Removing
the Bottom Shield ( page 21 ) .
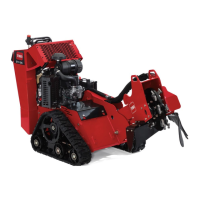
5. Loosen the 2 pump bolts ( Figure 47 ).
g007837
Figure 47
1. Pump 3. Belt
2. Pump bolts 4. Idler-pulley spring
6. T wist the pump counterclockwise and allow it to
drop down away from the pulley ( Figure 47 ).
Note: Ensure that the spider coupler drops
down with the pump.
7. Using a spring puller (contact your Authorized
Service Dealer) or stif f metal hook, pull the end
of the idler pulley spring of f the spring bolt to
release tension on the belt ( Figure 47 ).
8. Remove the belt.
9. Route a new belt around the pulleys.
10. Install the idler-pulley spring on the bolt.
1 1. Ensure that the spider coupler is in place on the
pump and then insert it into the pulley , twisting it
clockwise to seat it on the pump bolts.
33