8.Installthemowerbelt(Figure37).
9.Checkthebeltguideundertheengineframefor
theproperadjustment(Figure37).
Note:Thedistancebetweenthebeltguideand
mowerbeltshouldbe19mm(3/4inch)when
youengagethemowerbelt.Adjustthebelt,
ifnecessary.Thedisengagedbeltshouldnot
dragorfalloffthepulleywhentheguidesare
properlyadjusted.
ReplacingtheMowerBelt
Important:Thebrakeneedstobeadjustedwhen
thebelttensionorthebrakelinkageisadjusted.
1.Parkthemachineonalevelsurface,disengage
thePTO,andengagetheparkingbrake.
2.Shutofftheengine,removethekey,andwait
forallmovingpartstostopbeforeleavingthe
operatingposition.
3.Removetheknobsandbeltcoverfromthe
mower.
4.Removetheidlerpulleyandwornbelt.
5.Installthenewmowerbelt.
6.Installtheidlerpulley.
7.EngagethePTOandcheckthebelttension;
refertoAdjustingtheMowerBeltTension(page
37).
Note:Thepropermowerbelttensionis44to
67N∙m(10to15ft-lb)withthebeltdeected
13mm(1/2inch)halfwaybetweenthepulleys
(Figure39).
8.EngagethePTO.
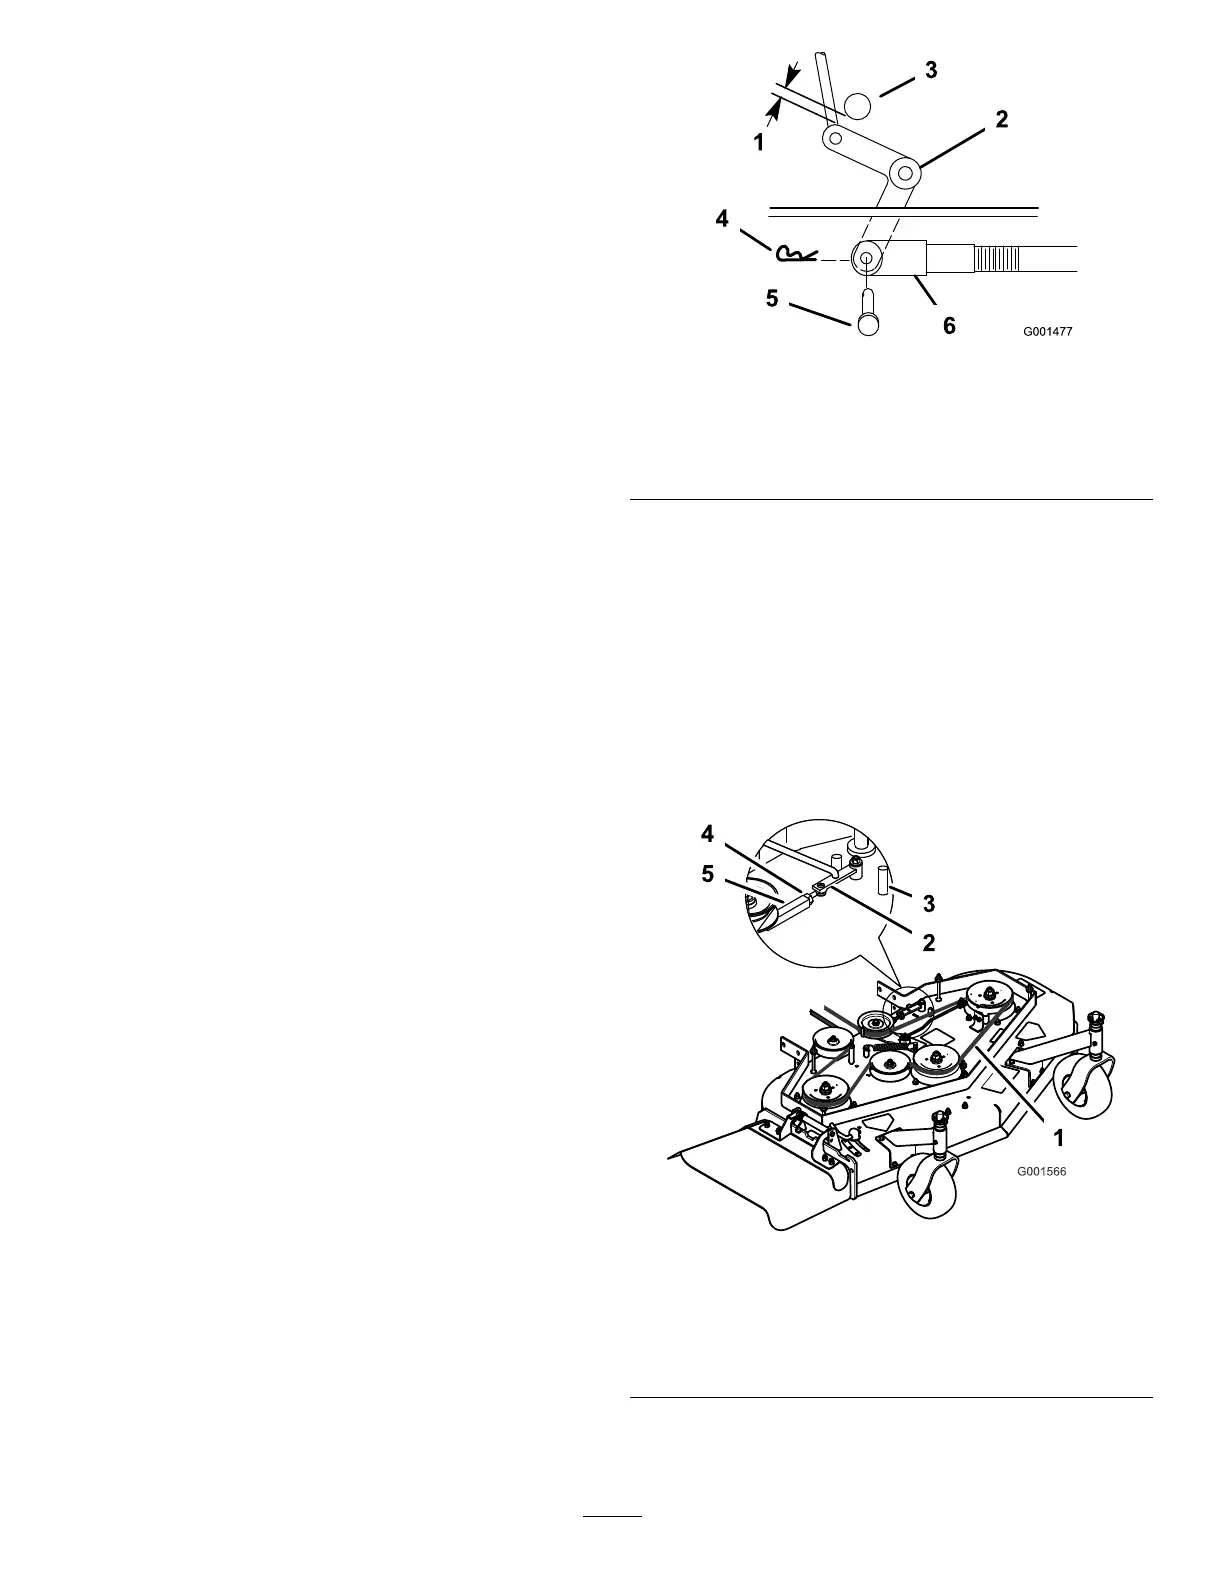
9.Checktheclearancebetweenthebellcrankand
transmission-outputshaft(Figure38).
Note:Theclearanceshouldbe2to3mm(1/16
to1/8inch).
g001477
Figure38
1.2to3mm(1/16to1/8inch)
4.Hairpincotter
2.Bellcrank
5.Clevispin
3.Transmission-outputshaft6.Clevis
10.Removethehairpincotterandclevispinfrom
thebellcrank(Figure38).
11.Rotatetheclevisclockwiseontherodtoincrease
theclearance;rotateitcounterclockwiseto
decreaseit(Figure38).
12.DisengagethePTO.
Note:Iftheassistarmdoesnotcontactthe
frontstoponthemowerdeck(Figure39),adjust
theclevistobringthebellcrankclosertothe
transmission-outputshaft(Figure38).
g001566
Figure39
1.13mm(1/2inch)deection
here
4.Locknut
2.Assistarm5.Turnbuckle
3.Frontstop
13.Checkthebeltguideundertheengineframefor
theproperadjustment(Figure37).
36