SideDischargingor
MulchingGrass
Thismowerhasahingedgrassdeectorthat
dispersesclippingstothesideanddowntowardthe
turf.
DANGER
Withoutthegrassdeector,dischargecover,
orcompletegrasscatcherassemblymounted
inplace,youandbystandersareexposedto
bladecontactandthrowndebris.Contactwith
rotatingmowerblade(s)andthrowndebris
cancauseseriousinjuryordeath.
•Neverremovethegrassdeectorfromthe
mowerdeck,becausethegrassdeector
routesmaterialdowntowardtheturf.If
thegrassdeectorisdamaged,replaceit
immediately.
•Neverputyourhandsorfeetunderthe
mowerdeck.
•Nevertrytoclearthedischargeareaor
mowerbladesbeforeyoudisengagethe
mowerblades.Turntheignitionkeyto
theOFFposition.Removethekeyand
disconnectthespark-plugwires.
AdjustingtheHeightofCut
Youcanadjusttheheightofcutfrom26to108mm
(1to4-1/4inches)in6mm(1/4inch)increments.
Youcanachievethisbyadjustingthebladespacers,
rearaxleheight,orfrontcasterspacers.Use
theHeight-of-CutChart(page22)toselectthe
combinationofadjustmentsrequired.
AdjustingtheBladeHeight
Adjustthebladesbyusingthe4spacers(6mmor
1/4inch)onthebladespindlebolts.Thisallowsfora
25mm(1inch)adjustmentrange,in6mm(1/4inch)
increments,ofcuttingheightinanyaxleposition.Use
thesamenumberofbladespacersonallthebladesto
achievealevelcut(forexample,2aboveand2below,
1aboveand3below,etc.).
1.Parkthemachineonalevelsurface,disengage
thePTO,andengagetheparkingbrake.
2.Shutofftheengine,removethekey,andwait
forallmovingpartstostopbeforeleavingthe
operatingposition.
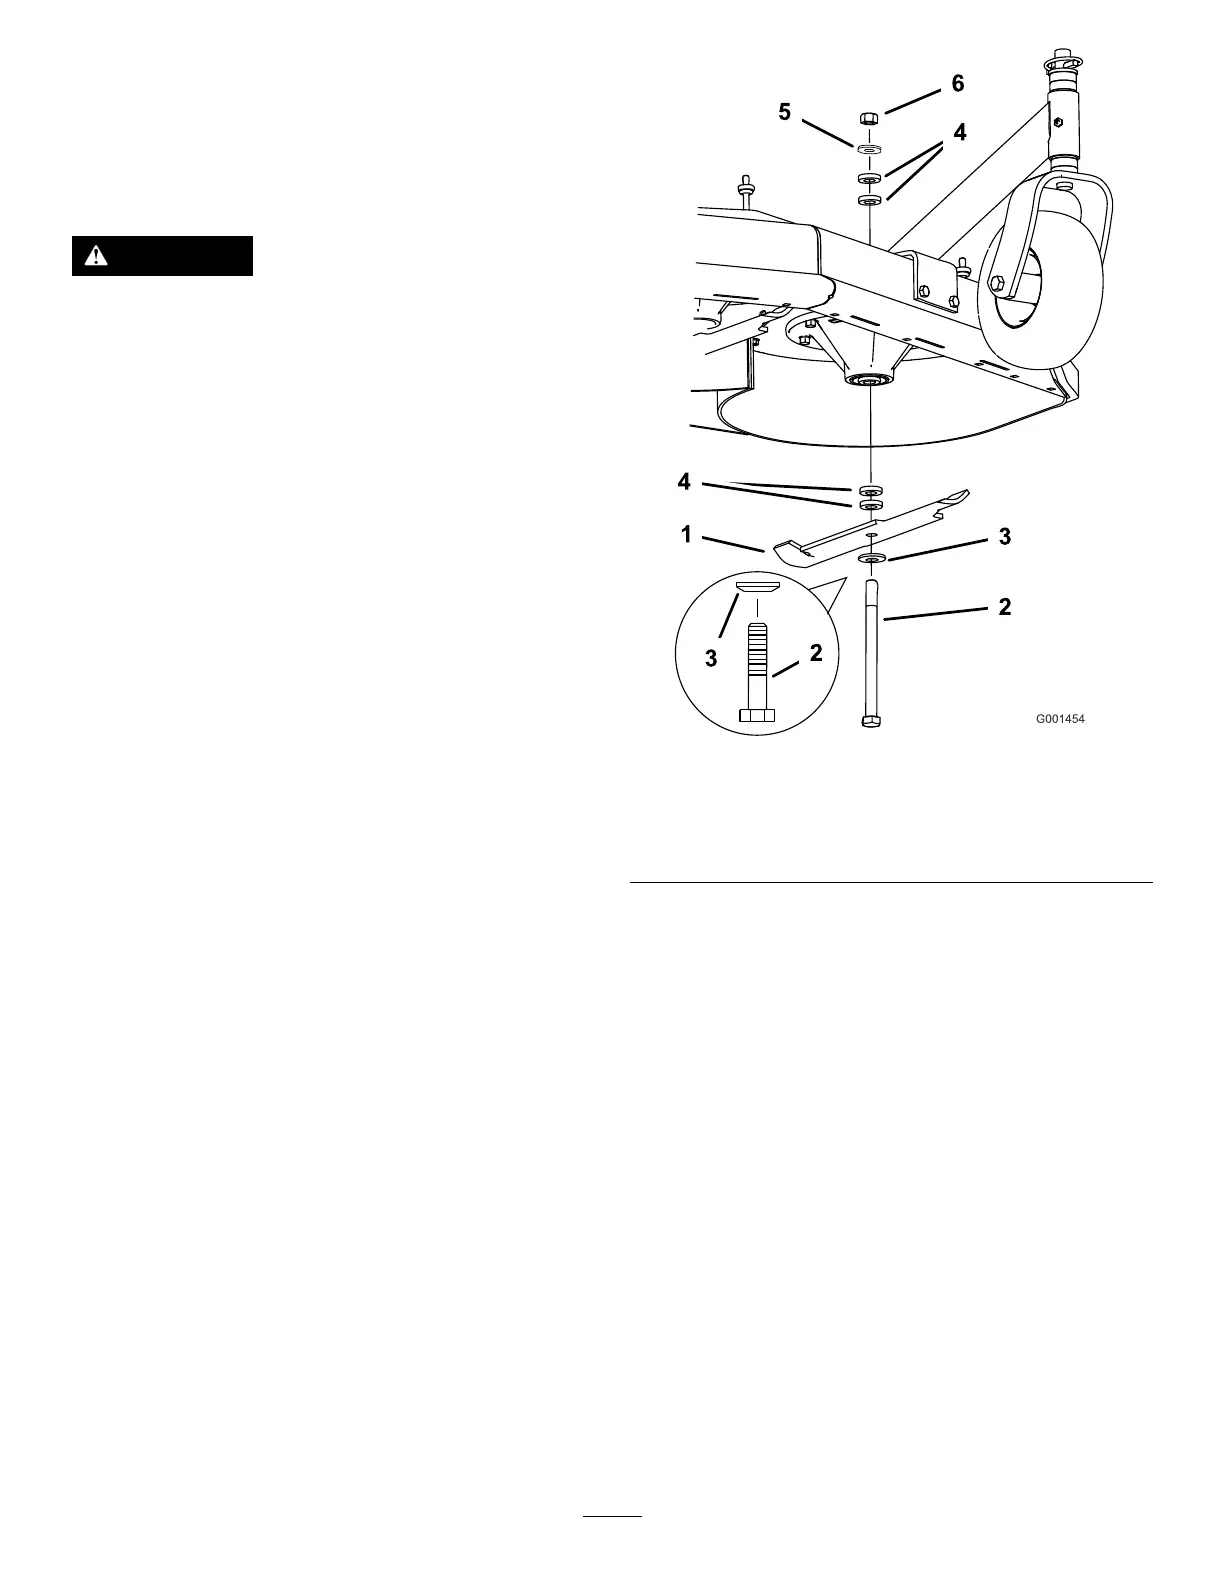
3.Holdthebladeboltandremovethenut(Figure
15).
g001454
Figure15
1.Blade
4.Spacer
2.Bladebolt5.Thinwasher
3.Curvedwasher
6.Nut
4.Removethebladeboltfromthespindleand
changethespacersasneeded(Figure15).
5.Installthebladebolt,curvedwasher,andextra
spacers,andsecurethemwithathinwasher
andanut(Figure15).
6.Torquethebladeboltto101to108N∙m(75to
80ft-lb).
AdjustingtheAxleHeight
Adjusttheaxlepositiontotheselectedheight-of-cut
setting.RefertotheHeight-of-CutChart(page22).
1.Parkthemachineonalevelsurface,disengage
thePTO,andengagetheparkingbrake.
2.Shutofftheengine,removethekey,andwait
forallmovingpartstostopbeforeleavingthe
operatingposition.
3.Loosen,butdonotremove,the2axle-pivot
boltsand2axle-adjustmentbolts(Figure16).
19