g017648
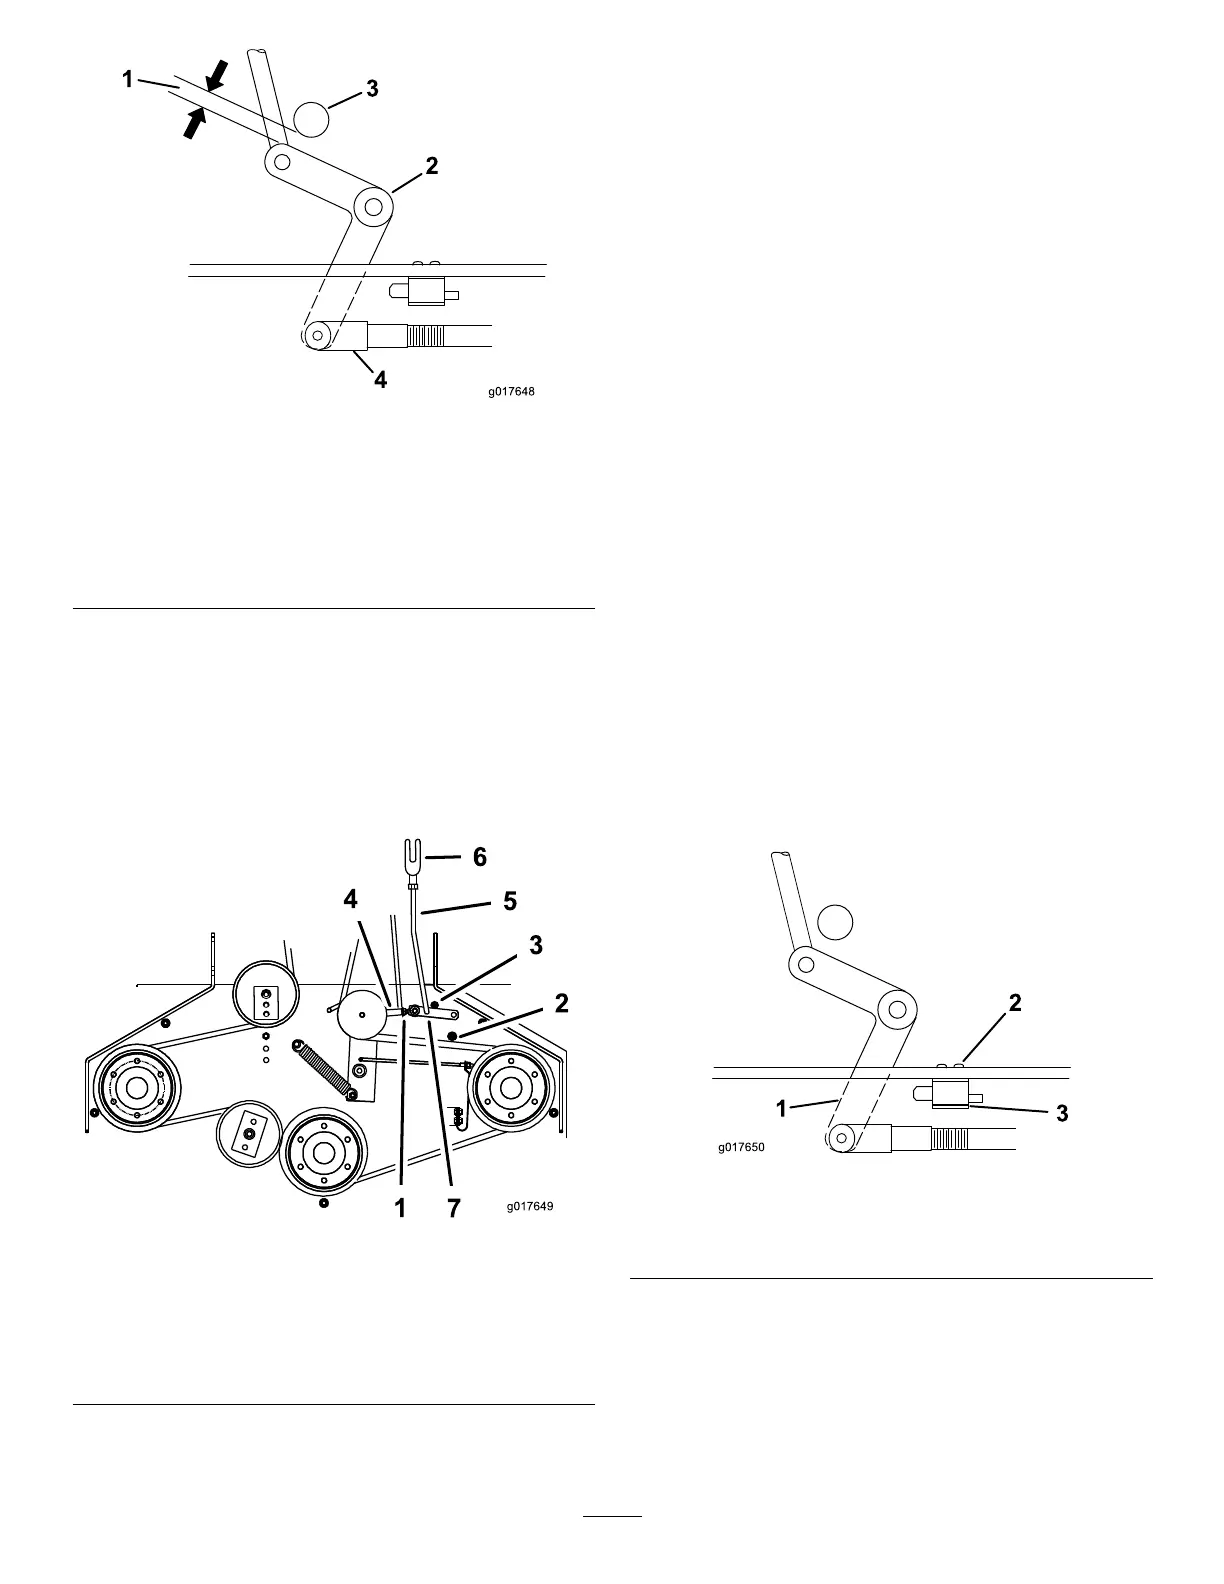
Figure44
1.Bellcrank4.Yoke
2.Safetyswitchlocated
undertheenginedeck
5.Nut
3.Bellcrankjustclearsthe
gussetwiththePTO
engaged
6.Assist-armlink
5.Ensurethattheassistarmisagainsttherear
assist-armstoponthedeck(Figure45).
6.DisengagethePTO.
7.Theassistarmshouldcontactthefront
assist-armstoponthedeck.Ifitdoesnot
contact,adjustthebellcranksothatitiscloser
tothegusset(Figure45).
g017649
Figure45
1.Yoke5.Assist-armlink
2.Nut6.Assistarm
3.Rearassist-armstop7.Turnbuckle
4.Frontassist-armstop
8.Toadjusttheassist-armlink,removethehairpin
cotterfromtheassistarm(Figure45).
9.Loosenthenutagainsttheyoke(Figure44).
10.Removetheassist-armlinkfromtheassistarm
androtatethelinktoadjustthelength.
11.Installtheassist-armlinkintotheassistarmand
secureitwiththehairpincotter(Figure45).
12.Checkiftheassistarmhitsagainstthestops
correctly.
AdjustingthePTO-Safety
Switch
1.Parkthemachineonalevelsurface,disengage
thePTO,andengagetheparkingbrake.
2.Shutofftheengine,removethekey,andwait
forallmovingpartstostopbeforeleavingthe
operatingposition.
3.Ensurethattheassistarmisagainstthefront
assist-armstop.
4.Ifneeded,adjustthePTO-safetyswitchby
looseningtheboltssecuringtheswitchbracket
(Figure46).
5.Movethemountingbracketuntilthebellcrank
pressestheplungerby6mm(1/4inch).
Important:Ensurethatthebellcrankdoes
nottouchtheswitchbody;otherwise,
damagetotheswitchcouldoccur(Figure
46).
g017650
Figure46
1.Bellcrank
3.Switch-mountingbracket
2.Boltsandnuts
6.Tightentheswitch-mountingbracket.
39