2. Inspect the primary lter for damage by looking
into the lter while shining a bright light on the
outside of the lter . If the primary lter is dirty ,
bent, or damaged, replace it.
Note: Holes in the lter appear as bright spots.
Do not clean the primary lter .
Installing the Filters
Important: T o prevent engine damage, always
operate the engine with both air lters and the
cover installed.
1. If you are installing new lters, check each lter
for shipping damage.
Note: Do not use a damaged lter .
2. If you are replacing the safety lter , carefully
slide it into the lter body ( Figure 55 ).
3. Carefully slide the primary lter over the safety
lter ( Figure 55 ).
Note: Ensure that the primary lter is fully
seated by pushing on the outer rim while
installing it.
Important: Do not press on the soft, inside
area of the lter .
4. Install the air-cleaner cover and secure the
latches ( Figure 55 ).
Servicing the Engine Oil
Service Interval : Before each use or daily
Every 100 hours (more often in dirty or dusty
conditions).
Every 200 hours —Change the engine-oil lter
(more often in dirty or dusty conditions).
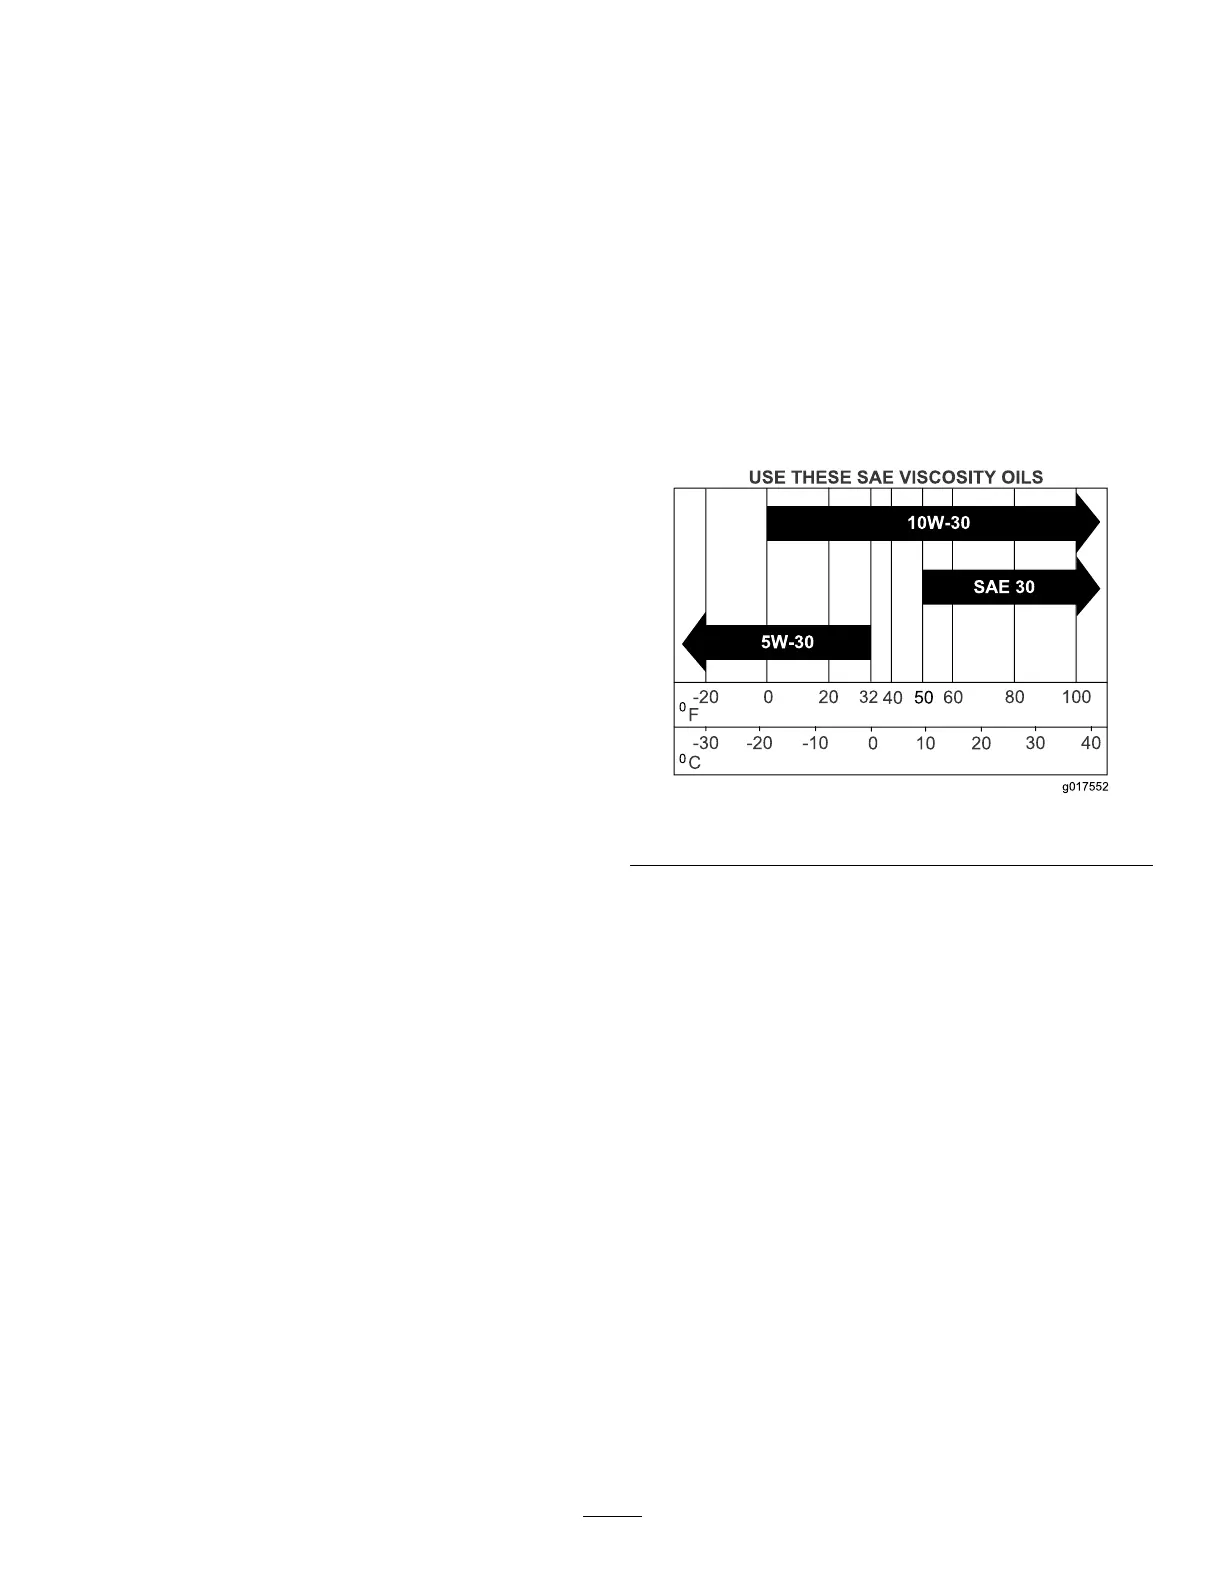
Engine-Oil Specications
Oil T ype: : Detergent oil (API service SJ or higher)
Oil Capacity: 1.9 L (64 oz) with a lter change;
1.6 L (54 oz) without a lter change
V iscosity: See the table below .
g017552
Figure 56
Checking the Engine-Oil Level
Note: Check the oil when the engine is cold.
Important: If you overll or underll the engine
crankcase with oil and run the engine, you may
damage the engine.
1. Park the machine on a level surface, disengage
the blade-control switch (PT O), and engage the
parking brake.
2. Shut of f the engine, remove the key , and wait
for all moving parts to stop before leaving the
operating position.
Note: Ensure that the engine is cool so that the
oil has had time to drain into the sump.
3. T o keep dirt, grass clippings, etc., out of the
engine, clean the area around the oil-ll cap and
dipstick before removing it ( Figure 57 ).
46
 Loading...