g010252
Figure 123
1. Right stabilizer
2. Deck strut (right side shown)
3. Remove the shoulder bolt and nut.
4. Remove the shoulder bolt and nut.
8. Raise the deck struts and secure them in the
raised position.
9. Slide the deck out to the right side of the
machine.
Replacing the Grass
Deector
Side-Discharge Machines Only
W ARNING
An uncovered discharge opening could allow
the machine to throw objects toward you or
bystanders, resulting in serious injury . Also,
contact with the blade could occur .
Never operate the machine unless you install
a mulch plate, discharge deector , or grass
collection system.
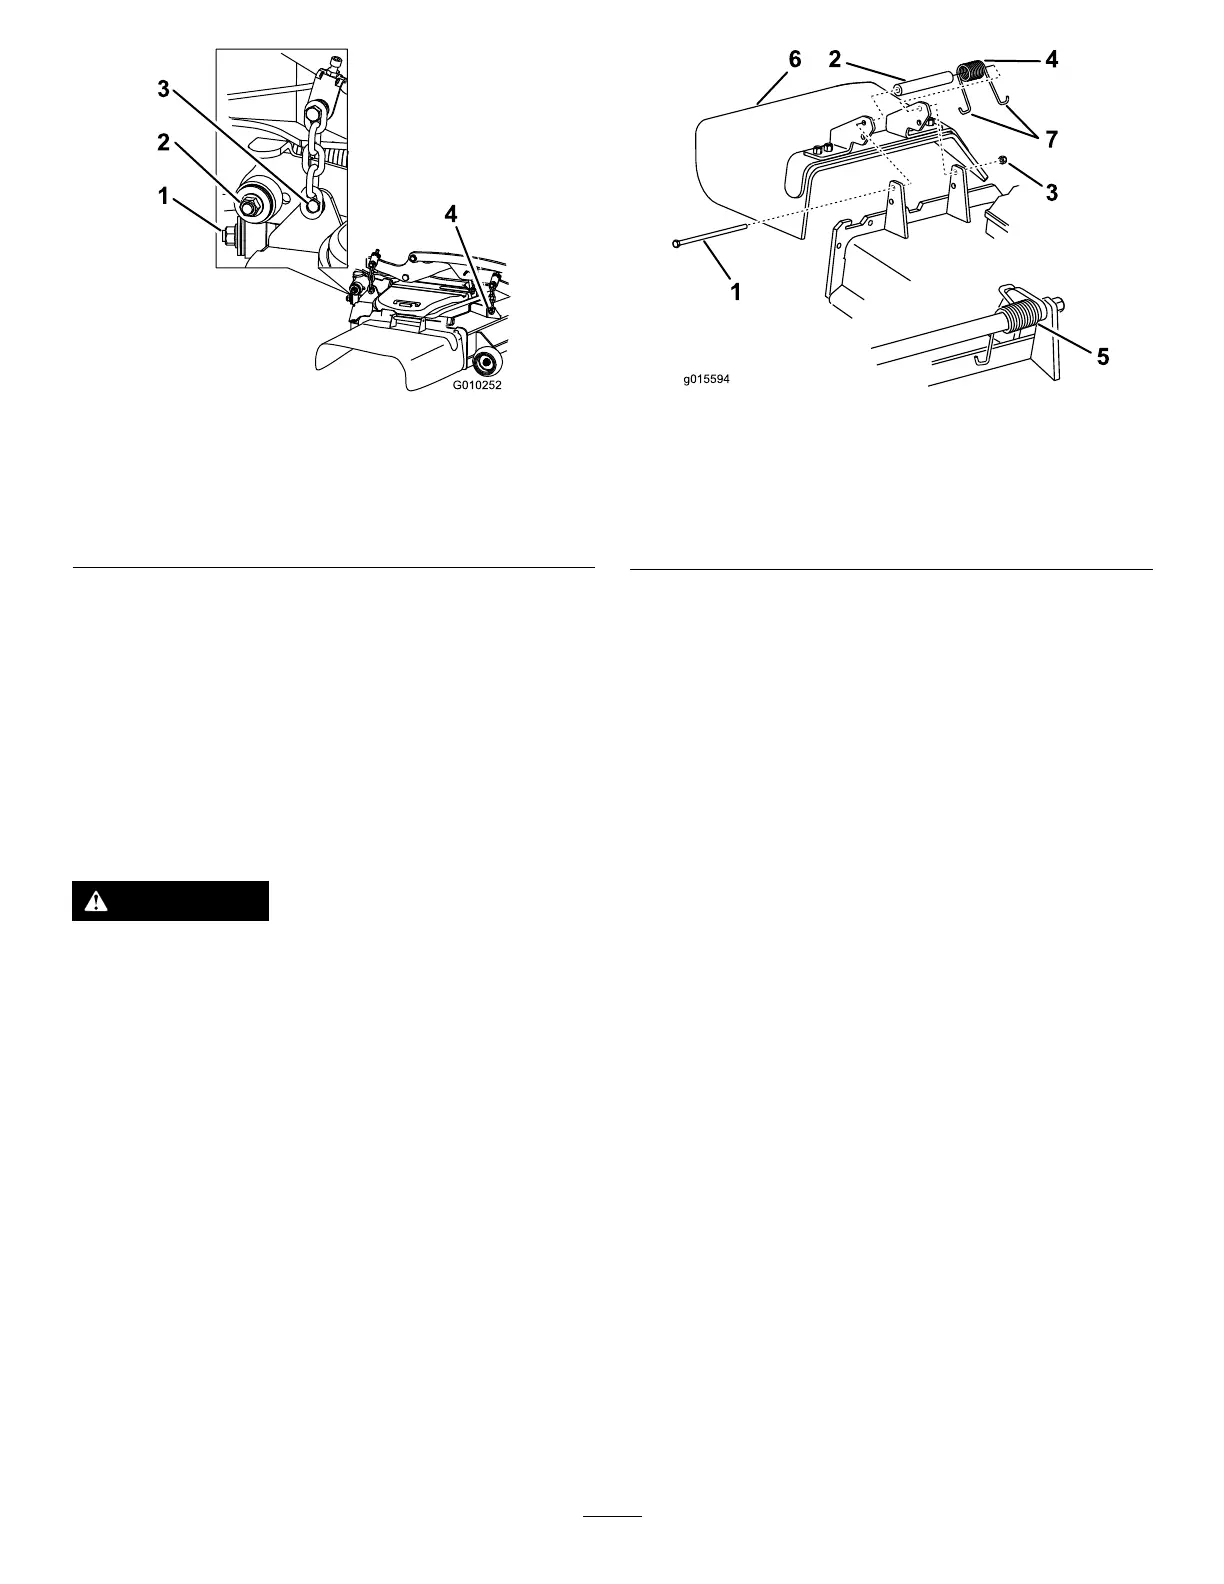
1. Remove the locknut, bolt, spring, and spacer
holding the deector to the pivot brackets
( Figure 124 ).
2. Remove the damaged or worn grass deector
( Figure 124 ).
g015594
Figure 124
1. Bolt
5. Spring installed
2. Spacer 6. Grass deector
3. Locknut
7. J -hook end of spring
4. Spring
3. Place the spacer and the spring onto grass
deector .
4. Place 1 J-hook end of the spring behind the
deck edge.
Note: Make sure that 1 J-hook end of the
spring is installed behind the deck edge before
installing the bolt as shown in Figure 124 .
5. Install the bolt and the nut.
6. Place 1 J-hook end of the spring around the
grass deector ( Figure 124 ).
Important: The grass deector must be able
to rotate. Lift the deector up to the full open
position and ensure that it rotates into the
full down position.
77