Checking and Cleaning the
Hydraulic-Unit Shrouds
Service Interval : Before each use or daily
1. Park the machine on a level surface, disengage
the blade-control switch (PT O), and engage the
parking brake.
2. Shut of f the engine, remove the key , and wait
for all moving parts to stop before leaving the
operating position.
3. Move the seat forward.
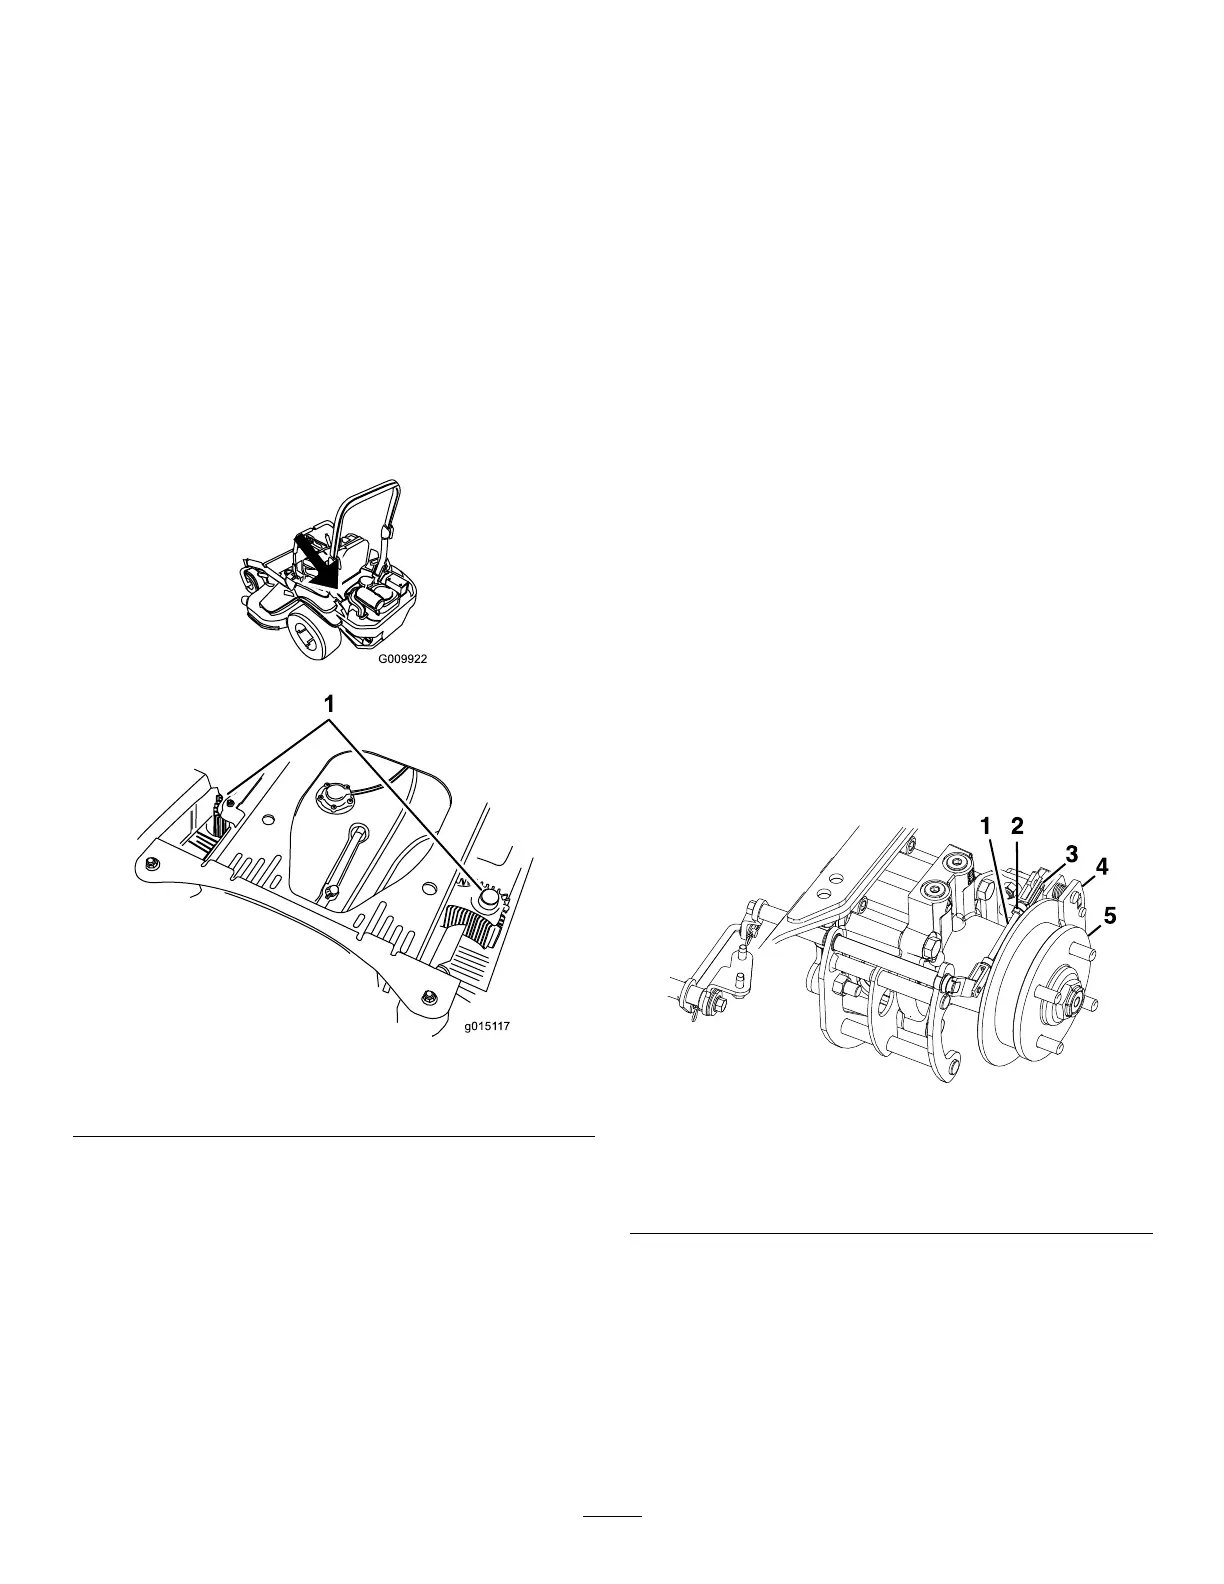
4. Clean the debris and grass from the
hydraulic-unit shrouds ( Figure 95 ).
5. Position the seat.
g009922
g0151 17
Figure 95
1. Hydraulic-unit shrouds
Brake Maintenance
Adjusting the Parking
Brake
Service Interval : After the rst 100 hours
Every 500 hours
Check to ensure that parking brake is adjusted
properly . This procedure must be followed after the
rst 100 hours or when a brake component has been
removed or replaced.
1. Park the machine on a level surface, disengage
the blade-control switch, and engage the parking
brake.
2. Shut of f the engine, remove the key , and wait
for all moving parts to stop before leaving the
operating position.
3. Raise the rear of the machine up and support
the machine with jack stands.
4. Remove the rear tires from the machine.
5. Remove any debris from the brake area.
6. Release the drive wheels; refer to Using the
Drive-Wheel-Release V alves ( page 36 ) .
7. Disengage the parking brake.
8. Remove the spring clevis pin from the rear
linkage and caliper ( Figure 96 ).
g297209
Figure 96
1. Rear linkage
4. Caliper
2. Jam nut 5. Wheel hub
3. Spring clevis pin
9. Loosen the jam nut on the rear linkage.
10. Push the caliper lever forward with nger
pressure until the brake pad contacts the hub
rotor .
1 1. Adjust the rear linkage until the spring clevis pin
can be inserted in the hole in the caliper lever .
Note: T o lengthen the linkage, rotate the clevis
1 turn outward.
66