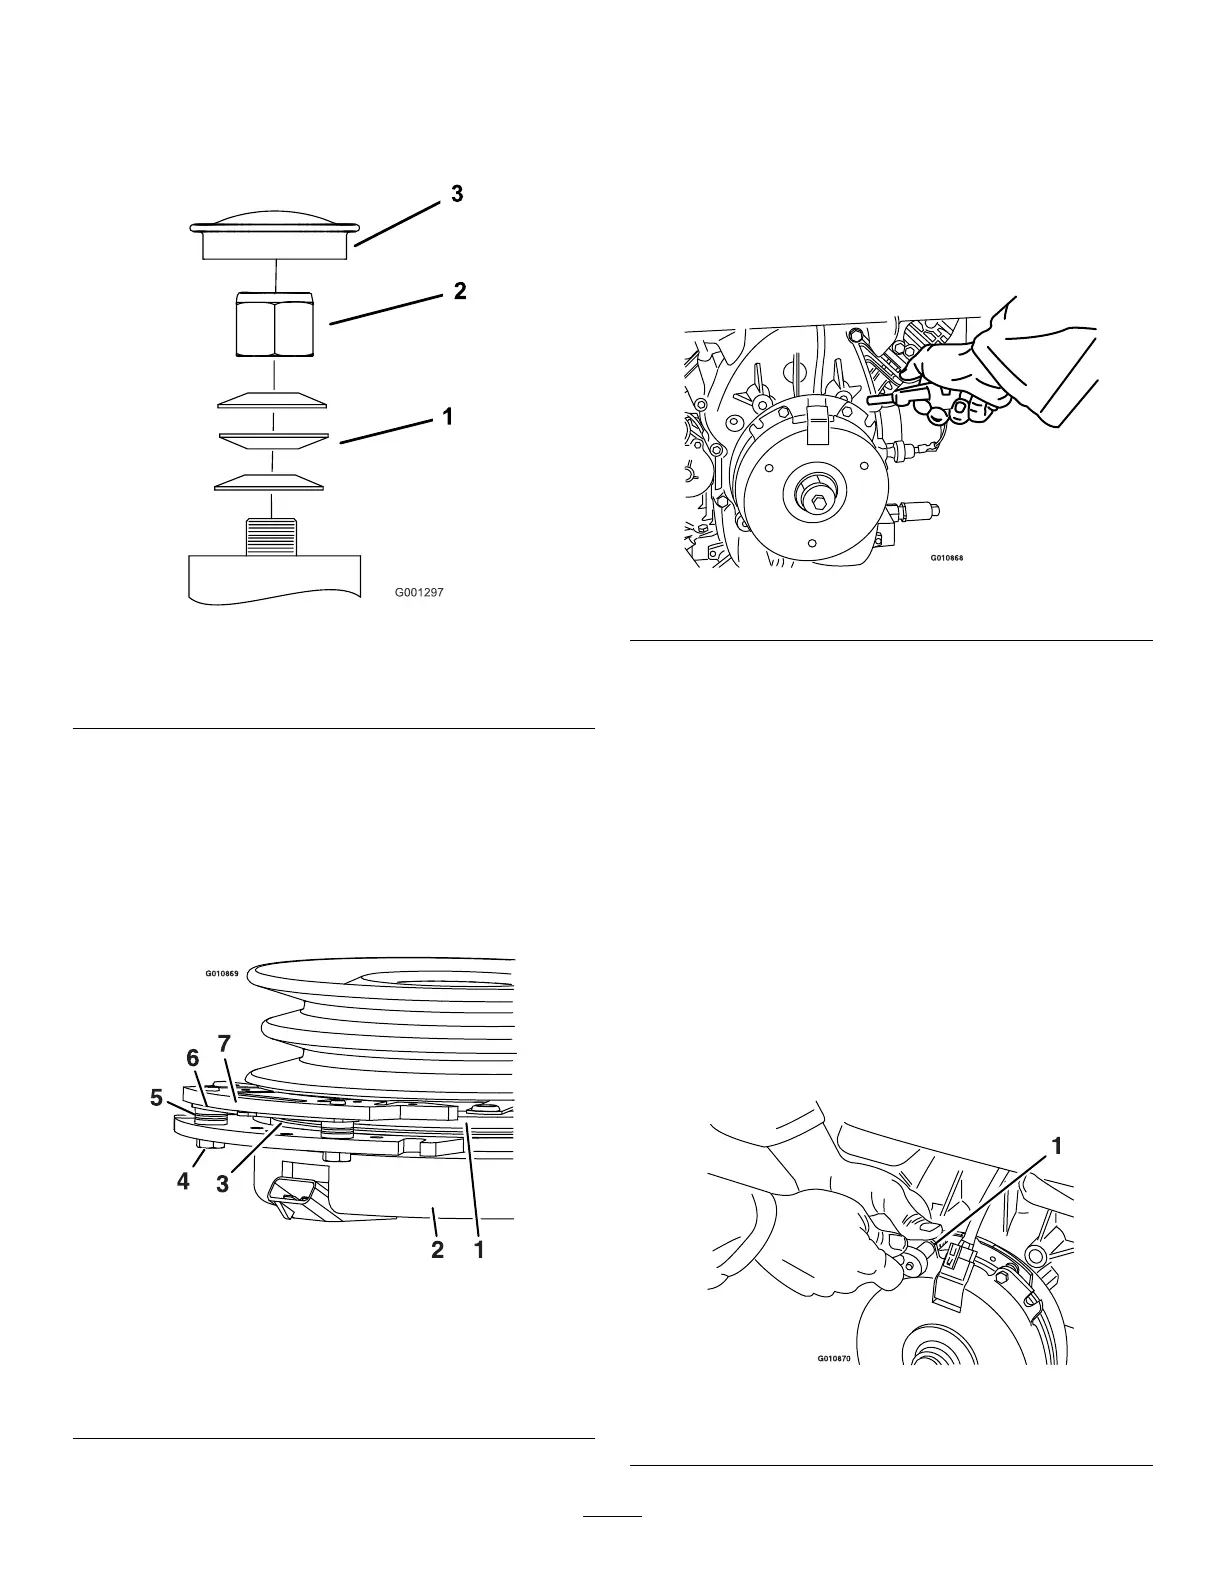
Important: Make sure that the spring
washers are installed correctly as shown in
Figure 86 .
5. Install the dust cap ( Figure 86 ).
g001297
Figure 86
1. Spring washers
3. Dust cap
2. Locknut
Removing the Clutch Shim
Some later model year units have been built with
clutches that contain a brake shim. When the clutch
brake has worn to the point where the clutch no longer
engages consistently , you can remove the shim to
extend the clutch life.
g010869
Figure 87
1. Armature 5. Brake spacer
2. Field shell 6. Re-gap shim
3. Rotor 7. Brake pole
4. Brake-mounting bolt
1. Park the machine on a level surface, disengage
the blade-control switch (PT O), and engage the
parking brake.
2. Shut of f the engine, remove the key , and wait
for all moving parts to stop before leaving the
operating position.
3. Using an air compressor , blow out any debris
from under the brake pole and around the brake
spacers ( Figure 88 ).
g010868
Figure 88
4. Check the condition of the wire-harness leads,
connectors, and terminals.
Note: Clean or repair as necessary .
5. V erify that 12 V is present at the clutch connector
when the blade-control switch (PT O) switch is
engaged.
6. Measure the gap between the rotor and
armature. If the gap is greater than 1 mm (0.04
inch), do the following steps:
A. Loosen both brake-mounting bolts 1/2 to 1
full turn as shown in Figure 89 .
Note: Do not remove the brake pole from
the eld shell/armature. The brake pole
has worn to match the armature and needs
to continue to match after you remove the
shim to ensure proper brake torque.
g010870
Figure 89
1. Brake-mounting bolt
63