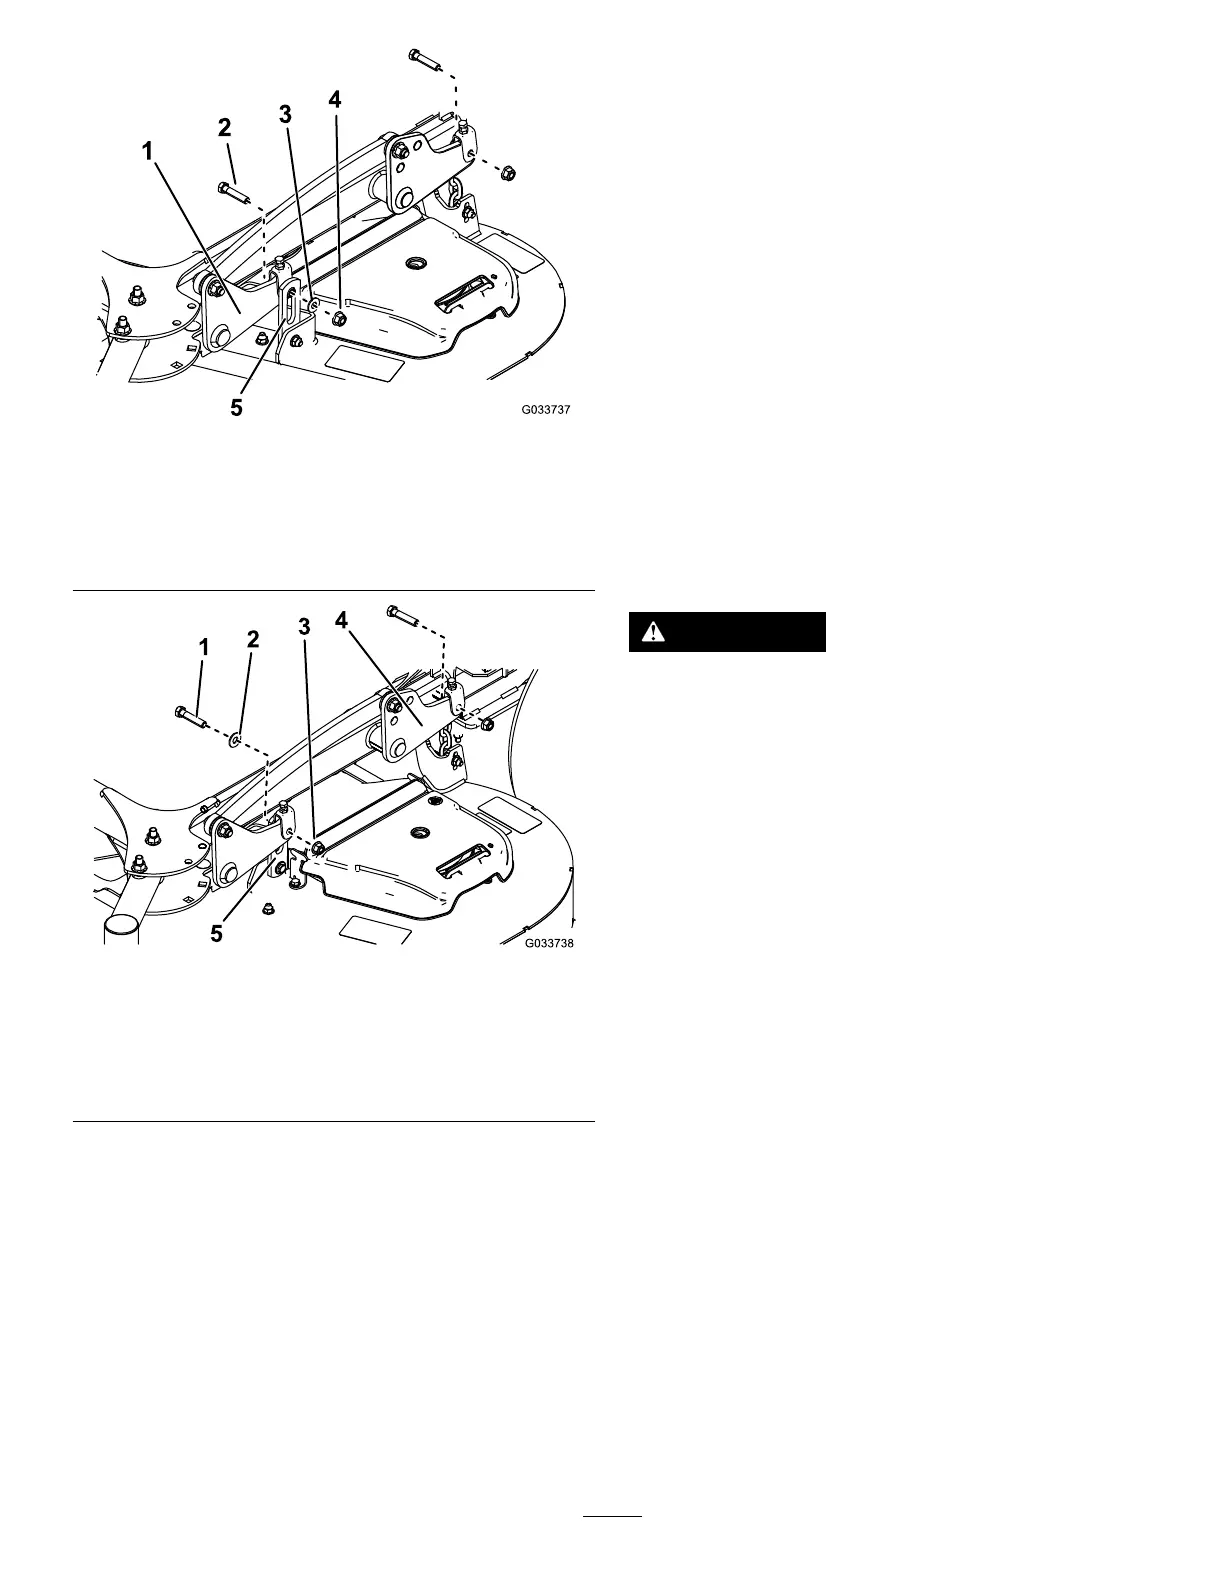
Figure75
LeftSideof52-inchDeckShown
1.Liftplate
4.Nut
2.Bolt5.Mower-deckhanger
3.Washer
Figure76
LeftSideof60-inchDeckShown
1.Bolt
4.Liftplate
2.Washer5.Mower-deckhanger
3.Nut
6.Rotatethecasterwheelsforward.
7.Slidethemowerdeckoutfromunderthemachine.
InstallingtheMowerDeck
1.Slidethemowerdeckunderthemachine.
2.Rotatethecasterwheelsrearward.
3.Connectthedeckhangerstotheliftplatesusingthe2
bolts,2nuts,and2washersthatyouretainedforeach
sideofthemowerdeck.
Note:Mountthefronthangerbracketsontheoutside
ofthefrontliftarmsfor52-inchdecks(Figure75).
Mountthefronthangerbracketsontheinsideofthe
frontliftarmsfor60-inchdecks(Figure76).
Note:Torquetheboltsto38to49N∙m(28to36
ft-lb).
4.Installthe2boltsthatyouretainedtoconnectthestrut
brackettotheframe(Figure74).
Note:Torquetheboltsto61to75N∙m(45to55
ft-lb).
5.Installthemower-deckbelt;refertoReplacingthe
Mower-DeckBelt(page44).
6.Levelthemowerdeck;refertoLevelingtheMower
DeckfromSidetoSide(page53)andLevelingthe
MowerDeckfromFronttoRear(page54).
ServicingtheCuttingBlades
Toensureasuperiorqualityofcut,keepthebladessharp.
Forconvenientsharpeningandreplacement,youmaywant
tokeepextrabladesonhand.
WARNING
Awornordamagedbladecanbreak,andapiece
ofthebladecouldbethrownatyouorbystanders,
resultinginseriouspersonalinjuryordeath.
•Inspectthebladesperiodicallyforwearor
damage.
•Replaceawornordamagedblade.
BeforeInspectingorServicingthe
Blades
Parkthemachineonalevelsurface,disengagethebladesand
settheparkingbrake.Turntheignitionkeytooff.Remove
thekey,anddisconnectthespark-plugwiresfromthespark
plugs.
InspectingtheBlades
ServiceInterval:Beforeeachuseordaily
1.Inspectthecuttingedges(Figure77).
2.Iftheedgesarenotsharporhavenicks,removeand
sharpentheblade;referto(page).
3.Inspecttheblades,especiallyinthecurvedarea.
4.Ifyounoticeanycracks,wear,oraslotforminginthis
area,immediatelyinstallanewblade(Figure77).
50