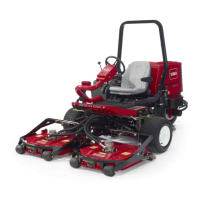
g031575
Figure16
1.Rearcylinder2.Adjustingnut
B.Graspthecylinderrodclosetothenutwith
apliersandrag,androtatetherod.
C.Raisethecuttingunitsandcheckthe
clearance.
Note:Repeattheprocedureifrequired.
D.Tightentheclevisjamnut.
Important:Lackofclearanceatthefrontstopsor
rearwearbarcoulddamagetheliftarms.
6
AdjustingtheCarrierFrame
NoPartsRequired
AdjustingtheFrontCuttingUnits
Thefrontandrearcuttingunitsrequiredifferent
mountingpositions.Thefrontcuttingunithas2
mountingpositionsdependingonwhatheightofcut
anddegreeofcuttingunitrotationyoudesire.
1.Forheightsofcutinthe2to7.6cm(3/4to3
inches)range,mountthefrontcarrierframesin
thelower,frontmountingholes(Figure17).
Note:Thispermitsmoreuptravelofthecutting
unitsrelativetothemachinewhenapproaching
suddenchangesinuphillterrain.Itdoes,
however,limittheclearanceofthechamberto
thecarrierwhencrestingsharp,smallhills.
g031576
Figure17
1.Upper,frontcuttingunit
mountinghole
3.Rearcuttingunitmounting
hole
2.Lower,frontcuttingunit
mountinghole
2.Forheightsofcutinthe6.3to10cm(2-1/2to4
inches)range,mountthefrontcarrierframesin
theupper,frontmountingholes(Figure17).
Note:Thisincreasesthechambertocarrier
clearanceduetothehigherpositionofthe
cuttingchamber,butcausesthecuttingunitto
reachitsmaximumuptravelmorequickly.
AdjustingtheRearCuttingUnit
Thefrontandrearcuttingunitsrequiredifferent
mountingpositions.Therearcuttingunithas1
mountingpositionforproperalignmentwiththe
Sidewinder®unitundertheframe.
Forallheightsofcut,mounttherearcuttingunitinthe
rearmountingholes(Figure17).
16
 Loading...


