e-STUDIO205L/255/305/355/455 © 2009 TOSHIBA TEC CORPORATION All rights reserved
ADJUSTMENT
3 - 88
3.15 Adjustment of the Finisher (MJ-1101)
Note:
Before performing each adjustment, make sure that all covers (incl. those of the finisher and host
machine) are closed. Otherwise, the power is not supplied to the finisher and the adjustment may
not be performed properly.
3.15.1 Adjusting the alignment position
Perform this adjustment after replacing the Finisher control board or when the alignment position must
be changed for some reason.
(1) Turn OFF the power of the equipment.
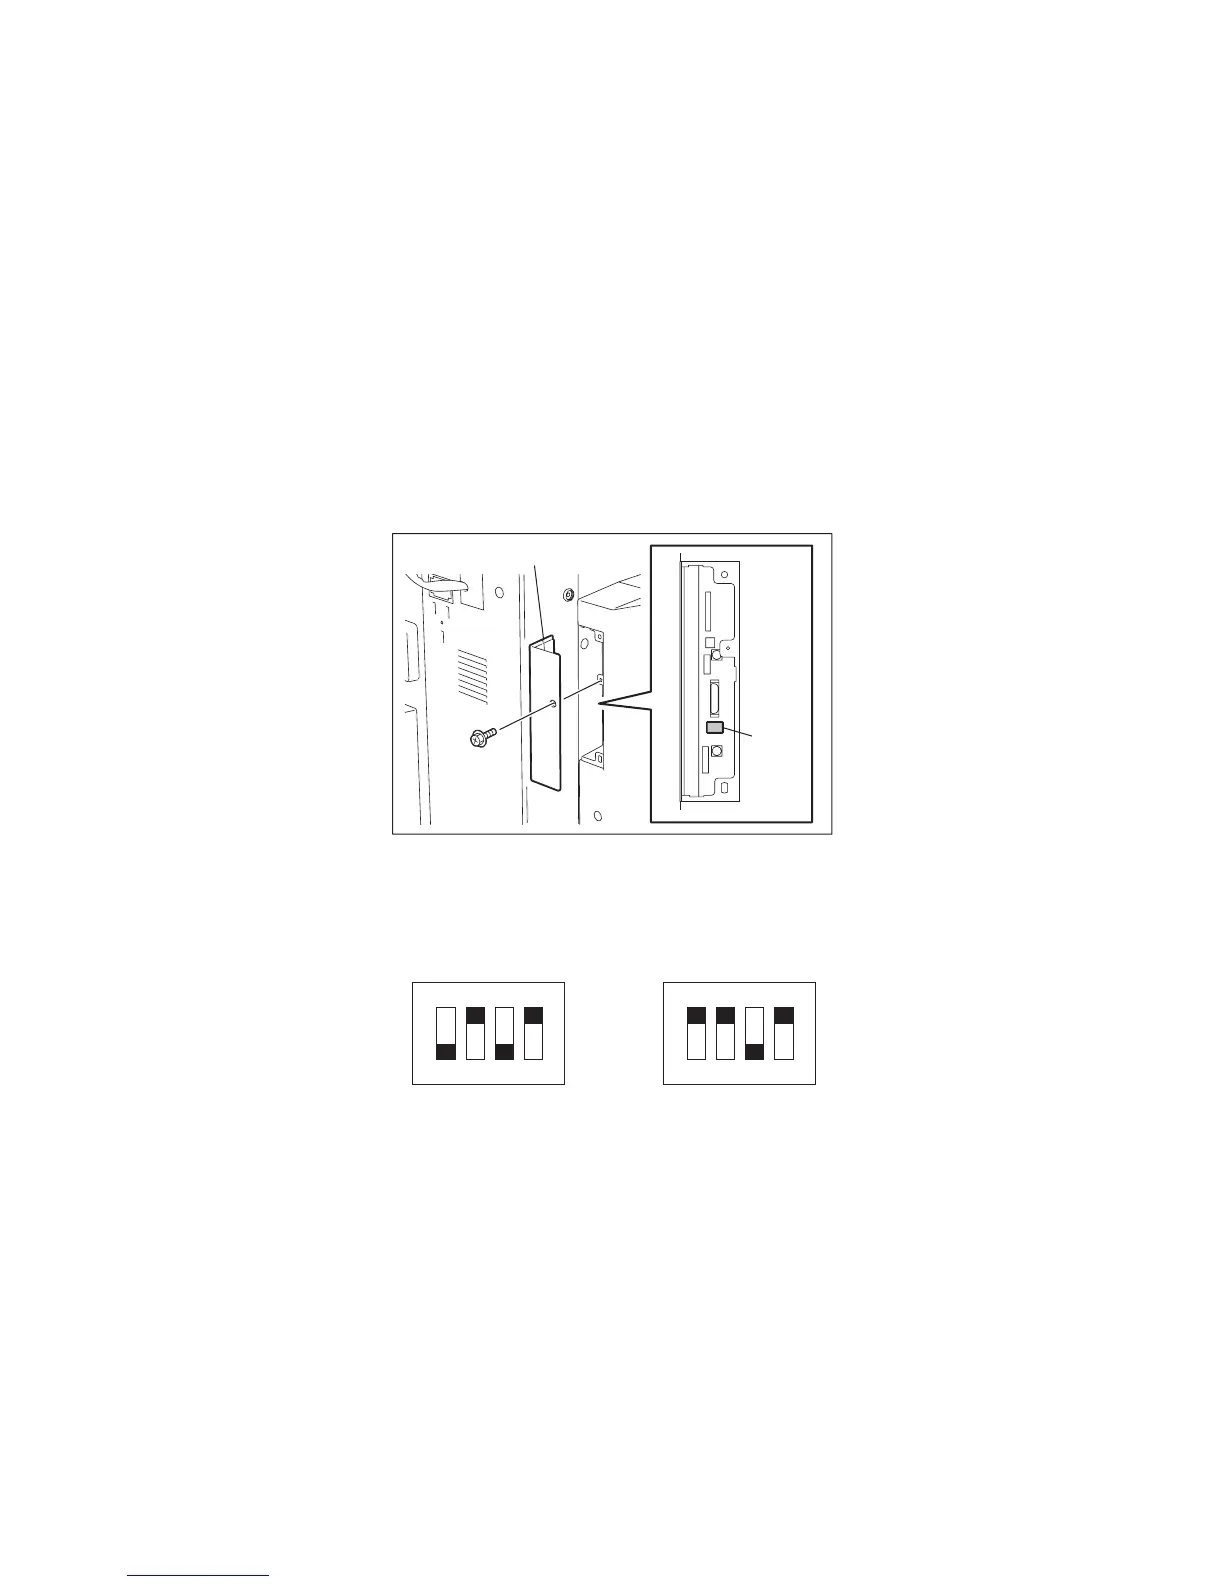
(2) Remove 1 screw and take off the board access cover.
(3) Set the SW1 on the Finisher control board as shown in the figures below.
Fig. 3-99
Fig. 3-100
(4) Turn ON the power of the equipment while [0] button and [8] button are pressed simultaneously.
The alignment plate moves to the A4 or LT size position and stops.
(It stops at the position of -5 steps from the center value of the adjustment range.)
SW1
Access cover
ON
1 2 3 4
ON
1 2 3 4
Adjusting for
A4 size paper
Adjusting for
LT size paper

 Loading...


