EasyManua.ls Logo

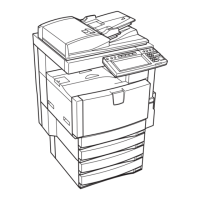
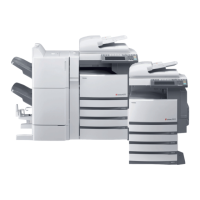
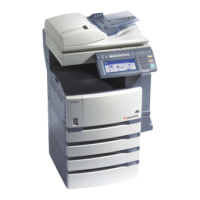
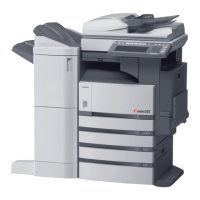
Toshiba e-STUDIO3510c User Manual

Toshiba e-STUDIO3510c
394 pages
To Next Page IconTo Next Page
Page #1 background imageLoading...
Page #1 background image
with GA
-
1210
MULTIFUNCTIONAL DIGITAL COLOR SYSTEMS
Operator's Manual
for Basic Functions

Table of Contents

Questions and Answers:

Toshiba e-STUDIO3510c Specifications

General IconGeneral
FunctionsPrint, Copy, Scan, Fax
Print Speed (Black)35 ppm
Print Speed (Color)35 ppm
ConnectivityUSB, Ethernet
Copy Speed (Color)35 cpm
Copy Speed (Black)35 cpm
Duplex PrintingYes
Copy Resolution600 x 600 dpi
Print Resolution1200 x 1200 dpi
Standard Paper Capacity550 sheets
Scanner TypeColor Scanner
Scan Resolution600 dpi
Paper SizeLegal, Letter
Network ConnectivityEthernet
Operating System CompatibilityWindows, Mac, Linux

Summary

Notice to Users

USE OF RECYCLED PAPER IN THE COPIER

Guidance on using recycled paper for optimal copier performance and reliability.

FCC NOTICE

Compliance details for Class A digital devices and potential interference.

User Safety

Laser safety information, Class 1 certification, and compliance standards.

Lineup of Our Manuals

Quick Start Guide

Describes initial setup method of equipment and accessories.

Operator's Manual for Basic Functions

Explains basic functions, focusing on copying, and includes safety precautions.

User Functions Guide

Details functions and settings accessed via the [USER FUNCTIONS] button.

Color Guide

Explains color-related functions like density adjustment and image editing.

TopAccess Guide

Explains network functions, scanning, and job management via TopAccess.

Before Reading This Manual

Precautions in this manual

Explains safety precautions according to three levels (Warning, Caution, Note) and other signage.

Description of original/paper direction

Trademarks

Lists trademarks of Microsoft, Adobe, and other companies.

Toshiba Quality is Second to None

Supplies / Parts

Features of the e-STUDIO2500c/3500c/3510c

General Precautions

When installing or moving

Important warnings and cautions related to installing or moving the equipment.

General Precautions

Other points

Additional points for placement, ventilation, and environmental considerations.

When using the Multifunctional Digital Color Systems

Warnings and cautions regarding the safe operation of the equipment.

General Precautions

Position of Certification label, etc.

Illustrates the location of certification and identification labels on the equipment.

General Precautions

During maintenance or inspection

Warnings and cautions related to performing maintenance or inspection on the equipment.

When handling supplies

Cautionary advice on handling and disposing of toner cartridges and toner bags.

Disclaimer Notice

Chapter 1 BEFORE USING EQUIPMENT

Description of Each Component

Front / Right side

Left side / Inner side

Configuration of options

Control panel

Control Panel Buttons and Lamps

Describes the function of each button and lamp on the control panel.

Adjustment of the angle of the control panel

Touch panel

Touch Panel Interface

Overview of the touch panel layout, including message display, buttons, and areas.

Preparation 1- Turning Power On/Off

Turning power off (Shutdown)

Energy Saving Mode

Preparation 2- Setting Copy Paper

Acceptable copy paper

Lists types, sizes, and maximum sheet capacities of acceptable copy paper.

Setting copy paper (size change)

Changing the setting of paper size

Drawer for special uses

Setting the drawer for special uses

Procedures for setting drawers for specific paper types like cover sheets or FAX paper.

Clearing the drawer for special uses

Placing paper in the Large Capacity Feeder (optional)

Chapter 2 HOW TO MAKE COPIES

Setting Originals

Acceptable originals

Lists types, sizes, and acceptable formats for originals.

Maximum number of sheets for scanning

Placing originals on the glass

Using the Reversing Automatic Document Feeder (optional)

Precautions

Lists types of originals to avoid due to potential misfeeding or damage.

Continuous feed mode

Single feed mode

Copying procedure

Stopping the copying operation

Scanning the next originals during copying (Auto job start)

Confirming and canceling auto job

Interrupt copying in progress and make other copies (Interrupt copying)

Bypass Copying

Bypass copying

Instructions for copying on OHP film, sticker labels, or non-standard paper using the bypass tray.

Bypass copying on standard size paper

Procedure for bypass copying using standard paper sizes like LD, LT, LG, ST-R.

Bypass copying on non-standard size paper

Procedure for bypass copying with non-standard paper sizes within specific ranges.

Proof Copy

Chapter 3 SETTING OF BASIC COPY MODES

Paper Selection

Switching Color Mode

Enlargement and Reduction Copying

Selecting Finishing Modes

Duplex Copying

Original Mode

Copy Density Adjustment

Chapter 4 IMAGE ADJUSTMENT

Color Balance (YMCK Adjustment)

RGB Adjustment

One-Touch Adjustment

Background Adjustment

Sharpness

Twin Color (2-Color) Copy

TWIN COLOR SELECTABLE

Copies in two manually specified colors: black part and non-black parts.

RED & BLACK

Copies red parts in red and other parts in black and white.

Monocolor copying

Hue

Saturation

Chapter 5 USING THE EDITING FUNCTIONS

IMAGE SHIFT

Creating a right or left margin

Shifts the original image to the right or left side to create a margin.

Creating a top or bottom margin

Shifts the original image to the top or bottom side to create a margin.

Creating a bookbinding margin

Creates a margin in the center (inner margin) for bookbinding.

EDGE ERASE

BOOK CENTER ERASE

DUAL PAGE

2IN1 / 4IN1

MAGAZINE SORT

EDITING

Trimming / Masking

Copies the inside of a specified area or masks a specified area.

Mirror image

Reverses the image horizontally (right and left) for copying.

Negative/Positive reversal

Reverses the contrasting density on the whole face of the original.

XY ZOOM

COVER SHEET

SHEET INSERTION

TIME STAMP

PAGE NUMBER

JOB BUILD

IMAGE DIRECTION

BOOK - TABLET

ADF / SADF

FULL IMAGE

IMAGE REPEAT

Chapter 6 e-FILING

e-Filing

Creating User Boxes

Changing Data of User Boxes

Deleting User Boxes

Storing Documents in e-Filing

Printing Stored Documents

Printing the whole document

Prints all pages of a stored document.

Test printing

Prints a part of a document by specifying start and last pages.

Printing the stored document after changing the settings

Prints stored documents after adjusting settings like paper source and finishing mode.

Deleting Folders or Documents

Chapter 7 TEMPLATE

Template

Template in “Useful Template”

Default templates available in user group 001 for various functions.

Registering User Groups and Templates

Registering a template in the public template group

Registers function combinations as templates accessible to all users.

Registering the new user group

Creates a new user group for organizing templates.

Registering a template in the user group

Registers function combinations as templates within a specific user group.

Changing Data of User Groups and Templates

Changing the data of a user group

Modifies names, passwords, or automatic start settings for user groups.

Changing the data of a template

Modifies names, passwords, or automatic start settings for registered templates.

Recalling Templates

When recalling a template in a public group

Recalls templates from the public group for use.

When recalling a template in a user group

Recalls templates registered within a specific user group.

Deleting User Groups or Templates

Deleting a user group

Deletes unnecessary user groups and all associated templates.

Deleting a template

Deletes specific templates from user or public groups.

Chapter 8 JOB STATUS

Job Status

Confirming Print Job Status

Confirms the status of print jobs and allows deletion or release of invalid jobs.

Confirming Scan Job Status

Confirms the status of scan jobs and allows deletion of scan jobs.

Log List

Confirming job history in log list

Confirms the history of copy, print, scan, and fax jobs in the log list.

Registering into address book from log lists

Registers unregistered fax numbers or email addresses from logs into the address book.

Printing journals (send/receive log list)

Prints the send and receive log lists of Fax jobs.

Print Status Display

Releasing print job errors

Procedure to resolve print job errors, typically by correcting paper size or selection.

Error Code

Chapter 9 BLINKING GRAPHIC SYMBOLS

Blinking Graphic Symbols

Drawer Display on the Touch Panel

Replace Toner Cartridge Symbol

Recommendation for original toner

Recommends using genuine Toshiba toner for highest quality output.

Replacing the toner cartridge

Step-by-step instructions for replacing the toner cartridge.

Cleaning the slit glasses

Procedure for cleaning the slit glass to maintain image quality.

Replace Toner Bag Symbol

Cleaning the chargers

Procedure for cleaning the chargers to maintain image quality.

Jam Symbols

Misfeed in the Reversing Automatic Document Feeder (optional)

Instructions for removing misfed paper from the Reversing Automatic Document Feeder.

Misfeed in drawer feeding area

Instructions for removing misfed paper from the drawer feeding area.

Misfeed in the Large Capacity Feeder (optional)

Instructions for removing misfed paper from the Large Capacity Feeder.

Misfeed in the Paper Feed Pedestal (optional)

Instructions for removing misfed paper from the Paper Feed Pedestal.

Misfeed on the bypass tray

Instructions for removing misfed paper from the bypass tray.

Misfeed in the automatic duplexing unit

Instructions for removing misfed paper from the automatic duplexing unit.

Misfeed in the jam releasing cover

Instructions for removing misfed paper from the jam releasing cover.

Misfeed in the fuser unit

Instructions for removing misfed paper from the fuser unit.

Misfeed in the Bridge Unit (optional)

Instructions for removing misfed paper from the Bridge Unit.

Misfeed in the Finisher and the Hole Punch Unit (optional: MJ-1101, MJ-6101)

Instructions for removing misfed paper from the Finisher and Hole Punch Unit.

Misfeed in the Saddle Stitch Finisher and the Hole Punch Unit (optional: MJ-1030, MJ-6004)

Instructions for removing misfed paper from the Saddle Stitch Finisher and Hole Punch Unit.

Misfeed in the Saddle Stitch Unit (optional)

Instructions for removing misfed paper from the Saddle Stitch Unit.

Call Service Symbol

Chapter 10 WHEN THIS MESSAGE APPEARS

“Toner near Empty”

“Time for Slit glass and Main charger cleaning”

Cleaning the slit glass

Procedure for cleaning the slit glass to improve image quality.

Cleaning the chargers

Procedure for cleaning the chargers to maintain image quality.

“Check staple cartridge”

Finisher (optional: MJ-1101)

Instructions for adding staples to the cartridge in the MJ-1101 Finisher.

Finisher (optional: MJ-1030)

Instructions for adding staples to the cartridge in the MJ-1030 Finisher.

“Check staple cartridge in the Saddle Stitch Unit”

“Examine stapler”

Finisher (optional: MJ-1101)

Instructions for removing jammed staples from the MJ-1101 Finisher.

Finisher (optional: MJ-1030)

Instructions for removing jammed staples from the MJ-1030 Finisher.

“READY (CHECK STAPLER)”

“Examine stapler in the Saddle Stitch Unit”

“READY (CHECK SADDLE STITCH STAPLER)”

“READY (HOLE PUNCH DUST BIN IS FULL)”

Hole Punch Unit (optional: MJ-6101, MJ-6004)

Procedure for disposing of punched paper bits from the hole punch dustbin.

“POWER FAILURE”

“Time for periodic maintenance”

“Check paper size setting on control panel for drawer N”

During copying (using a drawer)

Procedure to resolve paper size mismatch errors during copying from a drawer.

During copying (using the bypass tray)

Procedure to resolve paper size mismatch errors during copying from the bypass tray.

During printing from the FAX or Printer (using a drawer)

Procedure to resolve paper size mismatch errors during printing from a drawer.

During printing from the Printer (using the bypass tray)

Procedure to resolve paper size mismatch errors during printing from the bypass tray.

“Cannot print this paper size Select the other drawer”

“Cannot print this paper type Set the other paper type”

“Reboot the machine”

Chapter 11 MAINTENANCE

Daily Inspection

Simple Troubleshooting

Equipment does not start

Troubleshooting steps for when the equipment fails to start.

Paper jamming occurs frequently

Troubleshooting steps for frequent paper jamming issues.

Display does not change when buttons or icons are pressed

Troubleshooting for unresponsive buttons or icons on the display.

Functions cannot be set

Troubleshooting steps when functions cannot be set or are unavailable.

Image density is too low

Troubleshooting steps for low image density.

Image density is too high

Troubleshooting steps for high image density.

Image trouble

General troubleshooting for various image quality issues.

Chapter 12 SPECIFICATIONS & OPTIONS

e-STUDIO2500c/3500c/3510c Specifications

Specifications of Options

Packing List

Copying Function Combination Matrix

Image Quality Adjustment Combination Matrix