© 2005 - 2007 TOSHIBA TEC CORPORATION All rights reserved e-STUDIO520/523/600/603/720/723/850/853
ADJUSTMENT
3 - 73
3
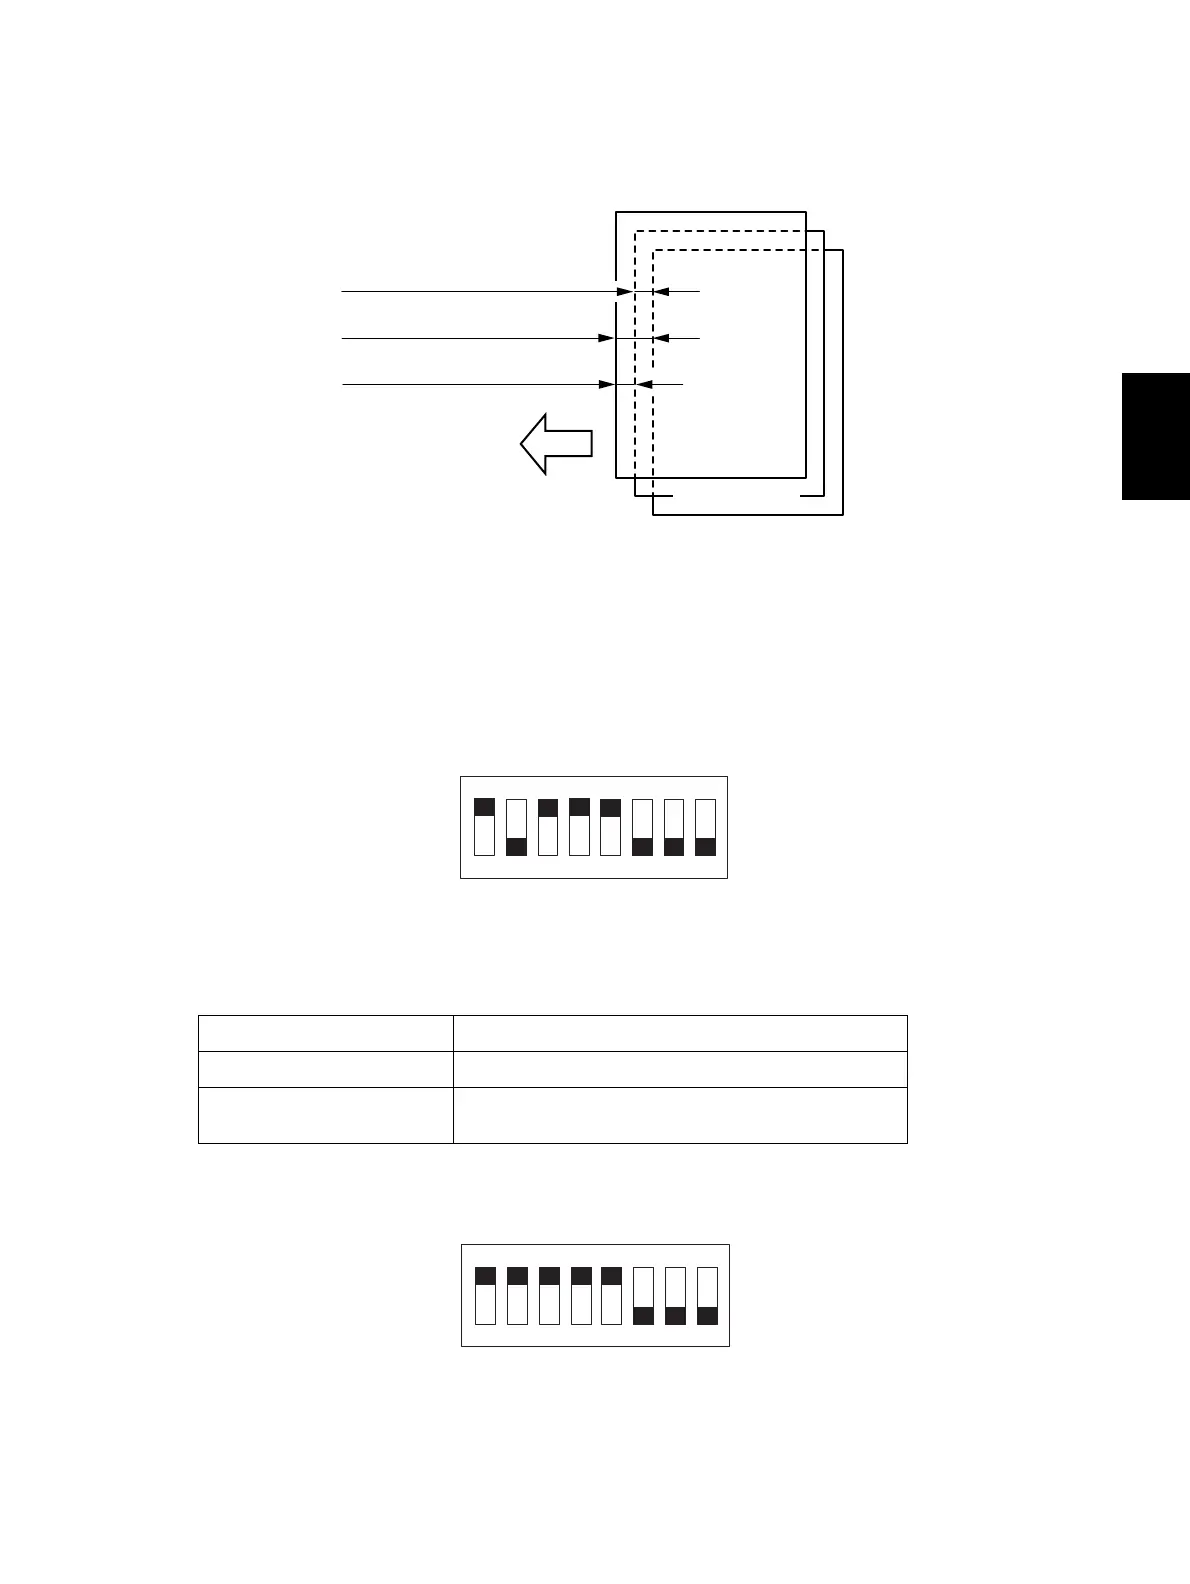
(6) Measure the winding amount (shift) of the stack of sheets, and compare this amount with the
standard amounts.
• This amount should be measured at the center of the paper leading edge.
Fig. 3-85
(7) If the amount is within the standard, turn the host machine OFF, and then set all bits of SW3 to
OFF. If the amount is outside the standard, perform the following.
(8) Turn the host machine OFF, and set SW3 on the finisher contoroller PCB as indicated. If
EEPROM (Q2) on the finisher controller PCB has been replaced, proceed to step 10.
Fig. 3-86
(9) Turn the host machine ON, and then press SW2 on the finisher controller PCB.
• The current setting values are displayed at LED1.
The adjustment width is 0.72mm for each N=1.
(10) Turn the host machine OFF, and then set SW3 on the finisher controller PCB as indicated.
Fig. 3-87
Adjustment value 0 Lights for 1 second (once)
Adjustment value +N Blinks (lights for 0.2 second) for N times.
Adjustment value -N Lights for 1 second (once), and blinks (lights for 0.2
second) for N times.
Third sheet
First sheet
Second sheet
Paper delivery
direction
First sheet and Second sheet:
0±1 mm
First sheet and Third sheet:
4 mm or less
Second sheet and Third sheet:
4 mm or less
ON
12345678
ON
12345678

 Loading...


