e-STUDIO520/523/600/603/720/723/850/853 © 2005 - 2007 TOSHIBA TEC CORPORATION All rights reserved
ADJUSTMENT
3 - 74
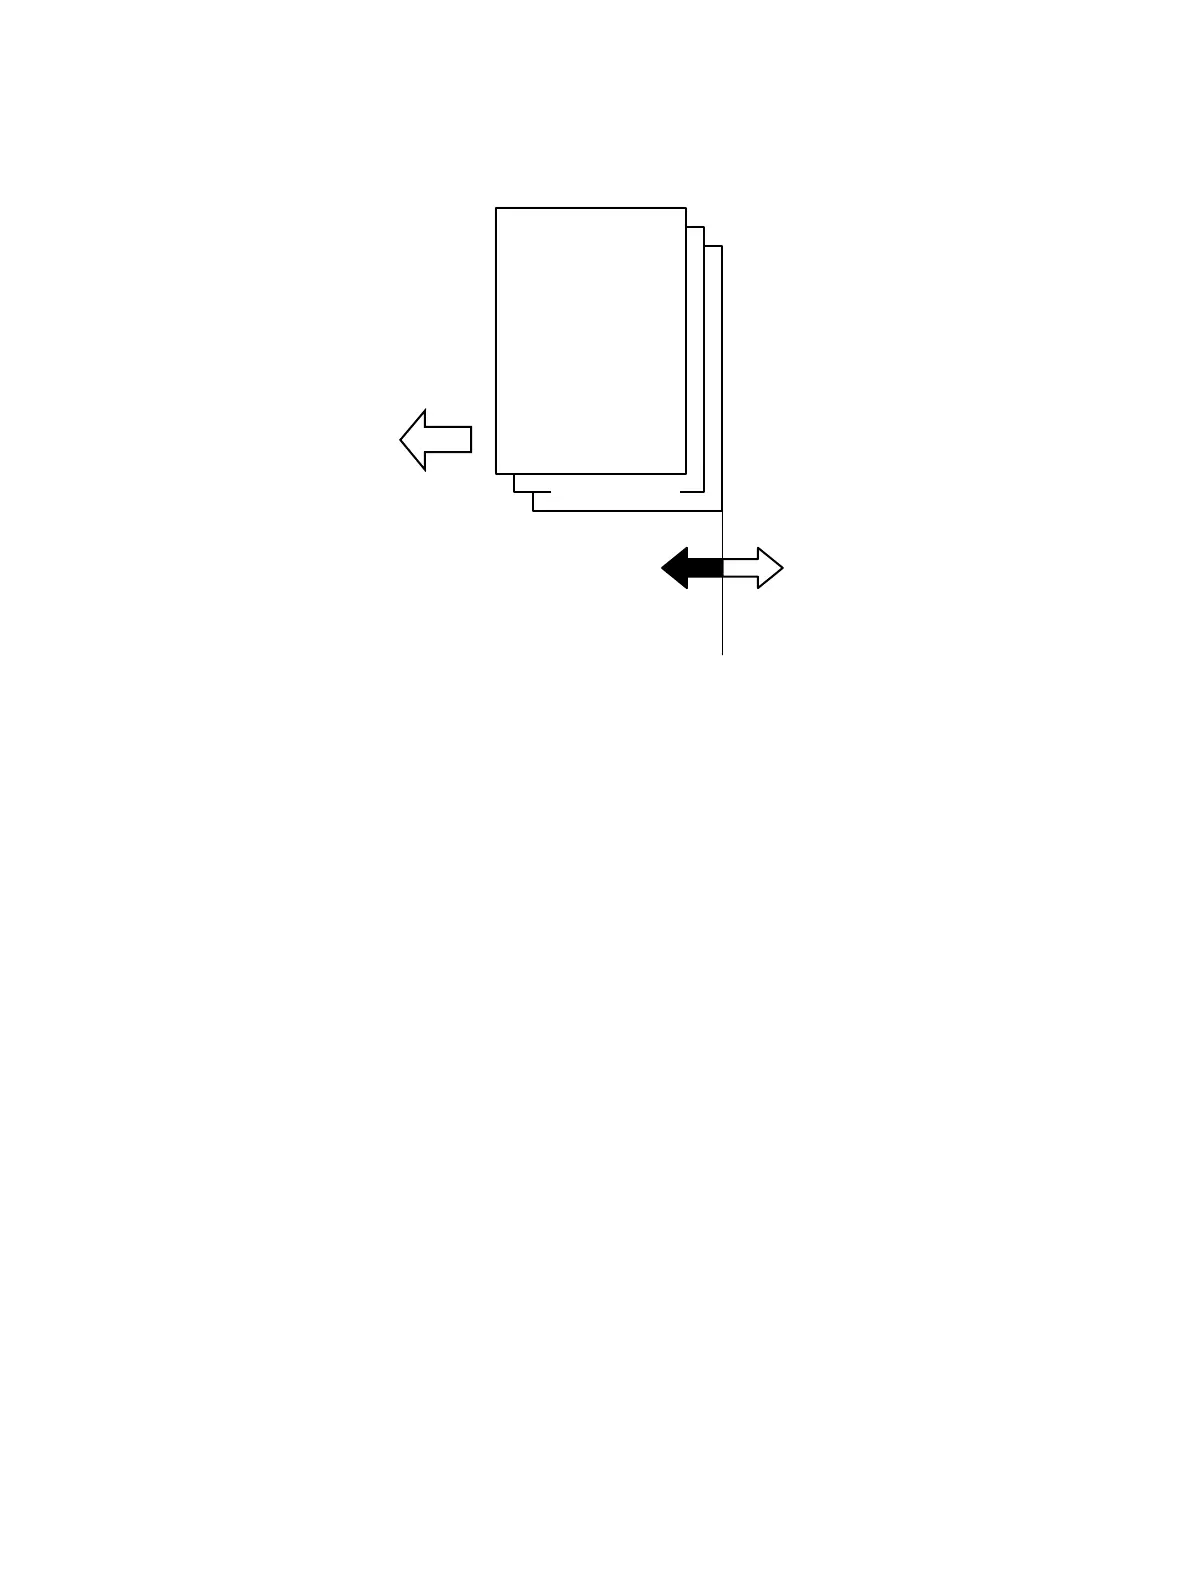
(11) Press SW1 or SW2 on the finisher controller PCB as necessary.
• Each press of SW1 increments the winding amount in 0.72mm increments.
• Each press of SW2 decrements the winding amount in 0.72mm increments.
Fig. 3-88
(12) Repeat steps 1) though 6) twice. Check that the winding amount is within the standard in both
times.
(13) Turn the host machine OFF, and set all bits of SW3 to OFF. This completes the adjustment.
Third sheet
First sheet
Second sheet
Paper
delivery
direction
Movement of
direction of
1st sheet by SW1
Movement of
direction of
1st sheet by SW2

 Loading...

