2.SCANNING (BASIC OPERATION)
22 Saving Data in the Shared Folder
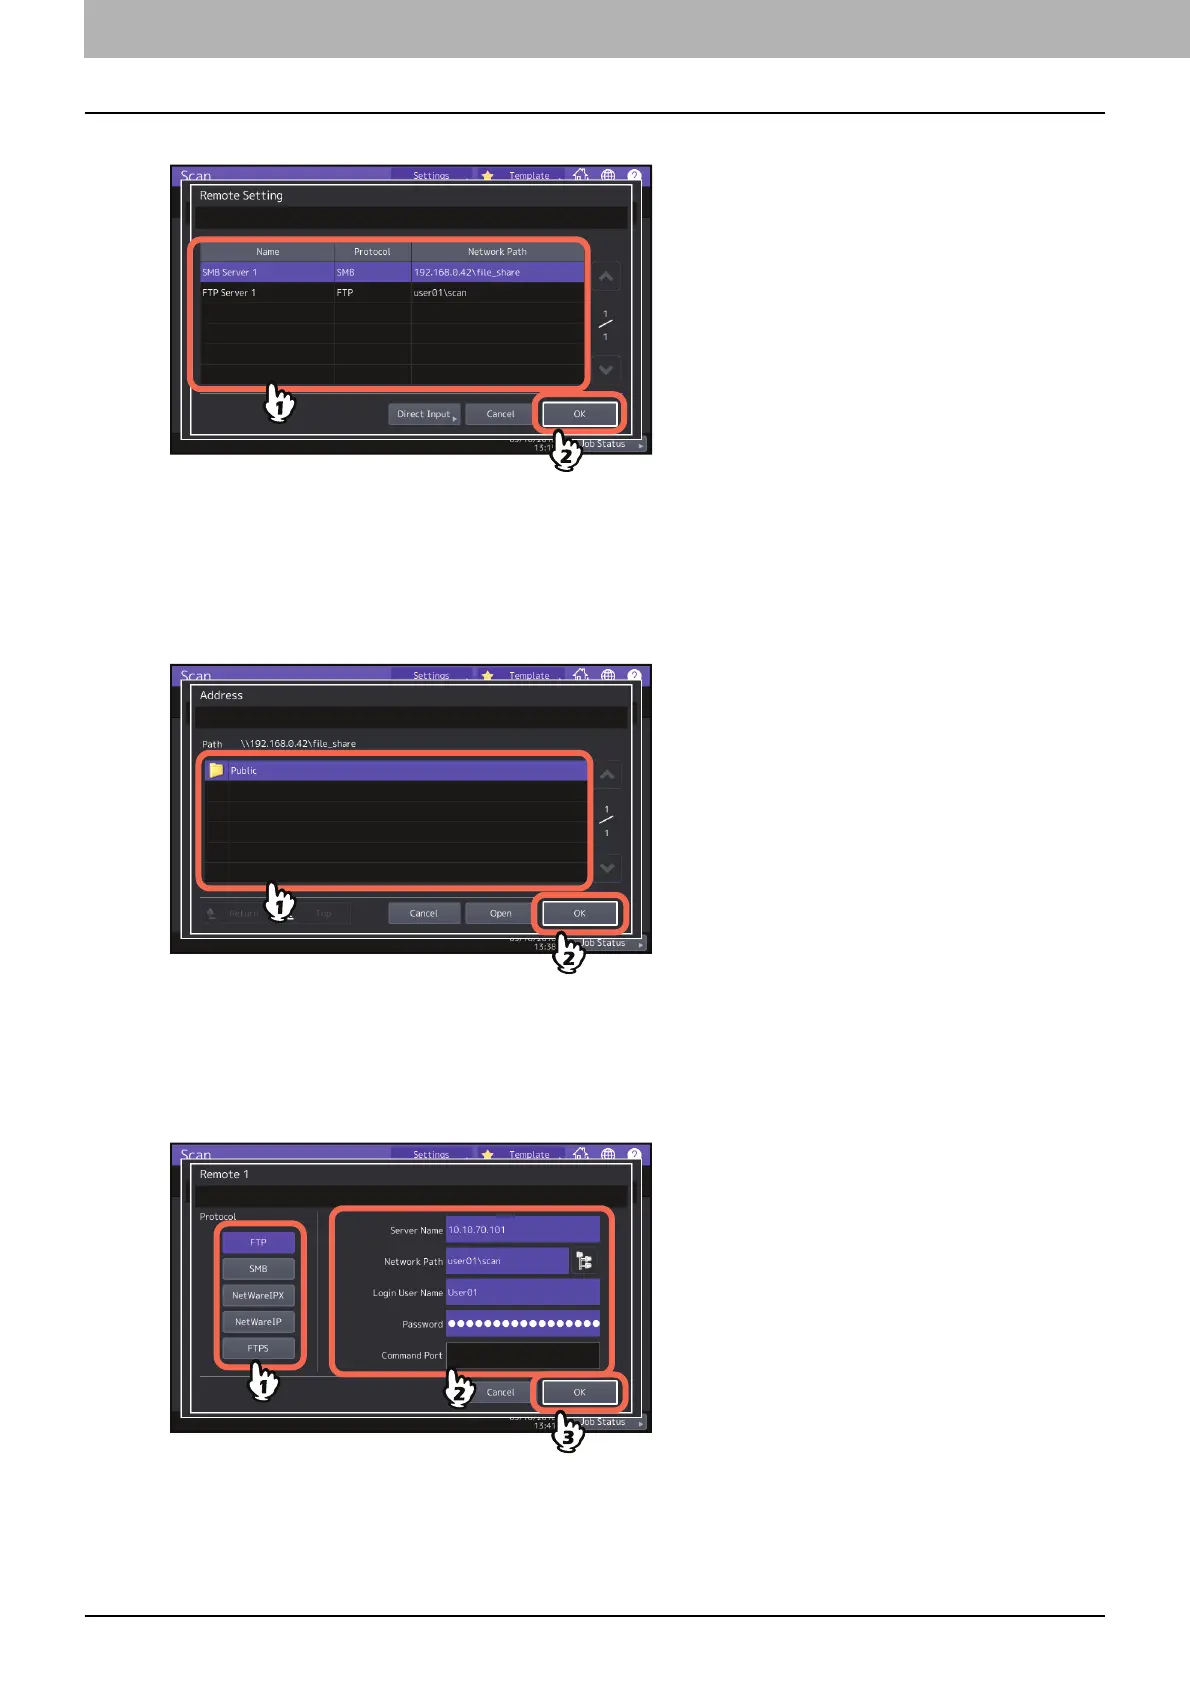
1
Select the desired file destination from the list and press [OK].
If FTP, NetwareIPX, NetwareIP or FTPS is selected for a protocol, you do not need to proceed to the next step.
The network path you select on the screen in the step 2 of “Saving Data in the Shared Folder” is displayed.
If SMB is selected for a protocol, proceed to Step 2.
If your desired file destination has not been registered in the equipment, press [Direct Input] and proceed to
Step 3.
2
If SMB is selected, select the folder to be stored and press [OK].
The network path you select on the screen in the step 2 of “Saving Data in the Shared Folder”is displayed.
3
To manually specify the remote file destination, set each option.
Select FTP, SMB, NetwareIPX, NetwareIP, or FTPS as a protocol to transfer the file.
Enter a file destination to [Server Name], [Network Path], [Login User Name], [Password] and/or [Command Port]
to specify it.
Finally, press [OK].
[Server Name] (FTP, NetwareIPX, NetwareIP, and FTPS only)
- When you select [FTP] or [FTPS]:
Enter the IP address of the FTP server. For example, to transfer the scanned data to “ftp://10.10.70.101/
user01/scan/,” enter “10.10.70.101” in this box.

 Loading...


