52
Chapter 10
Customize Your Network Settings
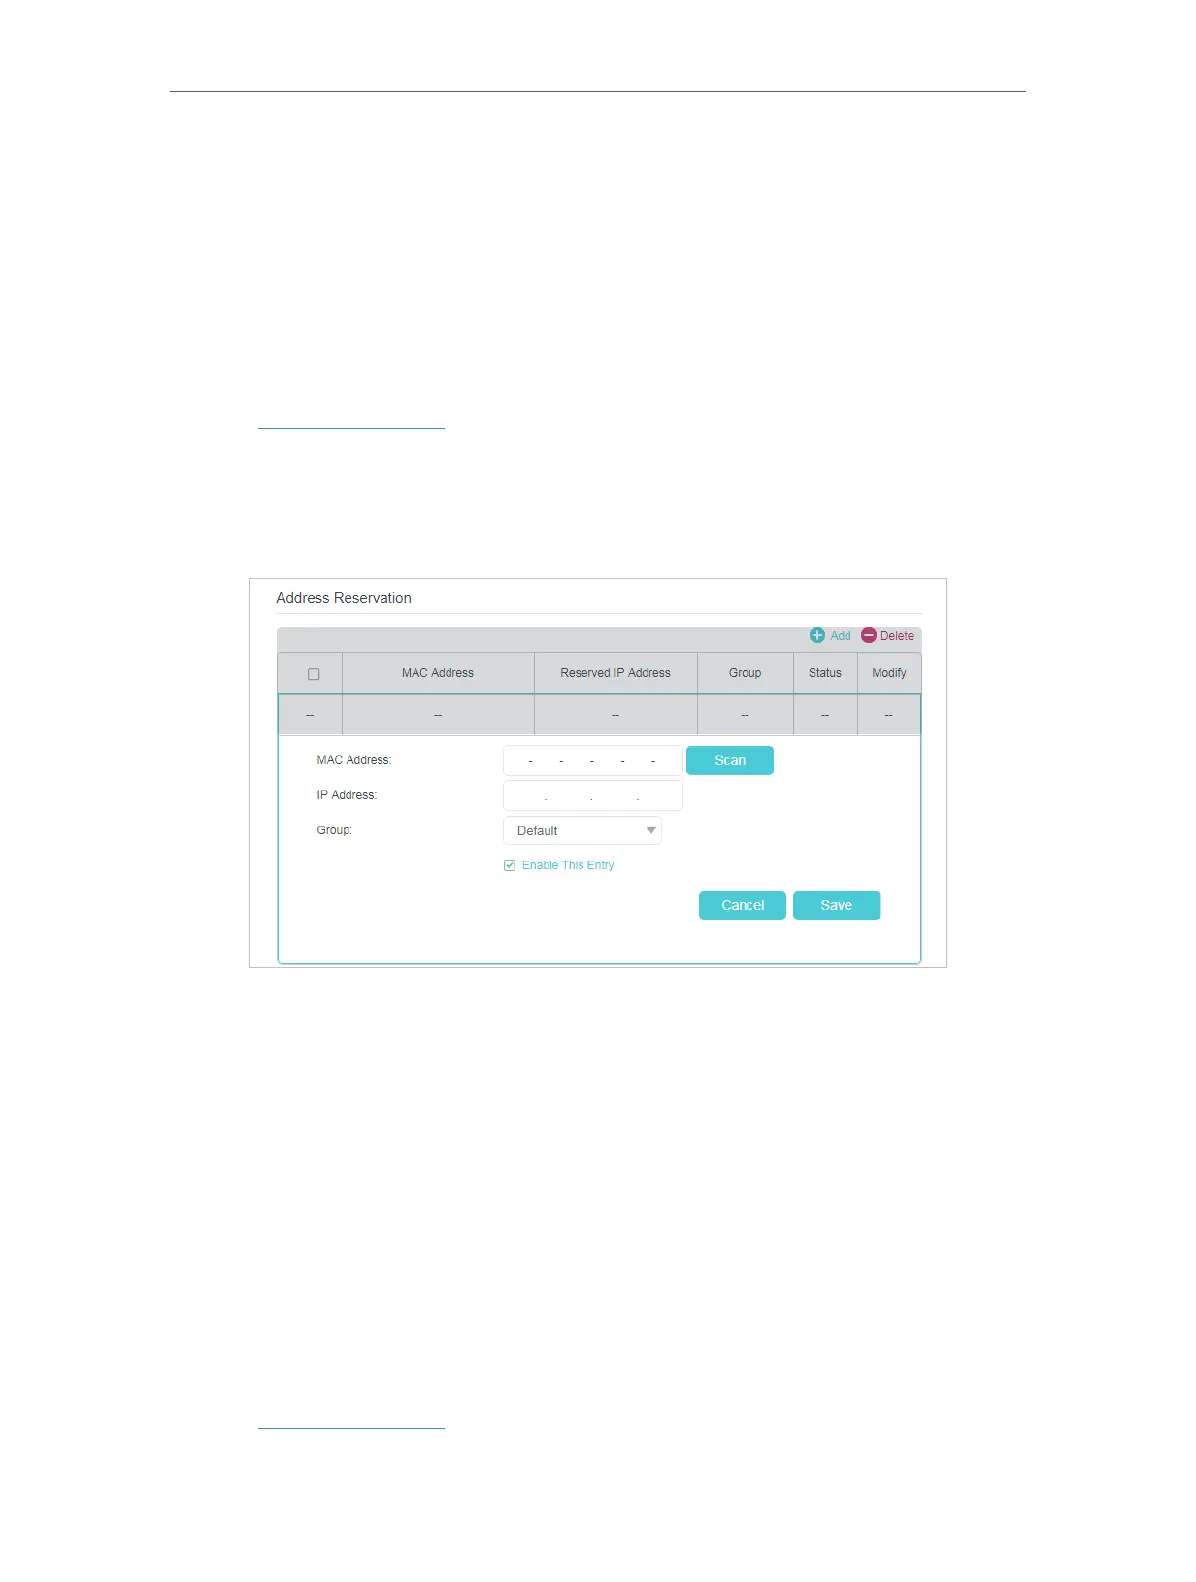
10. 1. 3. Reserve LAN IP Addresses
You can view and add a reserved address for a client. When you specify an IP address
for a device on the LAN, that device will always receive the same IP address each time
when it accesses the DHCP server. If there are some devices in the LAN that require
permanent IP addresses, please configure Address Reservation on the router for the
purpose.
Follow the steps below to reserve an IP address for your devices.
1. Visit http://tplinkwifi.net, and log in with the password you set for the router.
2. Go to Advanced > Network > LAN Settings page, and select IPv4.
3. Scroll down to the Address Reservation section, and click Add to add an address
reservation entry for your device.
4. Enter the MAC Address of the device for which you want to reserve IP address.
5. Specify the IP address which will be reserved by the router.
6. Select the Enable This Entry check box and click Save to make the settings effective.
10. 2. Configure IPv6 LAN Settings
Based on the IPv6 protocol, the router provides two ways to assign IPv6 LAN addresses:
• Configure the RADVD (Router Advertisement Daemon) address type
• Configure the DHCPv6 Server address type
10. 2. 1. Configure the RADVD Address Type
1. Visit http://tplinkwifi.net, and log in with the password you set for the router.
 Loading...