63
Chapter 10
Customize Your Network Settings
3. Select an option from the Security drop-down list and configure the related
parameters. The router provides four options, No Security, WPA/WPA2 Personal
(Recommended), WPA/WPA2 Enterprise, WEP. WPA2 uses the newest standard
and the security level is the highest. We recommend you don’t change the default
settings unless necessary.
4. Click Save to make the settings effective.
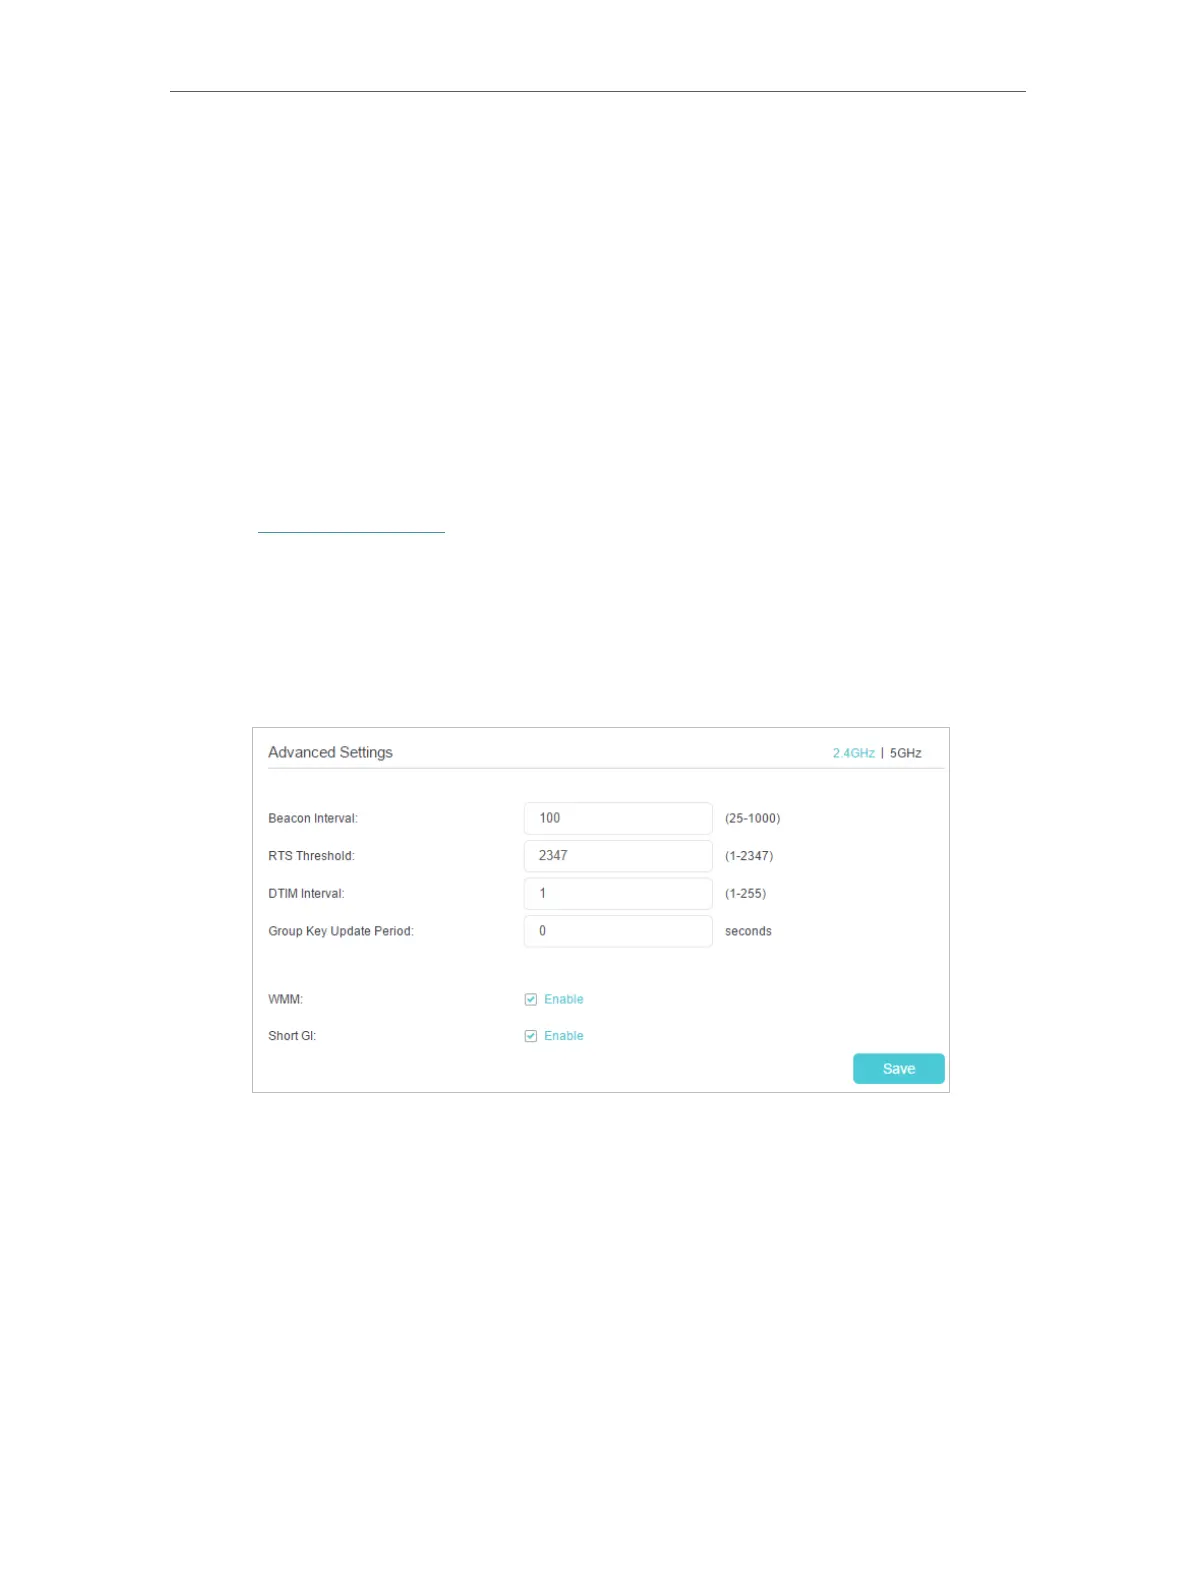
10. 7. 2. Advanced Wireless Settings
Advanced wireless settings are for those who want more network controls. You can
follow the instructions below to configure your router.
1. Visit http://tplinkwifi.net, and log in with the password you set for your router.
2. Go to Advanced > Wireless > Advanced Settings page.
¾ To change basic advanced settings:
Locate the Advanced Settings section and configure the advanced settings according
to the explanation below, and then click Save.
• Beacon Interval: Enter a value between 25 and 1000 in milliseconds to determine the
duration between which beacon packets are broadcast by the router to synchronize
the wireless network. The default is 100 milliseconds.
• RTS Threshold: Enter a value between 1 and 2347 to determine the packet size of
data transmission through the router. By default, the RTS (Request to Send) Threshold
size is 2347. If the packet size is greater than the preset threshold, the router sends
Request to Send frames to a particular receiving station and negotiates the sending
of a data frame, or else the packet will be sent immediately.
• DTIM Interval: Enter a value between 1 and 255 to determine the interval of the
Delivery Traffic Indication Message (DTIM). 1 indicates the DTIM Interval is the same
as Beacon Interval.
 Loading...