17
Chapter 4
Set Up Internet Connection
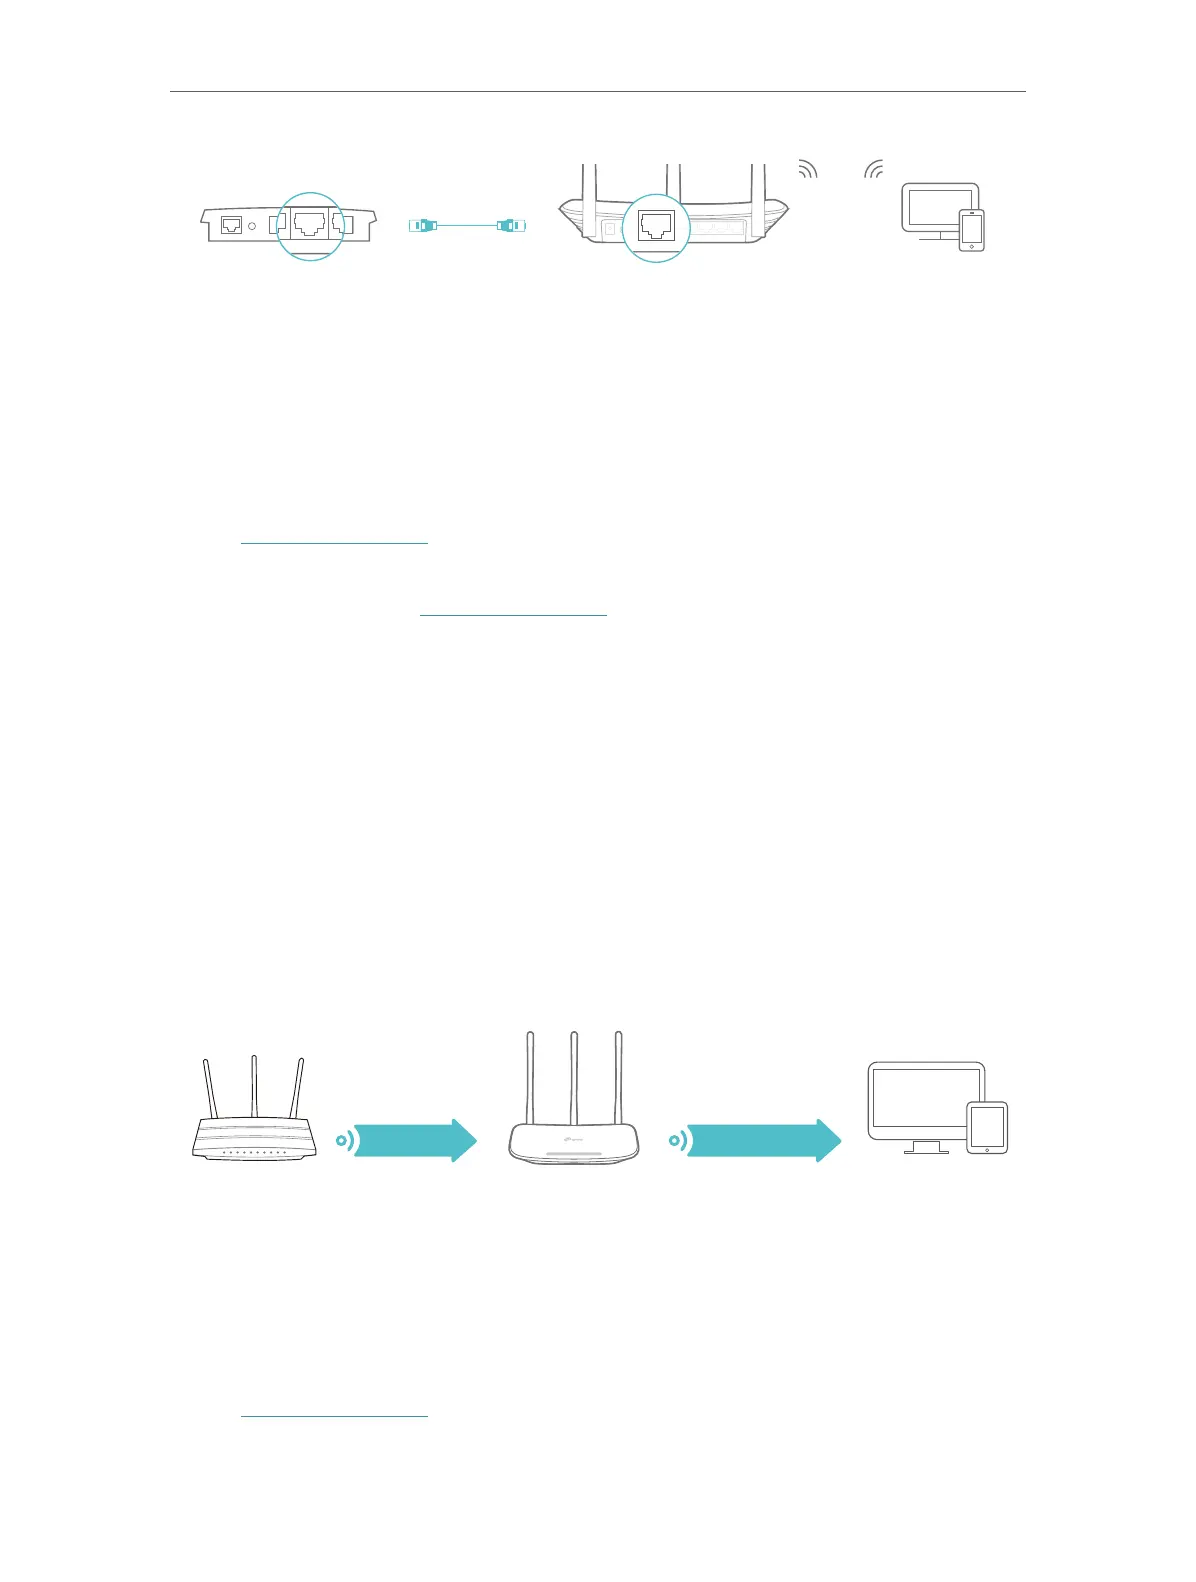
Wired Router Router
Ethernet4Ethernet3Ethernet1Ethernet2Internet
Ethernet4
Ethernet
Internet
Internet
Devices
1. Connect the router’s Internet port to your wired router’s Ethernet port via an Ethernet
cable as shown above. And power on the router.
2. Connect a computer to the router via an Ethernet cable or wirelessly by using the
SSID (network name) and Wireless Password printed on the label at the bottom of
the router.
3. Visit http://tplinkwifi.net, and log in with the password you set for the router.
4. Go to Settings or Advanced > Operation Mode, select Access Point and click Save.
Log in to the router via http://tplinkwifi.net after the router reboots.
5. Go to Quick Setup or Settings > Wireless > Wireless Settings and set the network
name(SSID) and passwords for the wireless network.
Now, you can connect to the SSID and enjoy your existing network.
4. 4. 2. Configure the Router in Range Extender Mode
In Range Extender mode, the device can copy and reinforce the existing wireless
signal to extend the coverage of the signal, especially for a large space to eliminate
signal-blind corners. Advanced functions like NAT, Parental Controls and QoS are not
supported in this mode.
To switch to Range Extender mode:
Extended NetworkHost Network
DevicesHost Router Router
1. Place the router next to your host router and power it on.
2. Connect a computer to the router via an Ethernet cable or wirelessly by using the
SSID (network name) and Wireless Password printed on the label at the bottom of
the router.
3. Visit http://tplinkwifi.net, and log in with the password you set for the router.
 Loading...