TD-8811 ADSL2+ Modem Router User Guide
6
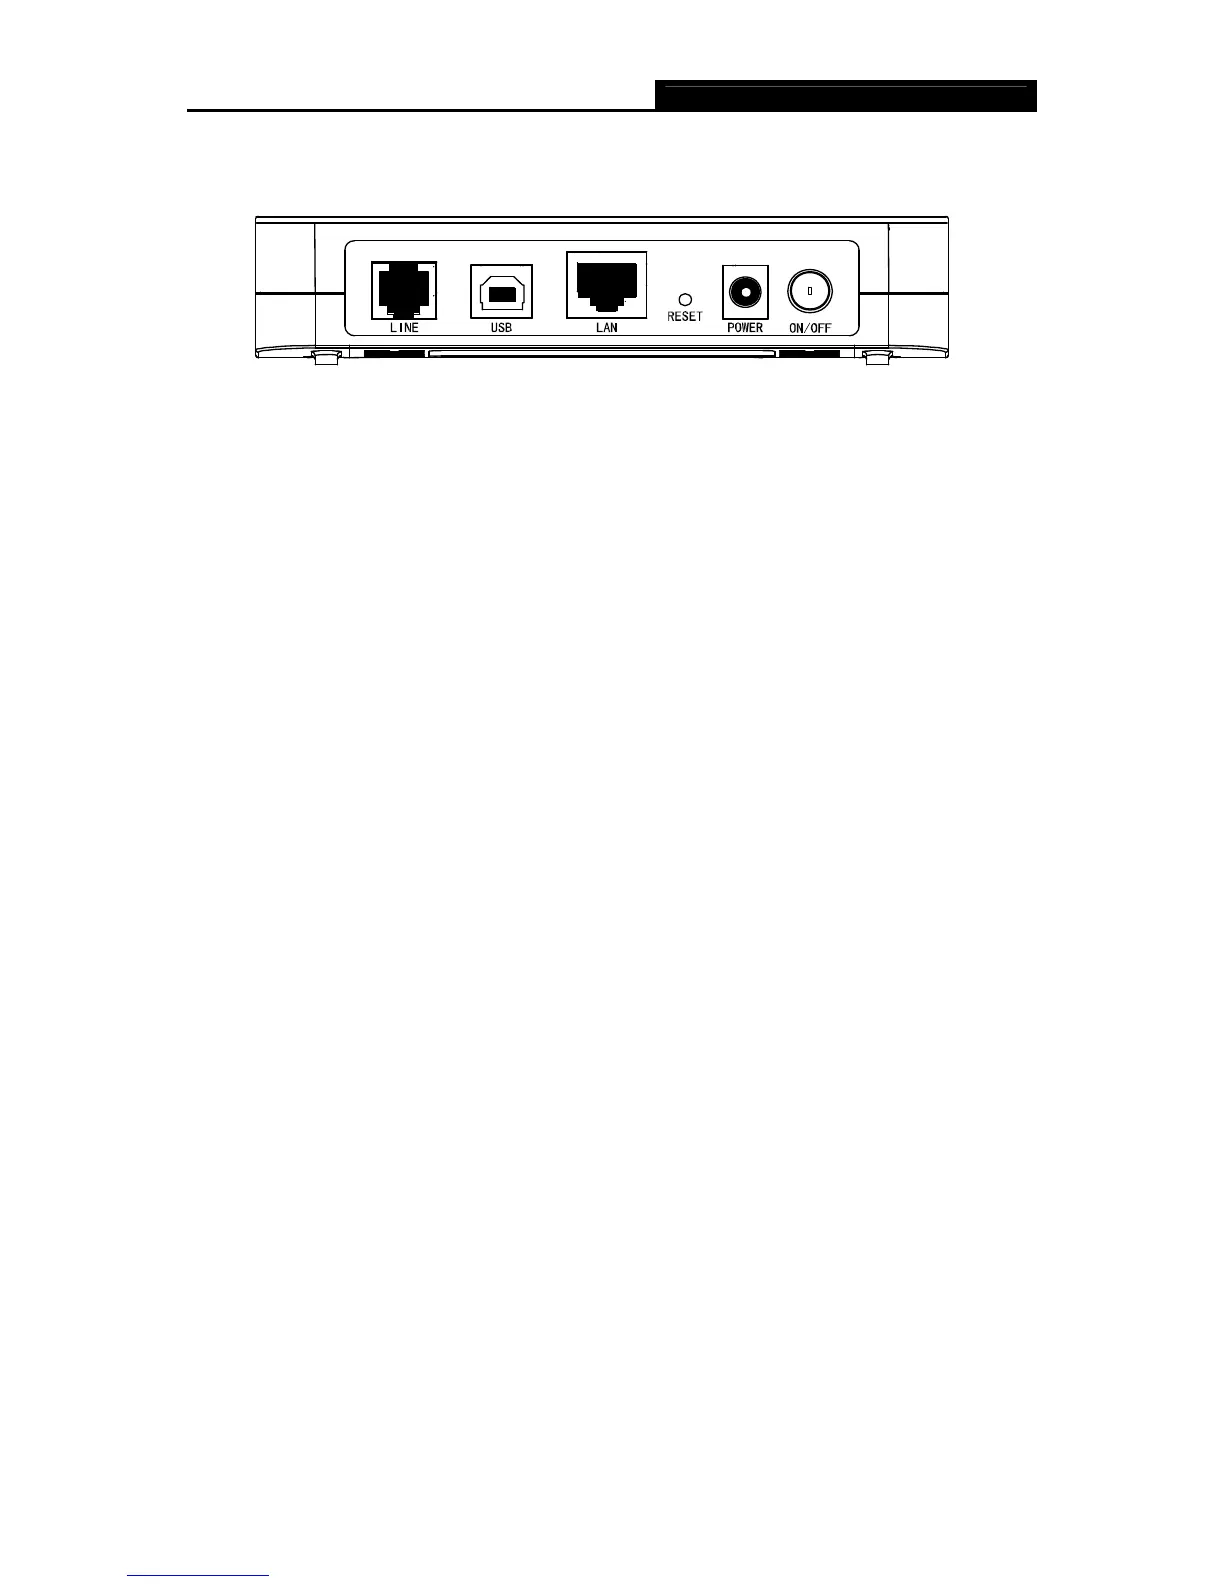
2.2 Rear-panel
¾ ON/OFF: Turn on/off the ADSL Router’s power.
¾ POWER: Please use the provided power adaptor, otherwise may cause damage to the
ADSL Router.
¾ RESET (reset default): Press the RESET button and hold for five seconds and then wait
for the router to reboot to its factory default settings.
¾ LAN: Connect to your computer with RJ45 cable.
¾ USB: Connect with your computer’s USB interface.
¾ LINE (WAN): Connect to the MODEM Port of Splitter or Connect with the telephone line.
2.3 Hardware Installation Procedures
The procedure to install the Router can be described in the following steps:
First Step: Connect the MODEM port of Splitter with the LINE port of the TD-8811 ADSL2+
Modem Router by telephone line.
Second Step: Connect category 5 cable with RJ45 jacks to ADSL2+ Modem Router’s LAN port
and your computer’s NIC. Or connect USB cable to ADSL2+ Modem Router’s USB port and
your computer’s USB interface.
Third Step: Plug one end of the AC Power Adapter into the Power jack on the Ethernet
ADSL2+ Modem Router and the other end to a standard electrical outlet.
Last Step: Check the line connection to see if everything is ready. Power up finally.



 To Next Page