170
RT-SVX24Q-EN
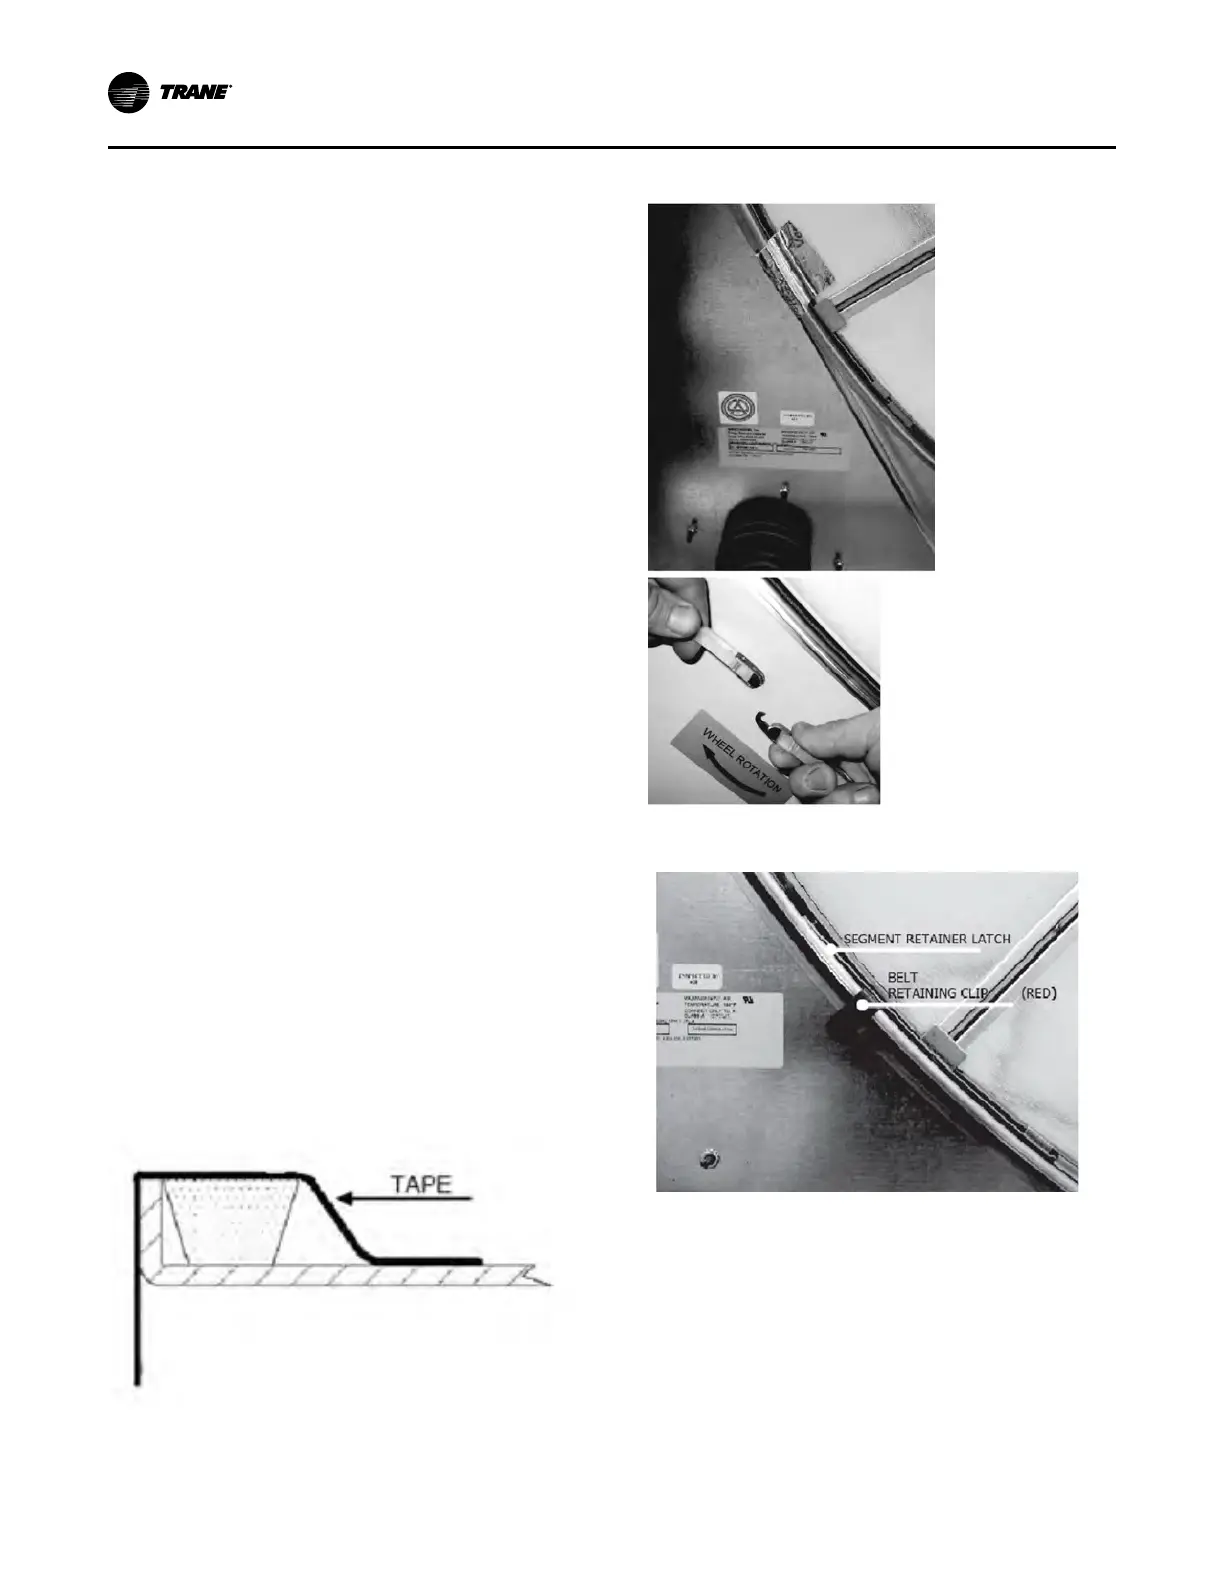
4. At a location near the motor pulley, tape the hook
end of the belt to the wheel rim, see Figure 127, p.
167 and Figure 131, p. 170. The tape should cover
the hook and belt, see Figure 129, p. 170.
5. Manually rotate the wheel clockwise while feeding
the belt onto the wheel rim, taking care that the belt
does not twist.
NNoottee:: If for any reason the belt were to become
flipped or twisted 90° in either direction, belt
failure will be imminent.
6. Upon feeding the belt completely through, remove
the tape and join the link with the belt positioned
around the wheel rim, see Figure 130, p. 170. Keep
light tension on the belt, as a slack belt may be
prone to twist.
7. Manually rotate the wheel clockwise until the linked
belt ends are approximately 180° from the motor
pulley location.
8. Insert the right angle belt retainer from the
replacement kit at the pulley location. Place it
between the segment retainer latch pivot point and
the wheel spoke, see Figure 131, p. 170 (left of the
spoke).
IImmppoorrttaanntt:: To avoid release of the segment latch
do not insert retainer on the other side
of spoke.
9. Manually rotate the wheel counter-clockwise to
position the belt retainer clip close to the center
beam and diameter seals.
10. In a section between the retainer clip and the motor
pulley, remove the belt from the wheel rim and then
place it over the pulley.
11. Manually rotate the wheel clockwise until the belt is
fully stretched around the wheel rim and motor
pulley.
12. Remove the belt retainer clip and manually rotate
the wheel clockwise at least two full rotations while
verifying the belt is not twisted on the wheel rim or
as it enters the pulley(s).
Figure 129. Link belt installation
Figure 130. Link belt installation
Figure 131. Retaining clip location
NNoottee:: Pile seal brackets are fixed with a single screw to
the cassette frame near the ends of the wheel
bearing beam. Because the height of the belt link
is slightly higher than that of the urethane belt, a
rare interference may occur when it passes the
seal bracket. If this occurs, remove the
interfering bracket(s). No measurable change of
performance will occur.
UUnniitt SSttaarrttuupp

 Loading...


