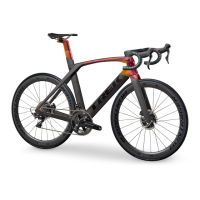
The 2016 Madone has a completely new
handlebar with internal cabling.
Installing the front derailleur
housing in the handlebar
TOOLS AND MATERIALS REQUIRED
• Installation cable (1) with
shift head
• Handlebar
• Derailleur housings (2)
• Brake housings (2)
• Hook tool
1. Prepare the housing. Cut it to length and finish the
ends (but do not install end caps).
NOTES
• One installation cable can be reused to install all
the housings.
• The length for each housing, by frame size, is
shown in the table at right.
2. Pass the installation cable completely through the
housing.
INSTALLATION CABLE
HOUSING
CABLE HEAD
Refer to precut/pre-installed housing lengths in table
below according to frame size.
Mechanical build housing lengths for 2016 madone
Total cable length recommendations
Frame size Recommended housing length in mm (as shipped*)
H1
Front
brake
Front
derailleur
Rear
brake
Rear
derailleur
50 595 670 1080 715
52 595 650 1105 695
54 605 650 1110 705
56 625 660 1110 705
58 645 675 1140 725
60 665 695 1160 740
62 690 715 1150 760
H2
Front
brake
Front
derailleur
Rear
brake
Rear
derailleur
50 615 655 1070 700
52 625 670 1095 715
54 640 675 1105 730
56 655 700 1130 735
58 680 710 1140 750
60 665 695 1150 745
62 715 745 1165 790
* Lengths as shipped include 80mm of excess housing to allow for
trimming to optional length based on bike setup.
NOTE
These lengths are subject to further trimming for
proper installation.
1 INSTALLING HOUSINGS IN THE HANDLEBAR
3