4-1
C H A P T E R 4
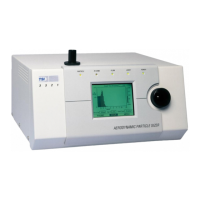
APS™ Spectrometer
Operation
This chapter describes how to set up and operate the Model 3321 at the
sensor using the control knob and LCD display. You can perform the same
operations from your computer using the Aerosol Instrument Manager
®
software with Model 3321 module.
In most cases you will want to set up initial sampling parameters at the
sensor and then, once you have verified that sampling conditions are as
desired, use the computer to collect, store, interpret, and print the sample
data. (Refer to the Aerosol Instrument Manager
®
Software for APS™
Sensors Manual (P/N 1930064) for more information on operating the
software.)
Although you can set up parameters and begin sampling at the APS™
sensor, the data shown on the LCD display is not stored, nor can it be sent
to a printer. To save or print data, you must collect it using the computer
interface and the Aerosol Instrument Manager
®
software.
The data displayed on the front panel may not exactly match data recorded
with the Aerosol Instrument Manager
®
software due to rounding
differences. Also, concentration displayed for <0.523 µm on the front panel
includes event 1 data and may not match the concentration reported by the
Aerosol Instrument Manager
®
software. When performing any critical or
detailed data analysis, Aerosol Instrument Manager
®
software should be
used. The front panel LCD display should only be used as a remote
indicator of instrument and measurement status.
Sample S e t up
These instructions assume that the APS™ spectrometer is connected to an
appropriate power source and the power on/off switch on the back panel is
switched to the on position.
1. Turn the control knob clockwise until the cursor runs off the right side
of the display and the CLEAR, START, and MENU buttons appear.
Continue turning the control knob until Menu button is highlighted; then
press the control knob. The menu shown in Figure 4-1 appears.
2. Turn the control knob clockwise until the cursor falls on the Sample
Time[s] command. Press the control knob once. Turn the control knob