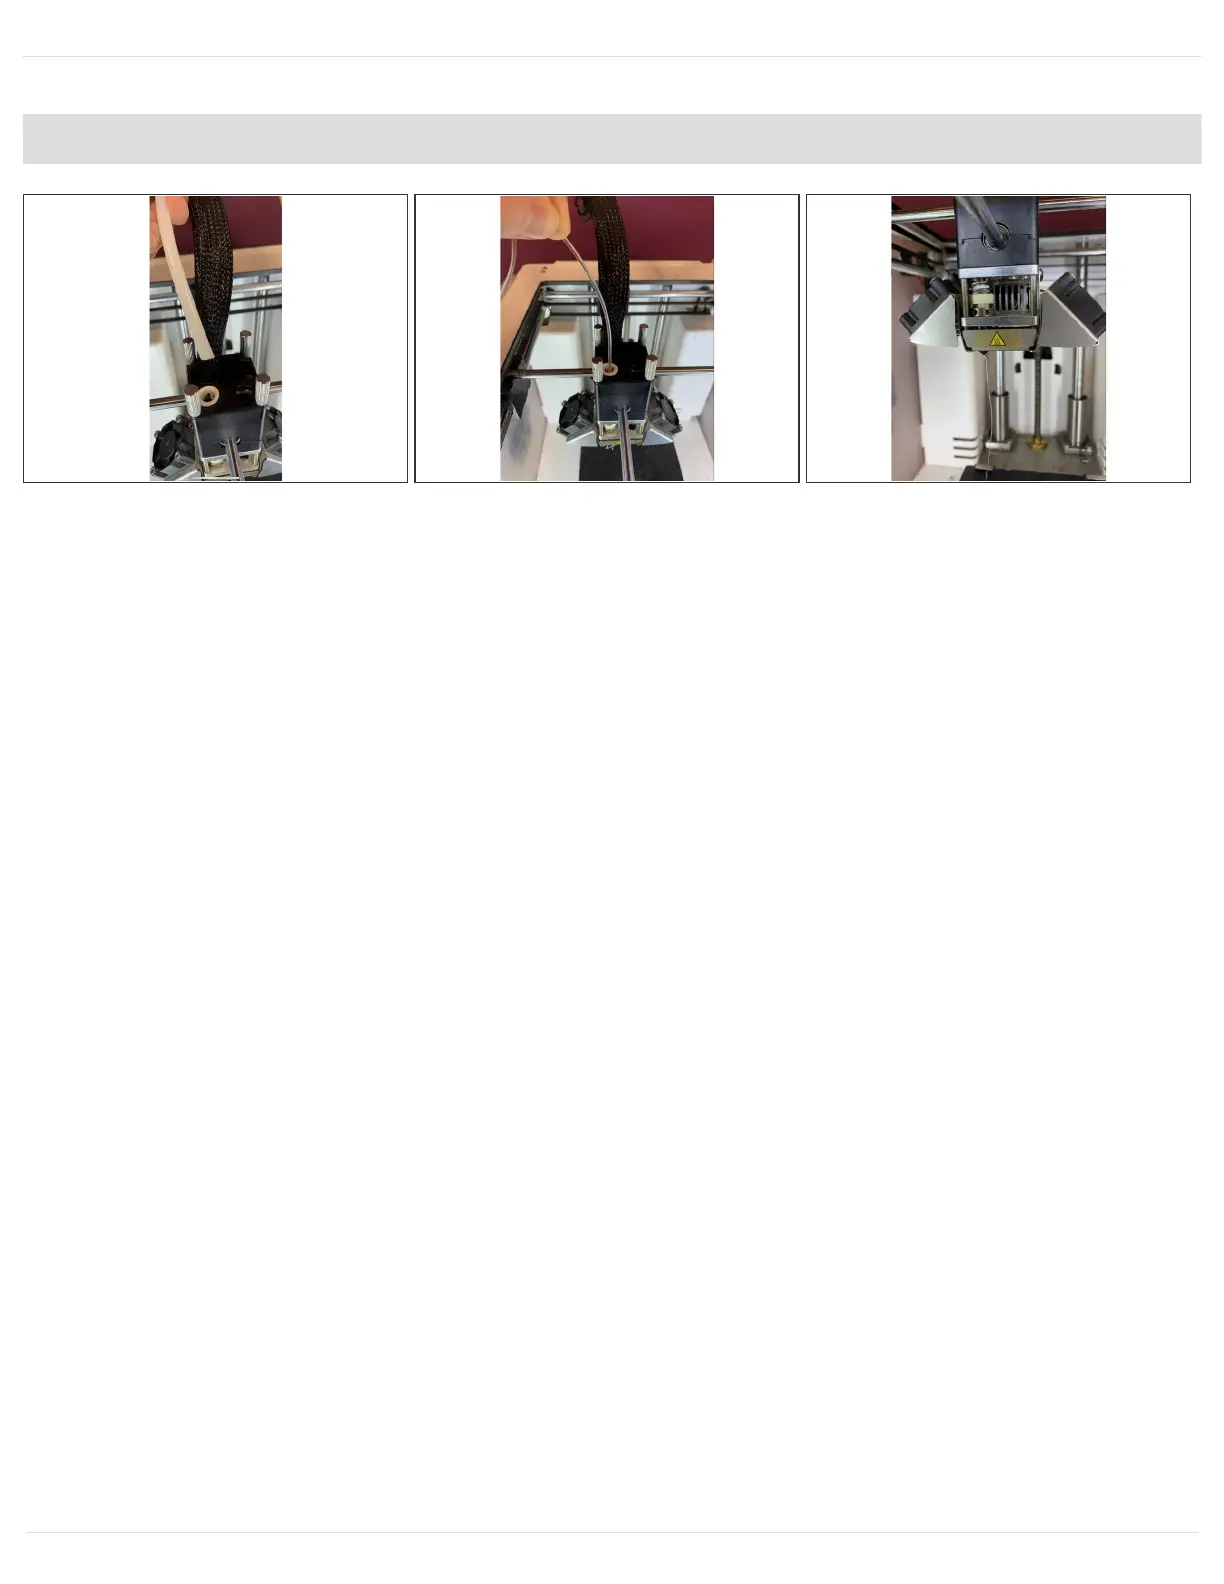
Step 7 — Remove bowden tube and pre-load clear filament
Remove the bowden tube from the print head by removing the lock clip.
Find 20-30cm of clear or white PLA. Manually load into the print core from the top of the print head
until you have purged any remaining material which was in the print head. You should only see
clear filament coming from the nozzle when it has been fully purged. Pull the filament you just
inserted back out before proceeding to the next step.
Press the bowden tube back into the print head and replace the lock clip. It is critical to ensure that
the bowden tube has been inserted as deep as it can go in order to effectively restrain the Teflon
tube in the print core.
New line.
This document was generated on 2021-12-22 12:23:35 AM (MST).
© 2021 support.mosaicmfg.com/ Page 7 of 9