Step 8 — Loading filament into the Ultimaker feeder
On the Ultimaker screen return to the main menu and then select Material > Change > PLA. The
printer will attempt to unload and will ask you to remove material. Select 'Ready' and then 'PLA'.
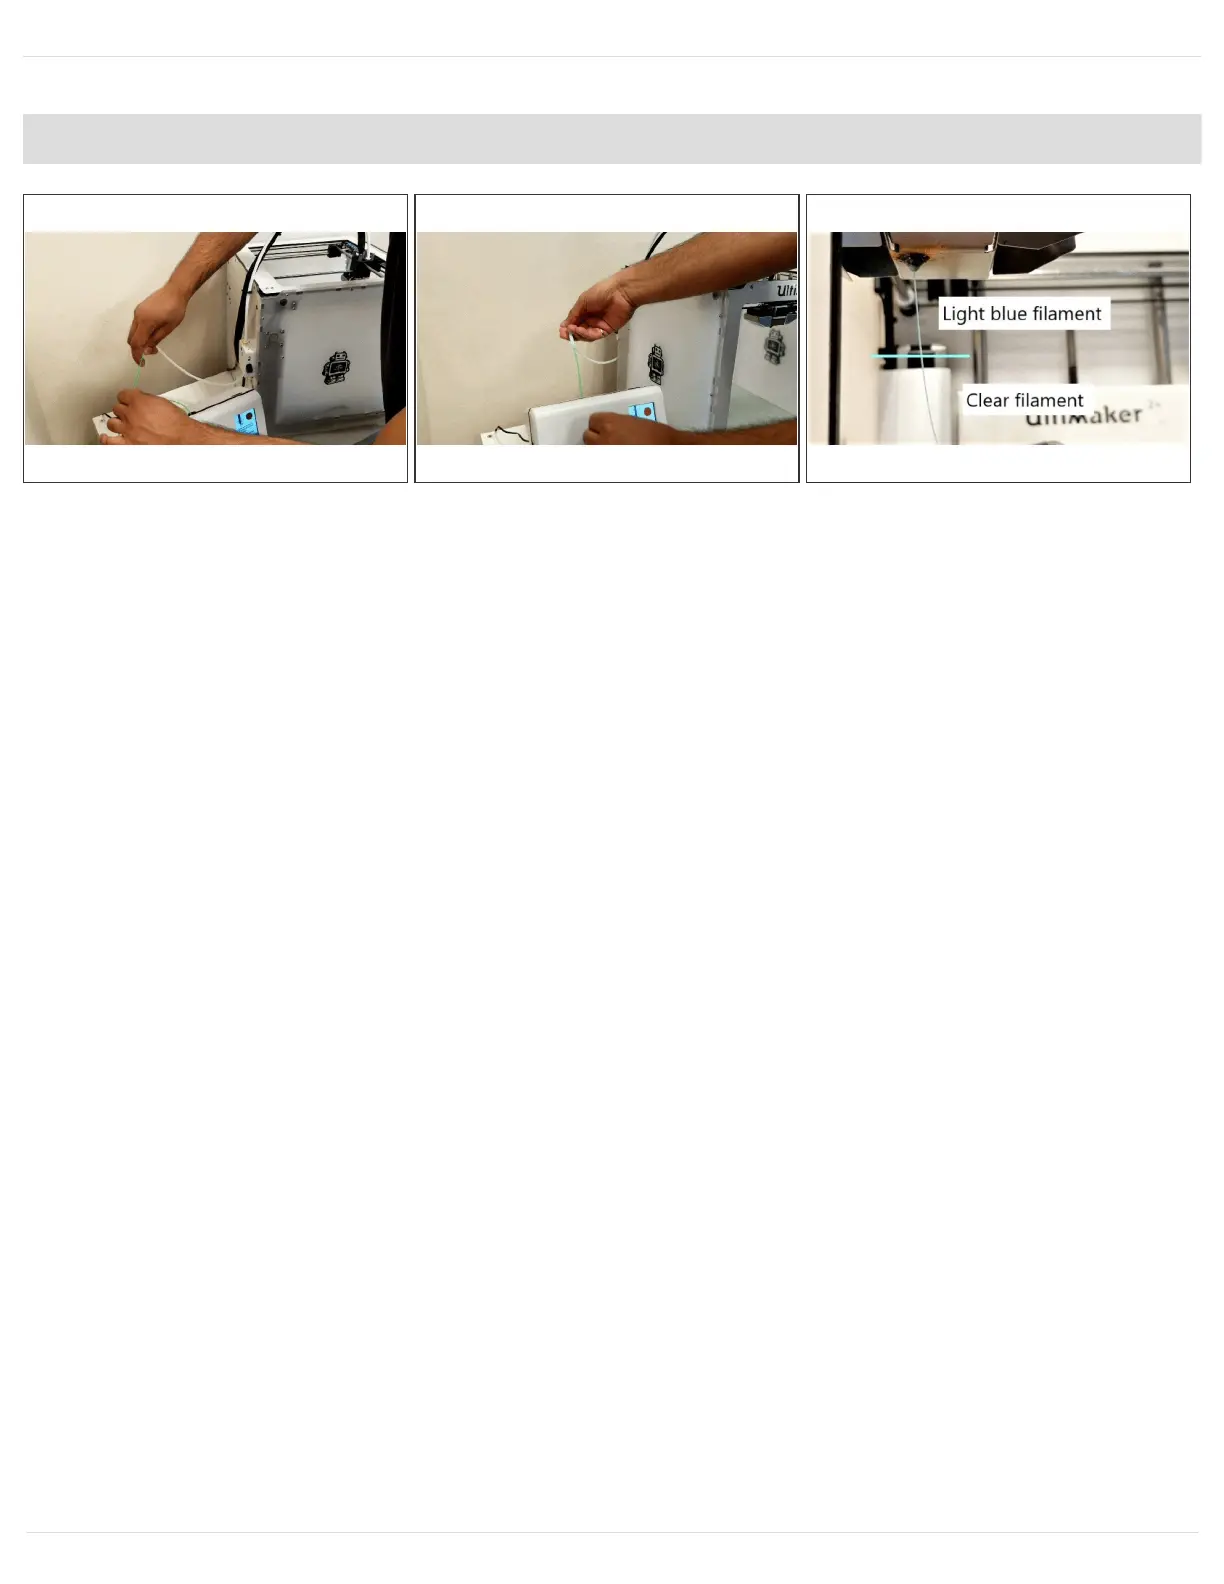
Feed the Palette filament into the Palette outgoing tube connected to the Ultimaker extruder. Push
the filament in until you feel that it's gripped by the drive gear of the printer. Simply gripping the
filament with two fingers is a quick way to check if it is being moved by the extruder and has
engaged.
Please ensure you hold the outgoing Teflon tube and that you are prepared to connect it to the
Palette 2 without having it tangle as the Ultimaker pulls filament in. Press 'Ready' on the Ultimaker
screen and it will start to load, once the printer has finished loading process, press 'Ready' again
immediately to stop loading.
At this point the filament will have been moved to the entry of your Ultimaker hotend. In the next
steps we will manually move filament to the tip of your nozzle. On the Ultimaker screen select
Maintenance > Advanced > Move Material.
Continue rotating the dial slowly until you see the new color form the filament you are loading
appear. For example, if the filament you are loading is blue and you had purged the nozzle
previously with clear filament then stop loading as soon as you see a slight amount of blue filament
come through the nozzle.
Press 'Next' and then 'Save' on the Palette screen to lock in this loading offset value.