pg. 26 UNINET DTF 1000
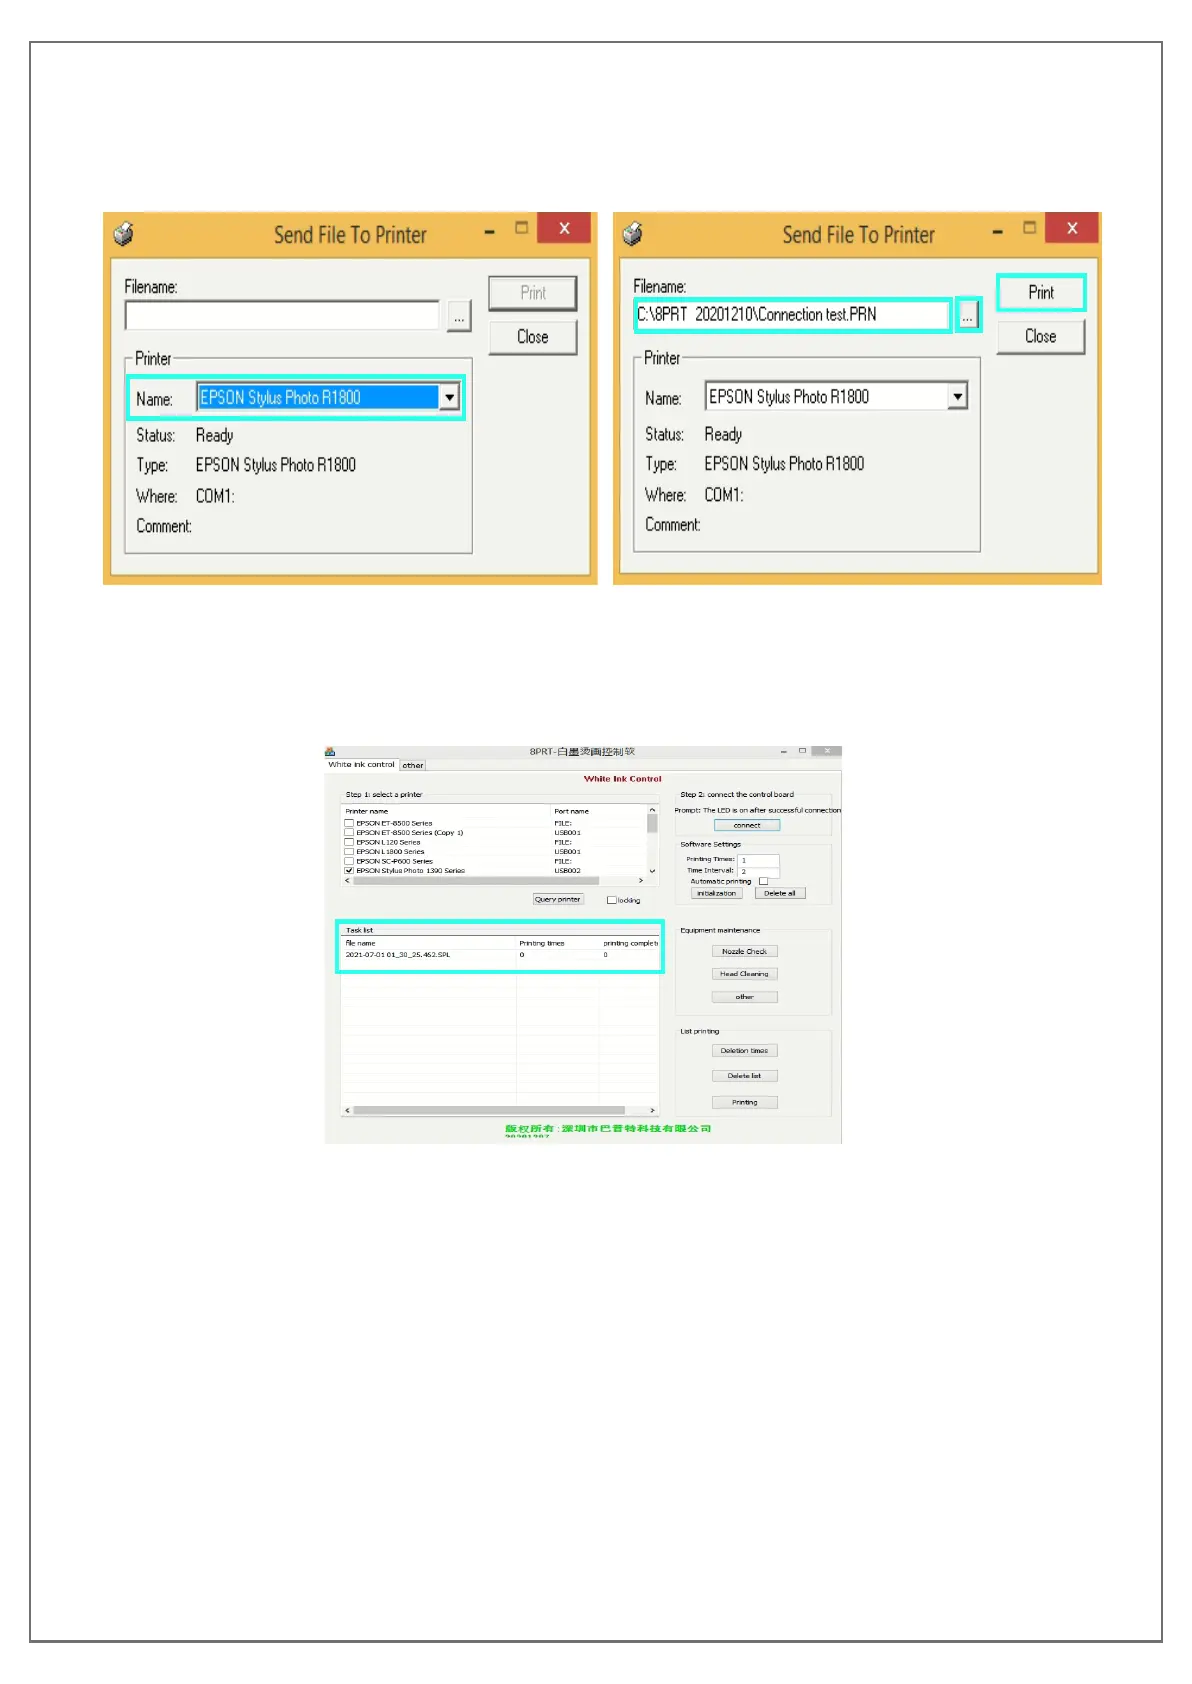
14. With the printer name selected, click on the ellipsis button next to the “Filename” box.
Select the file named “Connection Test. PRN” with the piece of paper for an icon. Once
selected click “Open”. Confirm that the filename looks like the example below, if so then
click on “Print”.
15. After clicking print, an error will appear. This is completely normal, the first print will always
result in an error.
16. Click “Print” again, the second print will also result in an error but this time you will see
that a job has been added to the “Task List” in the 8PRT program.
Jobs can now be sent to the Task List in 8PRT from AcroRIP.
IMPORTANT
When printing from 8PRT you must change the Feeding setting on the Printer tab in AcroRIP
from Roll Feed to Sheet. The port also needs to be changed from Epson Photo Stylus 1390 to the
Epson R1800.
Once a job is sent to 8PRT simply double click the “Printing Times” box and enter how many times
you would like that job to print. After entering the quantity, click the “Printing” button on the
bottom right-hand corner. You will see that the “Printing” button changes to “Stop It”. This does not
stop the current print but will stop any prints afterwards.