pg. 25 UNINET DTF 1000
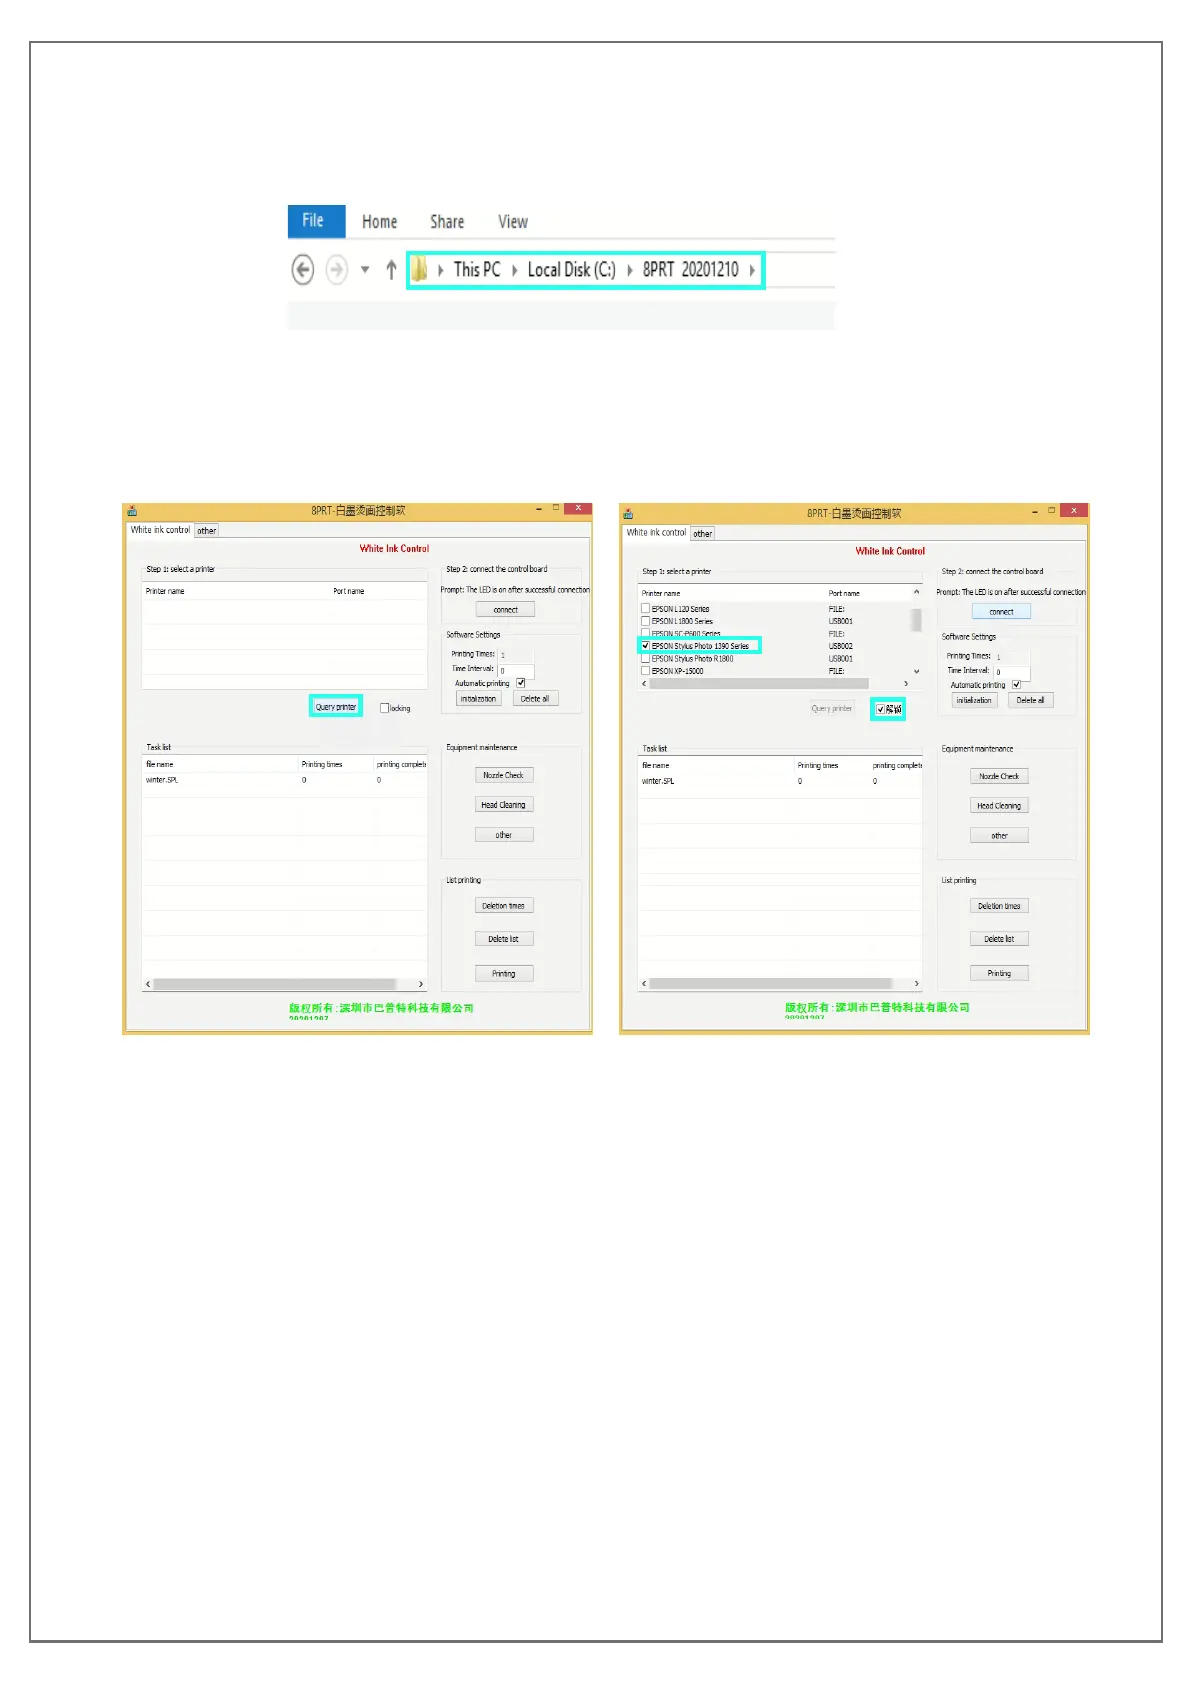
8. Move the 8PRT folder from the download section directly to the root of the C Drive. You do
not want a copy to remain in your download folder. The path should look like the example
below once the 8PRT folder is moved.
9. Go into the 8PRT 20201210 folder and right click on “8prtEn” and select “Run as
administrator”.
10. Once the program opens, select “Query Printer”. A list of printer names will appear, select
“Epson 1390” then click the “Locking” box.
11. With the correct printer selected and the locking box checked off, click “Connect” to sync
the software with your printer. The green light on the right-hand side of your printer
should light up after a few moments indicating the syncing was successful.
IMPORTANT
Every time the program is freshly started up, you must click “Connect” regardless of whether the
printer’s green button is lit up or not. If the program is simply minimized instead of closed when
you are done using it then you do not have to click it.
12. Going back to the 8PRT 20201210 folder that was placed in the C Drive, there is a file within
named “Connection Test” with a small printer for an icon, click on it to run it.
13. A window will open up, click on the name dropdown box and select “Epson Stylus Photo
R1800”.
`