36 Installation and maintenance instructions 0020308121_04
9.8 Flushing the heating installation for the first
time ("cold")
Note
The complete heating system must be flushed
at least twice: Once with cold water and once
with hot water in accordance with the following
instructions.
1. Check whether all thermostatic radiator valves and
both service valves on the product are open.
2. Connect a hose to the drain valve that is located at the
lowest position in the heating system.
3. Open the radiator valves and the drain valves so that
the water can drain quickly. Start at the next point in
the installation and open the purging valves on the ra-
diators so that the contaminated water can completely
drain.
4. Close the draining cocks.
5. Refill the heating system with water.
6. Check that the expansion relief valve of the heating
system is functioning correctly by turning the handle on
the valve.
7. Check the pressure in the heating system and top up
with water if necessary.
8. Close the filling valve and the cold water tap.
9.9 Filling the heating installation
1. Start check programme P.008. (→ Section 8.4)
◁ The prioritising diverter valve moves to the mid-
position, the pumps do not run and the product
does not switch to heating mode.
2. Observe the information on treating heating water.
(→ Section 9.3)
3. Open all radiator valves (thermostatic valves) of the
heating installation.
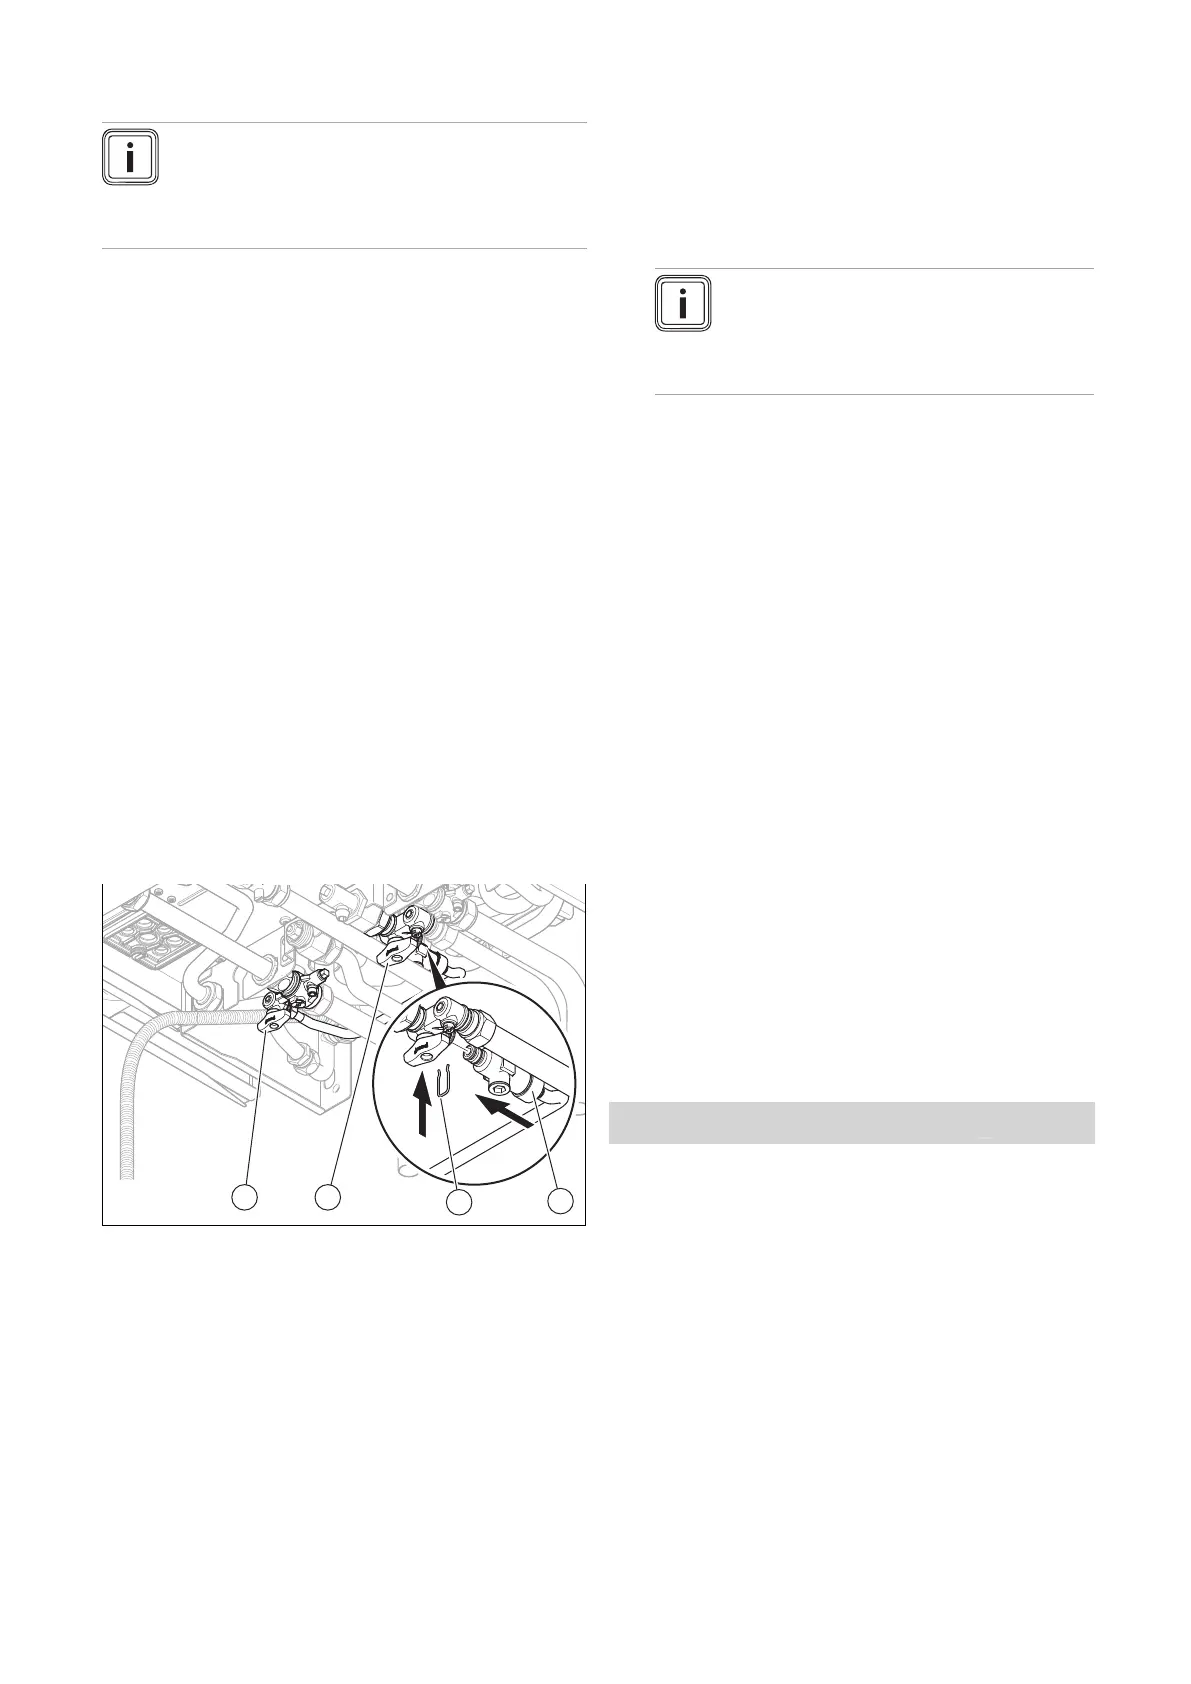
4. Fit the double non-return valve (1) of the filling line to
the cold-water isolation valve and secure the valve with
the spring clip (2).
5. To fill, first open the isolation valve (3).
6. Open the isolation valve (4) so that the water flows into
the heating system. Fill the heating system.
7. Purge the lowest radiator until water flows out of the
purging valve without bubbles.
8. Purge all other radiators until the entire heating system
has been filled with water.
9. Close all purging valves.
10. Monitor the rising filling pressure in the heating installa-
tion.
11. Fill with water until the required filling pressure is
reached.
12. After filling, close isolation valve (4) first and then isola-
tion valve (3). Disconnect the filling device by removing
the double non-return valve from the cold-water isola-
tion valve.
Note
Both isolation valves must be closed while
the heating system is operating and the
filling line must be removed from the double
non-return valve again.
9.10 Purging the heating installation
1. When you top up the heating water, start check pro-
gramme P.000. (→ Section 8.4) If fault code F.022 was
present for longer than 30 seconds, it is sufficient to
start the purge programme in order to reset the fault
code. It is not necessary to press the reset button.
◁ The product does not start up, the internal pump
operates intermittently and automatically purges the
heating circuit or the domestic hot water circuit.
◁ The display shows the filling pressure of the heat-
ing installation.
2. Ensure that the filling pressure of the heating installa-
tion does not fall below the minimum operating filling
pressure.
– ≥ 0.08 MPa (≥ 0.80 bar)
3. Check whether the filling pressure of the heating in-
stallation is at least 0.02 MPa (0.2 bar) above the dia-
phragm expansion vessel's counter-pressure (P
system
≥
P
diaphragm expansion vessel
+ 0.02 MPa (0.2 bar)).
Result:
Filling pressure of the heating installation is too low
▶ Fill the heating installation. (→ Section 9.9)
4. If there is still too much air in the heating installation at
the end of check programme P.000, restart the check
programme.
9.11 Filling and purging the domestic hot water
system
Validity: Product with integrated hot water generation OR Product with in-
tegrated hot water generation and shift-load cylinder
1. Open the cold-water isolation valve on the product.
2. Fill the domestic hot water system by opening all the
domestic hot water draw-off valves until water escapes.
 Loading...


