13Installation instructions for the electronicVED plus electric instantaneous water heater 0020149585_00
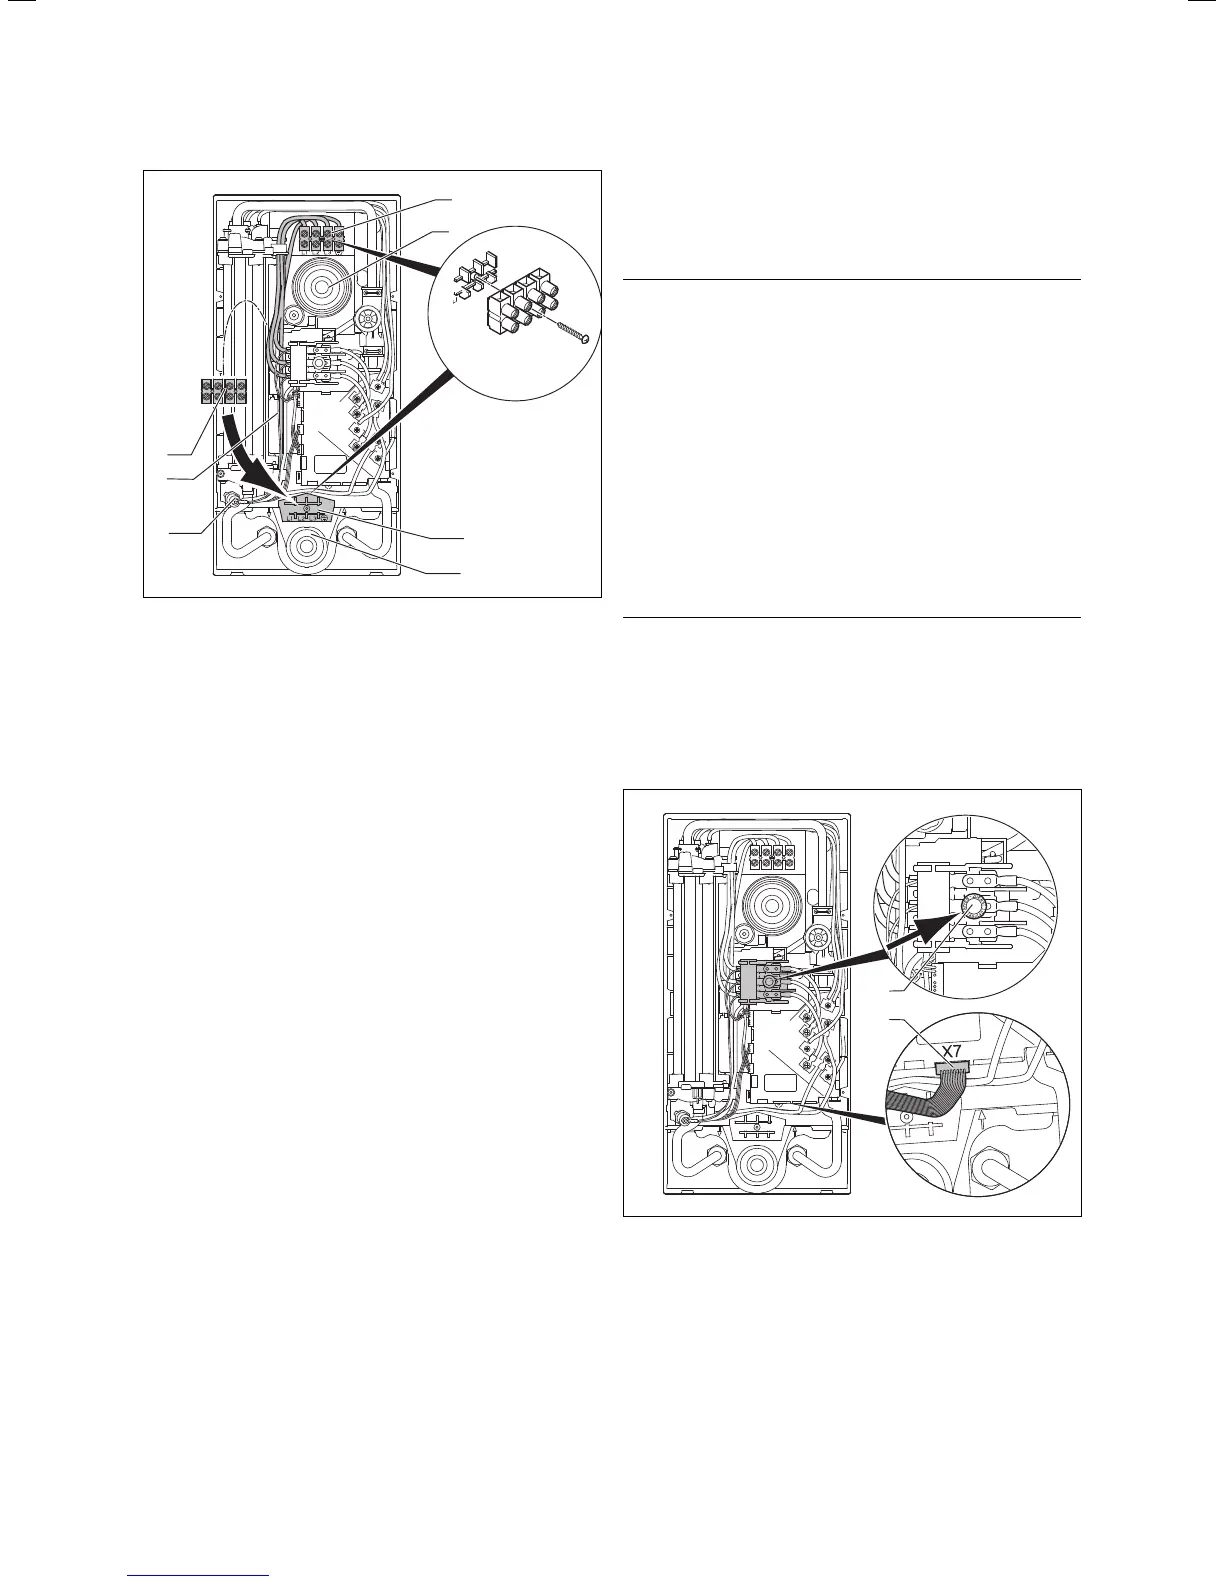
3
3a
1
2
4
5
6
Fig. 4.12 Electrical connection from above or below
4.6.2 Electrical connection from below
The electricity line is fed through the lower anti-spray-
water sleeve (5). Figure 4.7 explains how the anti-spray-
water sleeve must be prepared.
> Unscrew the mains connection terminal (1) (see
fig. 4.12).
> Move the mains connection terminal (6), including the
internal cable, to the lower position (4) in the unit.
> Screw the mains connection terminal to the lower
position (4).
> Pay particular attention to the internal protective
earth (3) that is screwed to position 3a.
> Check again that the mains connection terminal
cables are correctly positioned.
> Connect the individual conductors to L1, L2 and L3,
and the protective earth to the mains connection ter-
minal (1 in fig. 4.12).
4.6.3 Optional load-shedding relay
If required, a load-shedding relay that conforms with
current standards can be connected to the electron-
icVED plus. This relay will turn other power consumers
off while hot water is being drawn off so that there is no
overloading. The load-shedding relay must fulfil the fol-
lowing criteria:
– Input current < 15 A
– Continuous current > 50 A
> Install the optional load-shedding relay to the outer
conductor that is connected to the L2 mains connec-
tion terminal of the electronicVED plus.
5 Starting up/decommissioning
5.1 Purging the unit
b
Caution.
Risk of damage from heating wire dry fire.
The unit must be purged every time it is
started up. Otherwise, there is a risk of dry
fire and, as a consequence, damage to the
unit.
> Ensure that the unit is de-energised every
time the unit is started up or decommis-
sioned.
> Check that there is no voltage in the supply
lines and connections.
> Ensure that the power cannot be restored
inadvertently to any of the supply lines and
connections while you are working on the
unit.
To start up the unit, proceed as follows:
> De-energise the unit.
> Open the cold water stop valve.
> Close and open the hot water draw-off valve several
times. The unit will then be purged. In normal operat-
ing mode, the unit will not need to be purged again.
2
1
Fig. 5.1 Safety switch
> Push the safety switch (1) in, as shown in fig. 5.1.
i
If the display cable is not plugged into the
electronics, the power cannot be regulated.
The water temperature that the unit then
provides will comply with the last value set.
Installation 4
Starting up/decommissioning 5