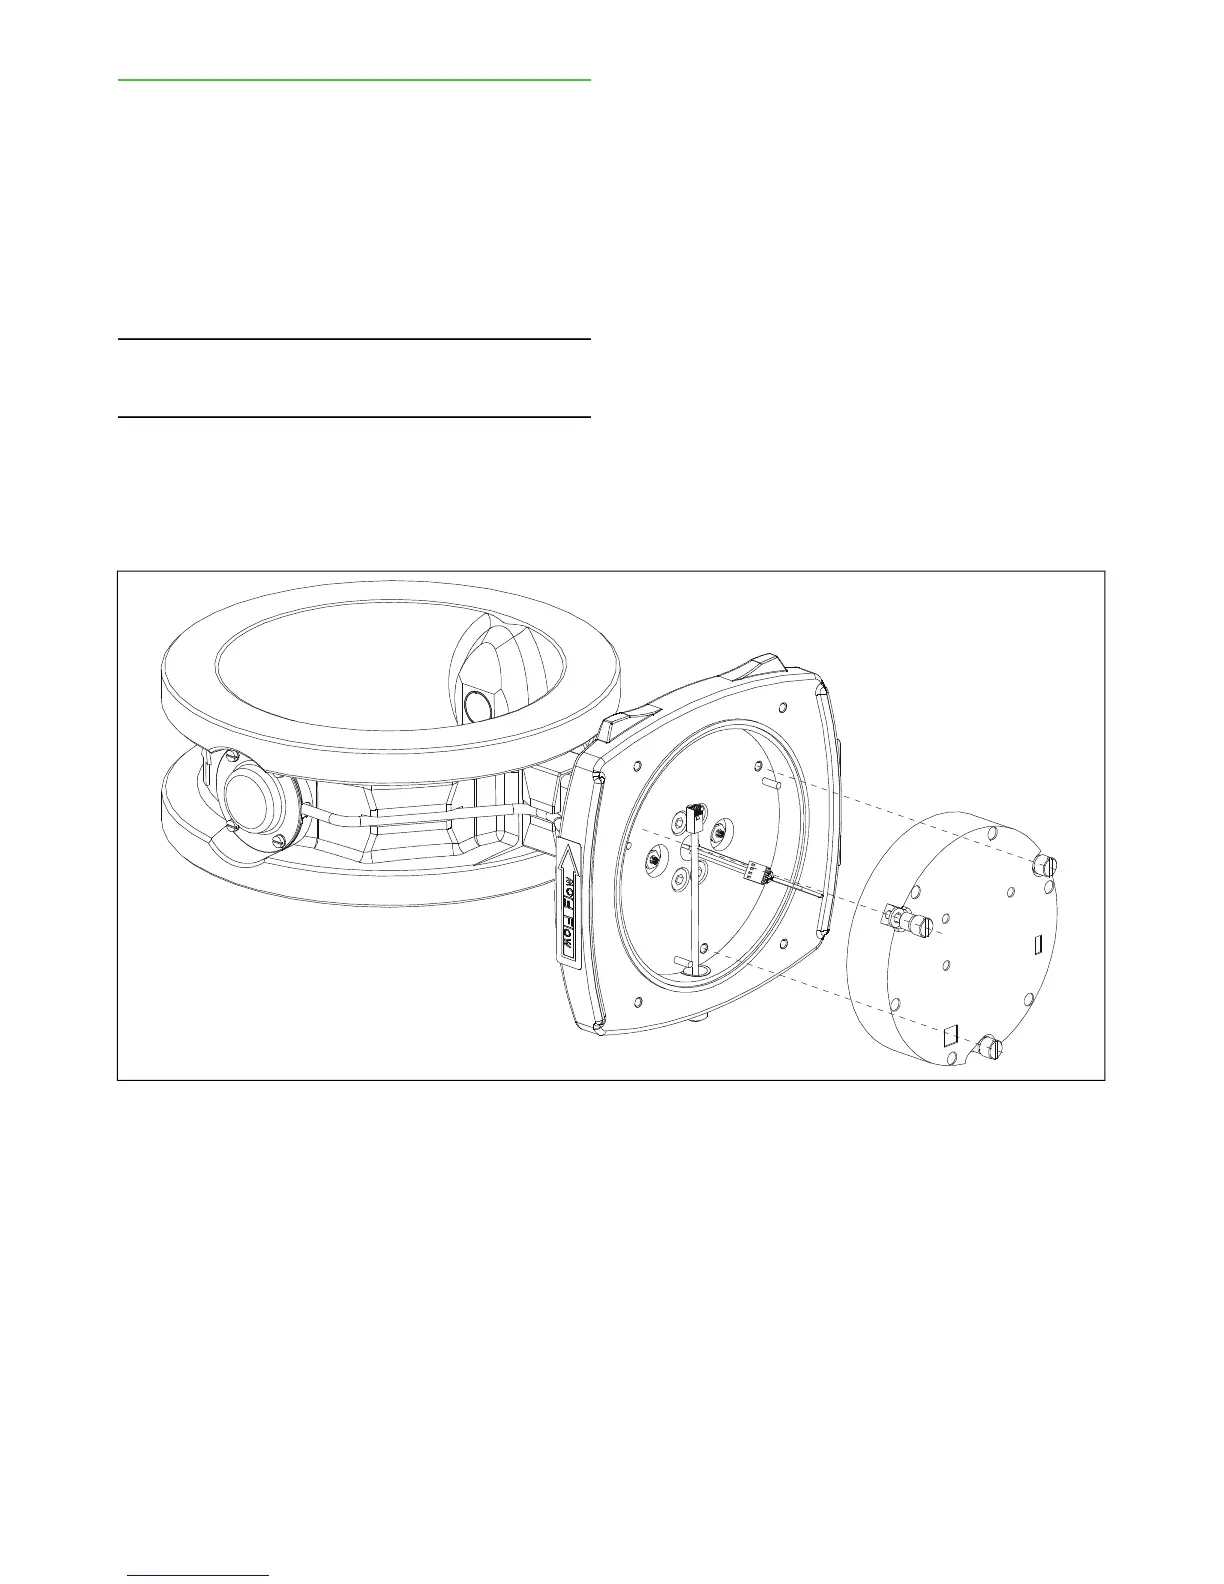
11.2. Sensor electronics
Removing (Fig. 2)
1. Unplug the sensor cable from the sensor base
plate to disconnect operating power.
2. Remove the electronics cover.
3. Disconnect the cable connector and temperature
sensor connector from the electronics, and bend
them to the side.
4. Remove the three mounting screws and lift the
sensor electronics out of the housing by pulling
evenly from the mounting screws.
NOTE: The sensor electronics is aligned in position by
three guide pins that keep it in place even when the
mounting screws are removed.
Installing
1. Align the groove on one side of the electronics with
the connector in the base plate. Move the electron-
ics and at the same time press it gently until the
guide pins on the base plate align with the holes
on the electronics. Press the electronics evenly
onto the base plate.
2. Fasten the three mounting screws of the sensor
electronics.
3. Connect the sensor cable and temperature sensor
cable connectors to the electronics.
4. Replace the sensor cover.
5. Plug the sensor cable to its connector on the base
plate.
6. After the power is connected, the Valmet TS may
ask you to choose calibration. Select:
- TCU, if you have not replaced the TCU;
- default calibration, if you have also installed a
new TCU.
Fig. 2. Removing the sensor electronics.
Installation & Owner's manual, OUL00489 V2.3 EN
38
Valmet Total Solids Transmitter