11.4. Antennas, FT-sensor
NOTE: Before starting the work, make sure that the pro-
cess pipeline must be empty and unpressurized, so that
the work can proceed safely!
Removing
1. Remove the sensor electronics as instructed in
section 11.1 above.
2. Remove the antenna cable as instructed in section
11.2 above.
3. Remove the mounting screws of the antenna using
a 5mm Allen key:
– FT50/FT80/FT100: four screws M6x20 + sealing
washers.
– Other sensor models: six screws M6x16 + lock
washers.
4. Pull out the antenna from the hole and remove the
O-ring.
5. Detach the antenna from the flange by opening
two M4x12 screws.
Installing
1. Fasten the antenna to the flange with two M4x12
screws and washers.
2. Clean the sealing surfaces of the antenna installa-
tion hole, for example with isopropanol.
3. Install a new O-ring against the shoulder on the
installation hole.
4. Apply some Loctite 270 locking medium on the six
mounting threads of the flange.
5. Make sure that the O-ring of the antenna flange is
in position, and install the antenna to the antenna
coupling.
6. Using a 5mm Allen key, tighten the mounting
screws of the antenna to a torque of 8 Nm:
– FT50/FT80/FT100: four M6x20 screws + sealing
washers.
– Other sensor models: six M6x16 screws + lock
washers.
7. Install the antenna cable and sensor electronics
in reverse order.
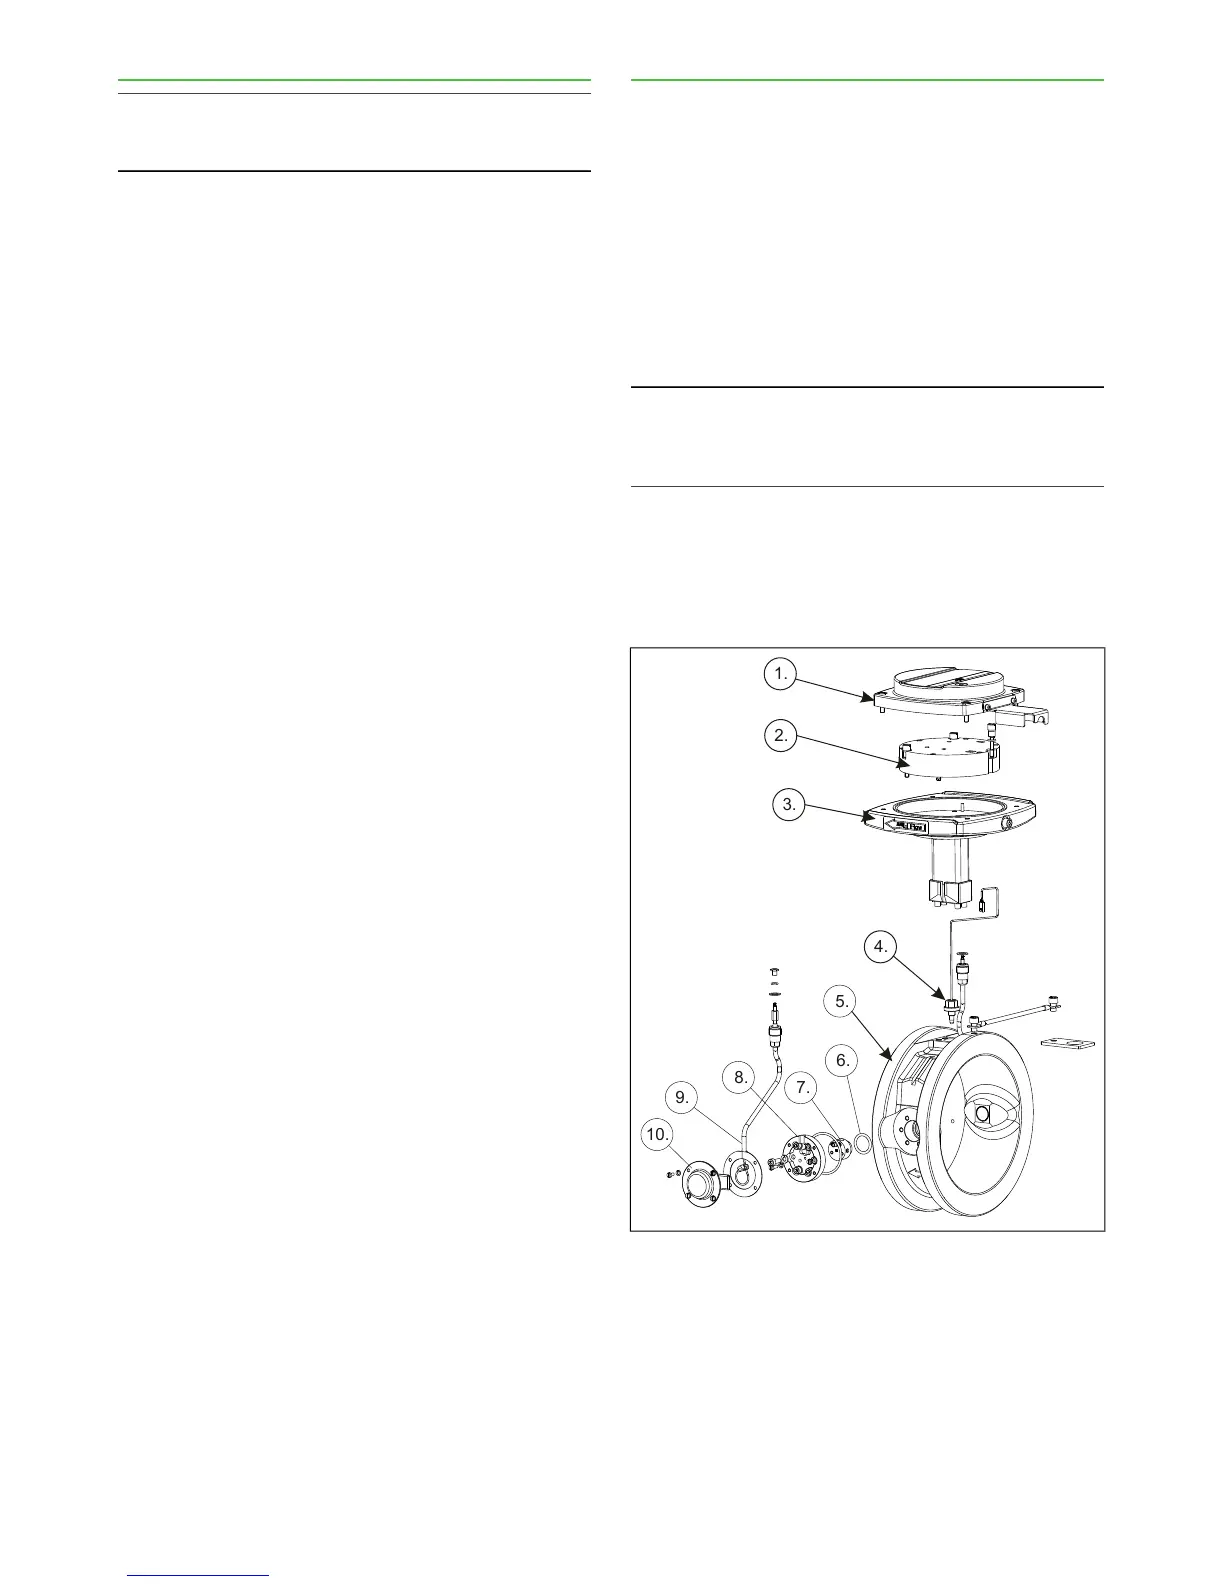
Parts in Fig. 5:
1. Sensor cover.
2. Sensor electronics.
3. Base plate assembly.
4. Thermoelement (temperature sensor).
5. Sensor body.
6. Antenna seal.
7. Microwave antenna.
8. Antenna flange.
9. Antenna cable.
10. Antenna cover.
11.5. TCU
Removing
1. Switch off operating power to the TCU, and discon-
nect the power wires from TCU terminal strip.
2. Disconnect the sensor cable and system cable
from TCU terminal strip.
3. Release the TCU from its shield.
Installing
1. Fasten a new TCU to the shield.
2. Connect the sensor cable, system cable and power
cable to the new TCU terminal strip.
3. Switch power on.
NOTE: It may take a couple of minutes before any char-
acters appear on the TCU display. This is perfectly nor-
mal: the internal back-up battery must recharge first be-
fore the display begins to operate.
4. If the device asks you to choose calibration, select:
– Sensor electronics calibration, if you have not re-
placed the sensor electronics,
– Default calibration, if you have also replaced the
sensor electronics.