102
User Manual
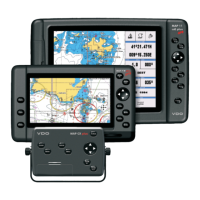
♦ Video Input option
♦ Video Output option
♦ Shows the most important engine data. It is connected to the engine
electronic system of up to two machines through two CAN bus inputs
and receives engine data. The display unit also has two bus outputs to
transfer data to VDO Easy Link Indicators. A maximum of 20 Easy Link
indicators can be connected per output.
TECHNICAL SPECIFICATIONS
♦ Power consumption : 1.3A max @ 12V
♦ Power consumption : 1.5A max @ 12V (with camera connected)
♦ Interface : NMEA-0183
♦ Autopilot Interface : NMEA-0180, NMEA-0180/CDX, NMEA-0183
♦ Engine Interface : CAN 2.0B Input for 2 Engines support-
ing SAE J1939
♦ Gauge Interface : 2 x Easy Link Output for analogue En-
gine Slave Instruments
♦ Display : TFT transmissive LCD (active area 10.4")
♦ Display Resolution : 800 x 600 pixels
♦ Video Input : PAL or NTSC video signals automatically
selected
♦ Video Output : VGA compatible (optional adapter cable)
♦ Cartography : C-MAP BY JEPPESEN C-CARD
♦ Operating temperature range: 0/+55°C (32/+131°F)
♦ Memory : Non volatile
♦ Keyboard : Silicon rubber, backlight
♦ Weight : 1,6 Kg
When the package containing the chart plotter is first opened, please check it for
the following contents (if any parts are missing contact the dealer the chart plot-
ter was purchased from):
♦ External bracket and I/O cable 1,5 mt/5,9 feet
♦ Video Input cable (2 pcs)
♦ Video Output cable
♦ Engine cable 1,5 mt/5,9 feet
♦ Chart plotter's protective cover
♦ Fuse 2 Amp. + fuseholder
♦ Flush mounting kit
♦ Smart DGPS WAAS Receiver with cable 15 mt/45 feet
♦ User Manual
INSERTING/REMOVING PROCEDURE
Inserting the C-CARD
Hold the C-CARD by the short inclined side so that you can see the C-MAP BY
JEPPESEN label. Open the door (see left side of the following picture), gently push
the C-CARD into one of the two slots; push the C-CARD in as far as it will go, then
close the door to hold fixed into the slot.