SERVICE
Service - 63
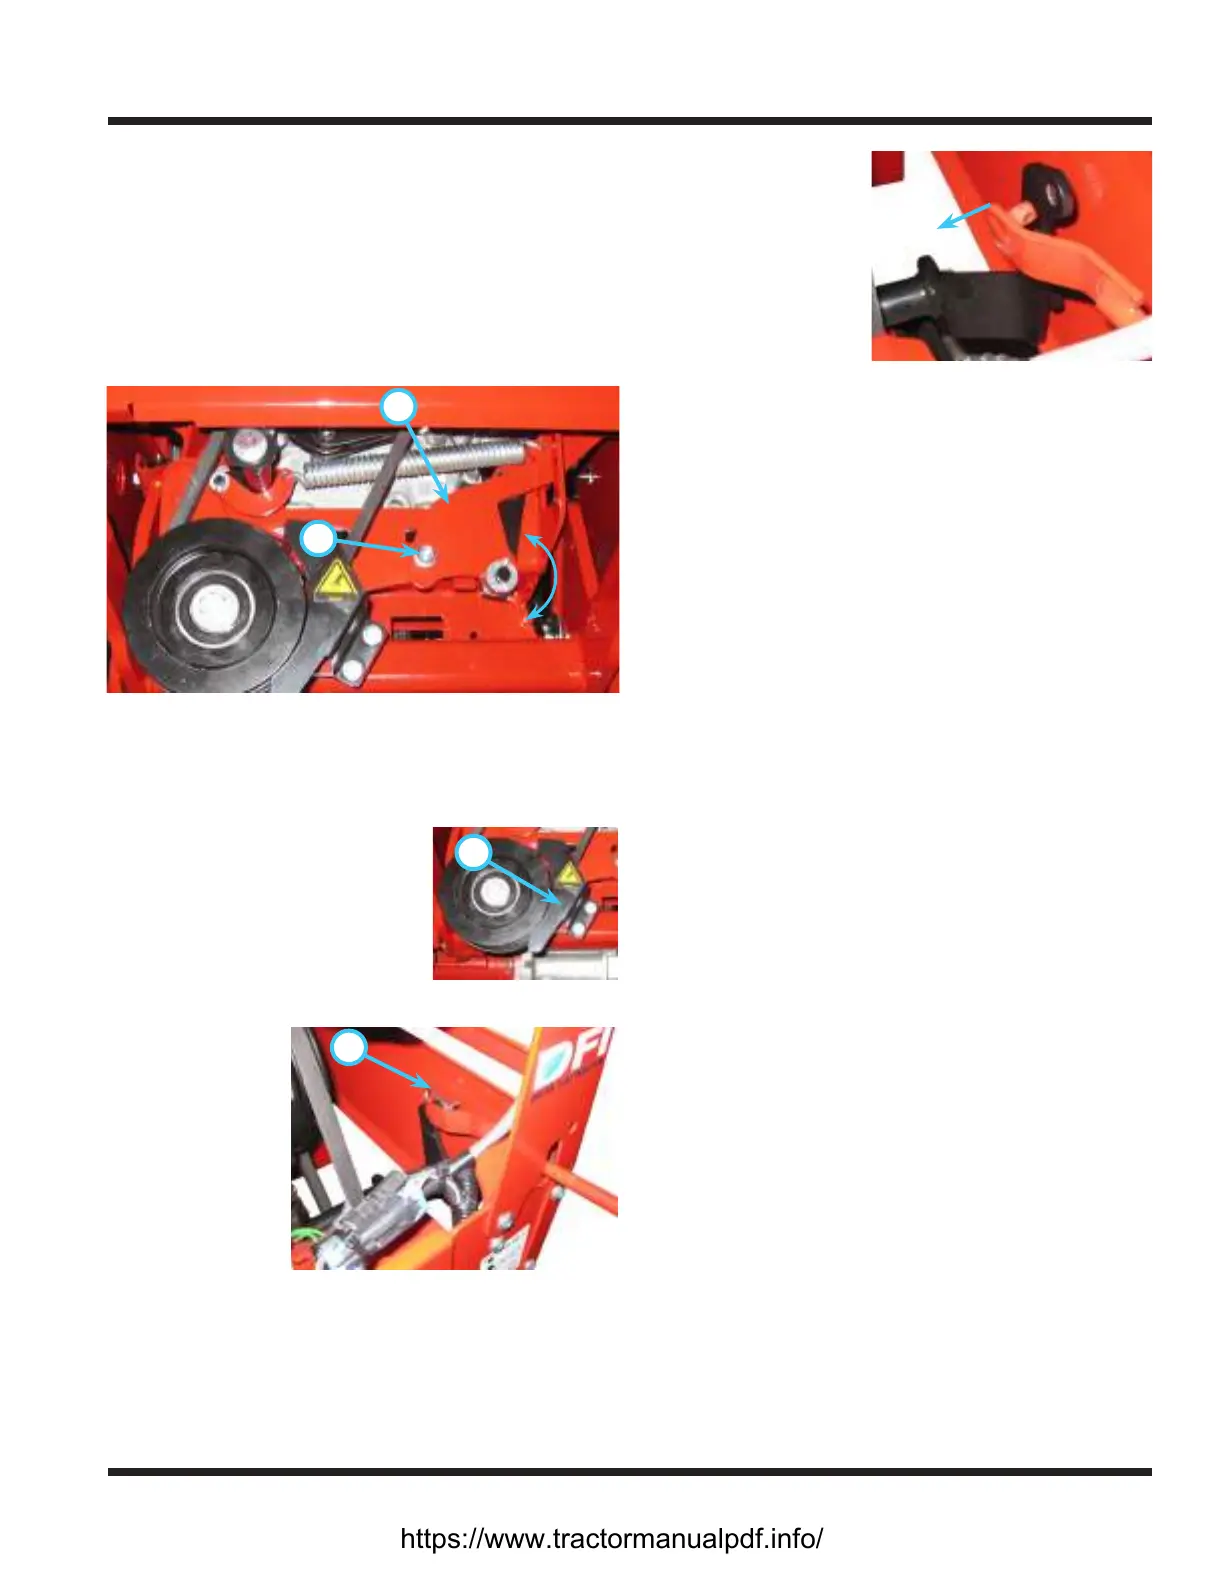
PTO Belt Tension Adjustment
1. Pull out on the PTO belt tensioner rod to release
tension from the belt tensioner linkage.
2. Loosen the adjustment bolt (A) and rotate the ten-
sion adjustment link (B) clockwise to increase the
tension applied to the PTO and attachment belts.
Rotate the tension adjustment link counterclock-
wise to decrease the tension applied to the PTO
and attachment belts.
3.
A
B
Tighten the adjustment bolt securely. Torque to 42
Nm (31 ft-lbs).
PTO Belt Replacement
1. If the power unit has been running, allow the
engine to cool.
A
2. Remove the right engine
cover.
3. Remove the PTO idler pulley
guard (A).
4. Pull the PTO belt tensioner
rod out to release the belt
tension.
B
5. Remove the
hairpin (B) and
washer that
fastens the
belt tensioner
rod to the belt
tension rocker.
6. Remove the
belt tensioner rod
from the belt
tension rocker.
7. Lift up on the PTO
idler pulley and re-
move the belt from
the pulley.
8. Pull the belt up
between the PTO tension rocker and the front grill
and remove from the clutch pulley. If necessary,
rotate the PTO tension rocker to increase the gap
between the rocker and the grill.
9. Push the new belt down between the PTO tension
rocker and the front grill (it may be necessary to
turn the belt sideways).
10. Install the belt onto the clutch pulley.
11. Lift up on the PTO idler pulley and install the belt
into the rear groove of the idler pulley.
12. Reinstall the PTO belt tensioner rod to the belt
tension rocker and fasten with the washer and
hairpin.
13. Reinstall the PTO idler pulley guard. Torque the
bolts to 11 Nm (100 in-lbs).
14. Reinstall the right engine cover.
https://www.tractormanualpdf.info/