11
The Alignment Tool Outline
Install the VX-424A Programming Software to your
PC.
Execute the VX-424A Programming Software.
Click the left mouse button on the “Radio” menu, then
click the left mouse button on the “Alignment” param-
eter.
Operate the transceiver according to the computer’s
screen.
When the command has been successful, a message on
the computer screen will confirm that the transceiver
is now in the alignment mode. You may adjust the fol-
lowing parameters from the computer.
Reference Frequency
TX High Power
TX Low Power
Maximum Deviation
Modulation Balance
CTCSS Deviation
DCS Deviation
LTR Deviation
Sequential Tone Deviation
STD Deviation (MIC Gain)
Tight Noise Squelch
Threshold Noise Squelch
Tight Noise Squelch RSSI
TX Save RSSI
RX Tune
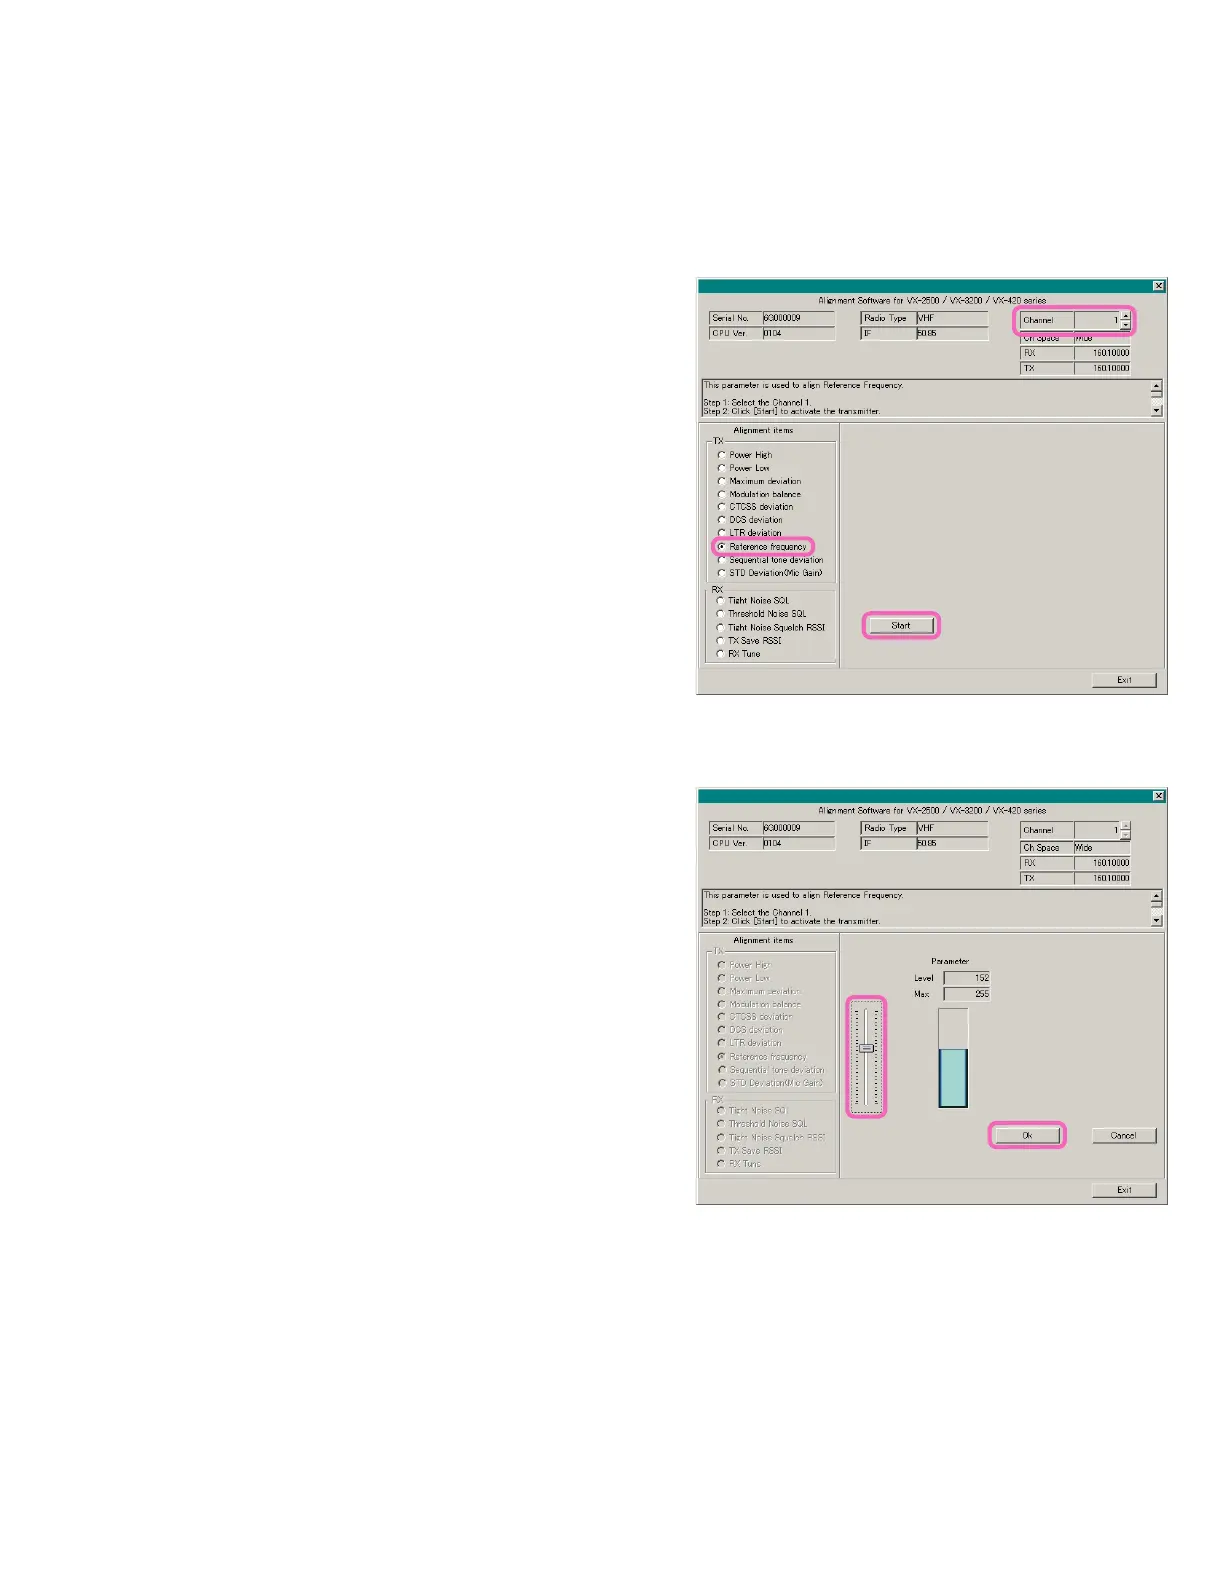
Reference Frequency
c Set the transceiver to CH 1 (band center) via the “Chan-
nel” box on the “Alignment” window previously.
d Click the left mouse button on the “Reference Fre-
quency” button.
e Click the left mouse button on the “Start” button.
Alignment
f Move the Slide Bar, as needed as, so that the frequency
counter displays 160.100 MHz ±100 Hz.
g Press the “OK” box to lock in the new data.
c
d
f
g
e
 Loading...