18
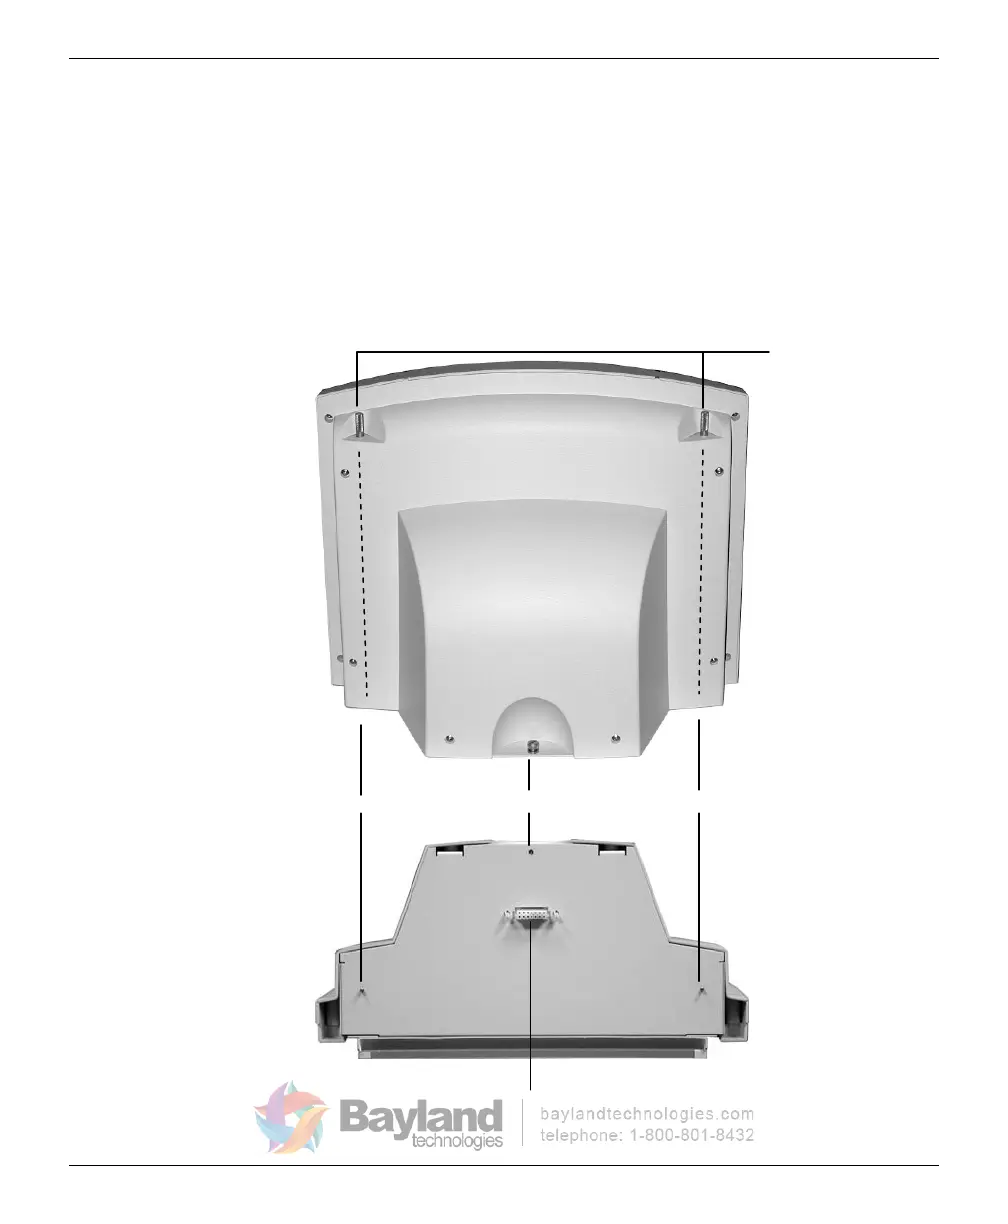
3. Attach the feeder to the digitizer:
a.
Note the three screws protruding from the bottom of the feeder
.
These
mate to holes in the digitizer
base. Two of the
screws are
very long—their tops ends are near the top of the feeder.
Also note the connector on the bottom of the feeder
. It mates to
the connector on top of the digitizer base.
Top ends of
long screws
Long screw Short screw Long screw
Connector
Feeder, rear view
Feeder, bottom view
VIDAR CADPRO Advantage Installation Guide
 Loading...