Visionary, Network Audio Video
DUETE-2/DuetD-2 USER MANUAL
INSTALLATION AND CONNECTIONS (SYSTEM
E
XAMPLES
)
INSTALLATION AND CONNECTIONS (SYSTEM EXAMPLES)
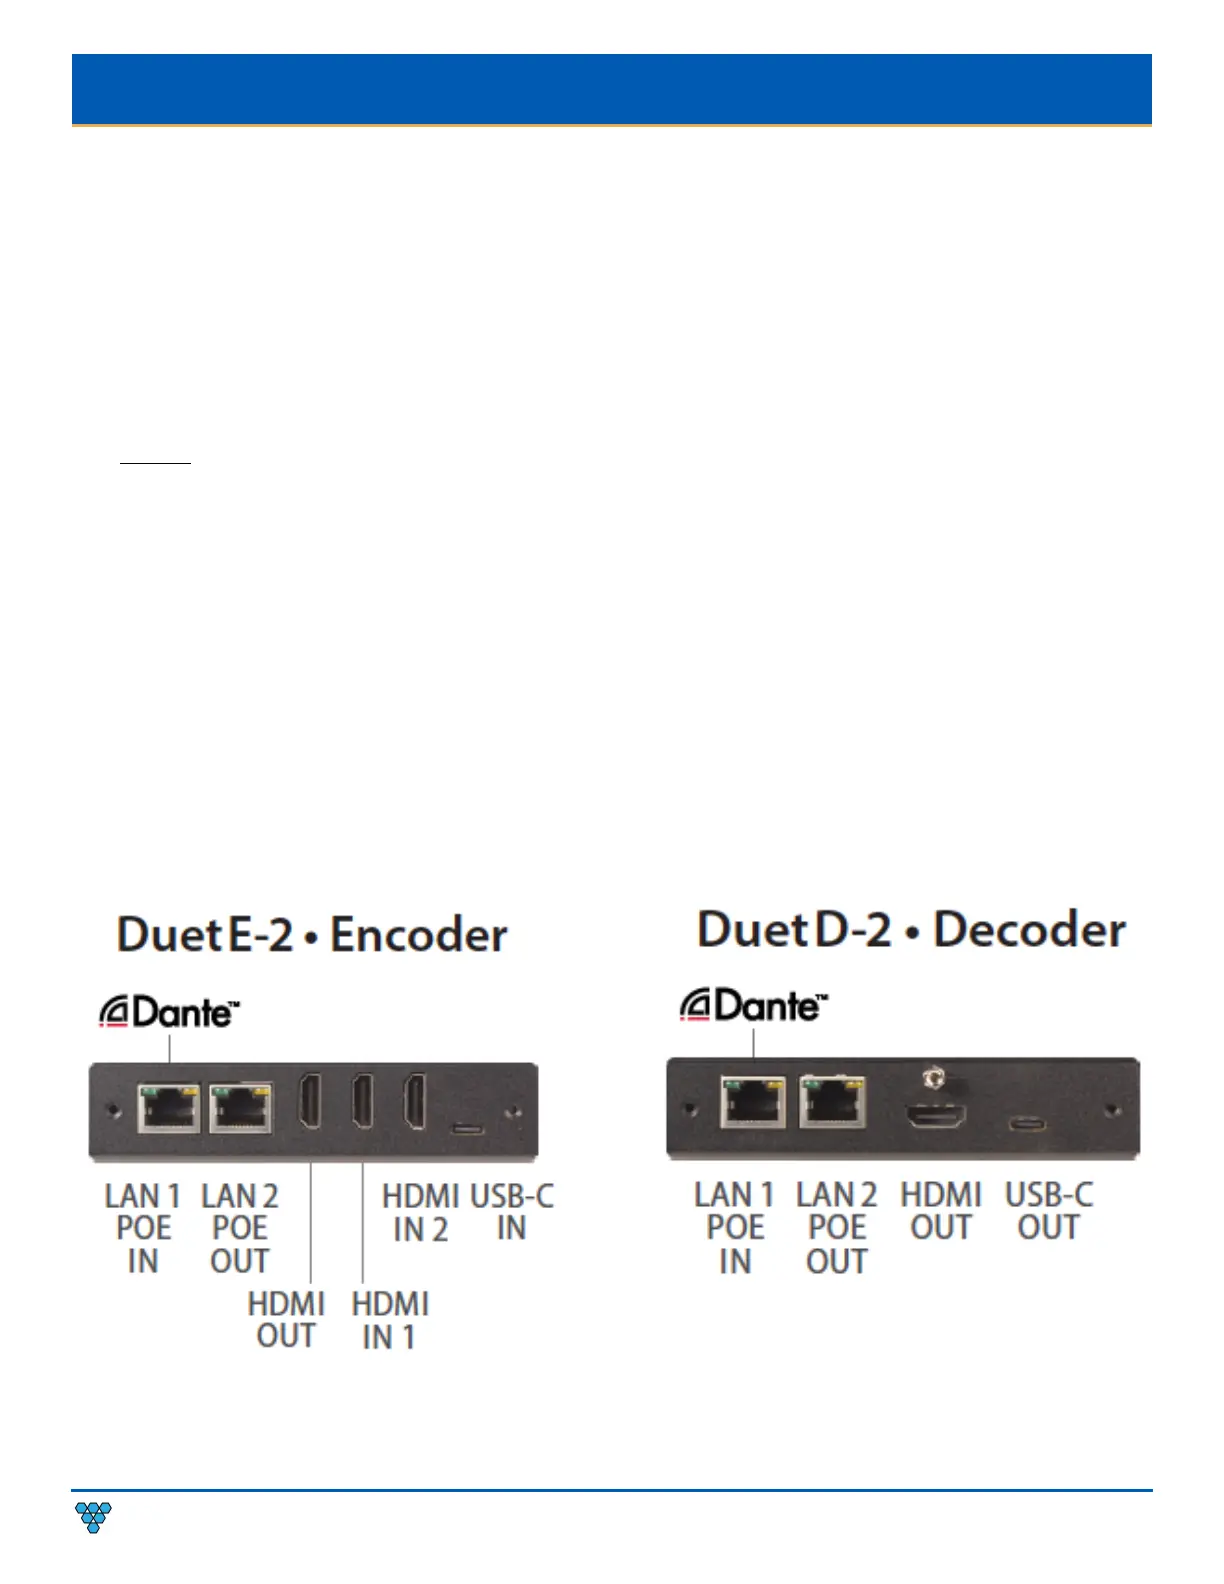
This section provides installation and connection instructions for six configuration examples. For each encoder and decoder in the
system examples below, follow these step-by-step connection instructions.
1. Use an HDMI cable to connect the AV source to the HDMI IN1 and/or HDMI IN2 port on the encoder unit.
2. (Optional) Use a USB-C cable to connect the AV source to the USB-C IN port on the encoder unit.
Note: USB-C IN may be used to connect easily and share media from your Mac, Laptop, Tablet, Mobile, and Other USB-C enabled
devices. Not all devices will be compatible; Source devices must support DisplayPort Alt Mode for USB Type-C or Thunderbolt.
3. (Optional) Use an additional HDMI cable to connect the HDMI OUT (Loop-through) port on the encoder unit to a local display.
4. Connect an HDMI cable from the display to the HDMI OUT port on the decoder unit.
5. (Optional) Connect a USB-C cable from a PC or Soft Codec to the USB-C OUT port on the decoder unit.
Note: USB-C OUT enables soft-codec integration via driverless USB 2.0 connection to a PC for web conferencing applications such as
Zoom, Skype, Cisco WebEx, and Microsoft Teams. Dynamically switch and view decoder output on your PC for recording, editing,
videoconferencing, and streaming applications. Use the PC streaming software of your choice and live broadcast your signal to any
online video platform. Bridge Dante™/AES67 audio into soft-codec via USB-C. USB Video Class (UVC) - compliant, a video capture
standard that is compatible with Mac OSX, Windows®, Linux® and Android operating systems. Output Resolutions up to 1080p.
6. Connect a CAT 5 (or better) cable from the LAN1 port on the encoder unit to a PoE port on the network switch.
7. Connect a CAT 5 (or better) cable from the LAN1 port on the decoder unit to a PoE port on the network switch.