11
DSC
(Device Special
Command)
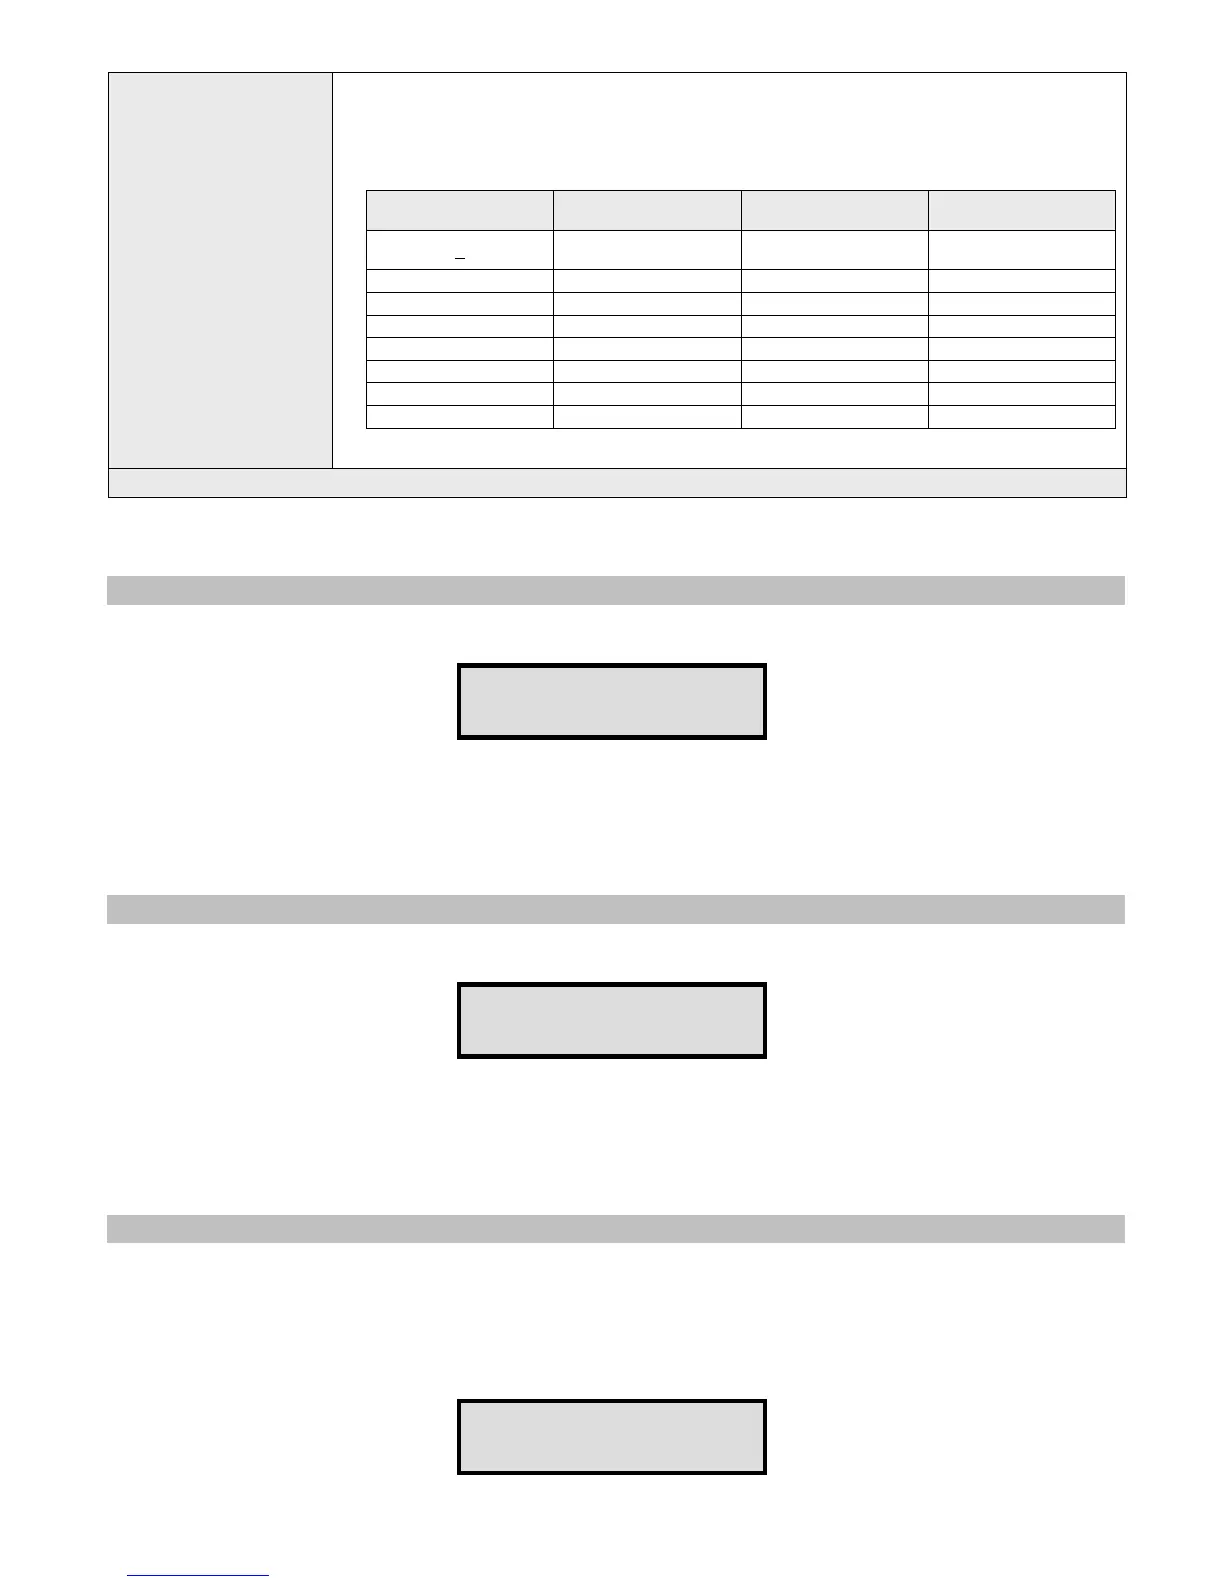
Additional device parameters:
1. For Widearea service pagers, it contains the 3-digit area code.
2. For Intercom devices, this field allows override of the Full-Duplex, Auto answer and
Incoming Alert Tone settings programmed in to the VNS22xx (applicable to VNS22xxversion
4.06 or later):
DSC Value
Full Duplex / Hand
Free
Auto Answer
Incoming Call Alert
Tone
0
Default VNS22xx
Settings
Default VNS22xx
Settings
Default VNS22xx
Settings
1 X - -
2 - X -
3 X X X
4 - - -
5 X - -
6 - X -
7 X X -
Note: Underlined values indicate default values.
After the last step is completed, the display will flash DATA SAVED and return to the Device to Edit menu.
Repeat the above steps for additional devices or press the * key twice to return to the Main Menu.
3.1.2 Time Setup Menu
From the Administration Menu, select 2 followed by the # key. The following screen will be displayed:
ENTER GMT TIME:
12:00
Enter the UTC (Universal Coordinate Time) or GMT (Greenwich Mean Time) time in 24 hours (military) format. The display
will change back to Time Setup.
DO NOT enter the local time as the unit uses the universal atomic time as a reference and calculates the local time based
on your Time Zone.
If the VS4500 is connected to a PC or receives the time from a GPS receiver, it will revert back to the source time few
minutes later overwriting the time changes made.
3.1.3 Date Setup Menu
From the Administration Menu, select 3 followed by the # key. The following screen will be displayed:
ENTER GMT DATE:
010106
Enter the UTC (Universal Coordinate Time) or GMT (Greenwich Mean Time) date in MMDDYY format. The display will change
back to Date Setup.
DO NOT enter the local date as the unit uses the universal atomic time as a reference and calculates the local time based
on your Time Zone.
If the VS4500 is connected to a PC or receives the time from a GPS receiver, it will revert back to the source time few
minutes later overwriting the time changes made.
3.1.4 View Messages Menu
Use this option to view the pre-programmed messages. Pre-programmed messages allow you to send alphanumeric
message via the keypad or optional telephone interface by entering * followed by the message number.
For example, if message 05 is programmed as “TEST”, entering *05 will send the message “TEST” to the selected device.
See Page to Menu section on page 18 for more detailed information.
From the Administration Menu, select 4 followed by the # key. The following screen will be displayed:
PPGM MESSAGE: 01