Instruction Response/Reaction OK
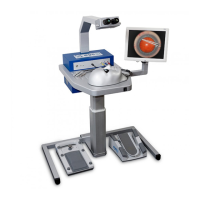
3 Starting up the simulator
3.1 Start the simulator by pressing
the power button on the front panel
of the simulator PC.
The red LED on the front panel lights
up; the yellow LED starts flashing.
After a minute the greed LED lights
up. The login screen is displayed.
The microscope shows an animated
VRmagic logo in stereoscopic view.
4 Login
4.1 Use the touch screen to login to
the system with username „demo“
and password „demo“.
The touch screen shows the main
menu.
5 Checking the system status
5.1 Choose System Information
from the main menu.
Status of Video Control, Optical
Tracking, Instrument Board, In-
strument Footpedal, Microscope
Footpedal, Touchscreen = Ready
Status of BIOM Interface = not
connected (unplug BIOM temporar-
ily if otherwise).
6 Starting the simulation
6.1 Return to the main menu by
tapping the Back button.
6.2 Start a training task:
Tap Training Modules in the main
menu.
Choose a training module depend-
ing on the connected surgery
interface:
Cataract: Phaco Training
Vitreoretinal: Vitrector Training.
Choose a level and tap Select
Level.
6.3 Tap Start Training. A stereoscopic outside view of the
virtual patient eye is shown in the
microscope.
7 Checking the artificial eye
7.1 Carefully move the artificial eye
using your hand.
Look into the microscope to see the
virtual eye moving correspondingly.
Eyesi Surgical Simulator – Installation and Operating Guide
60
Troubleshooting and Service