10 BlueCool S-Series
Notes:
■
Ensure the unit is mounted stably.
■
Install condensed-water drain lines on a down-
ward slope and without water pockets.
■
The diameter of the condensed-water drain line
must match the condensed-water drain fitting on
the condensed-water tray.
■
Connect the condensed-water tray via the con-
densed-water drain line to the bilge or other con-
densation/water collection points.
■
There must be no backpressure in the con-
densed-water drain line.
■
If necessary, make a new water collection point
complete with pump, level switch and drain line.
Secure hose connector to connection socket of condensed-wa-
ter tray.
Ensure leak-proof fit.
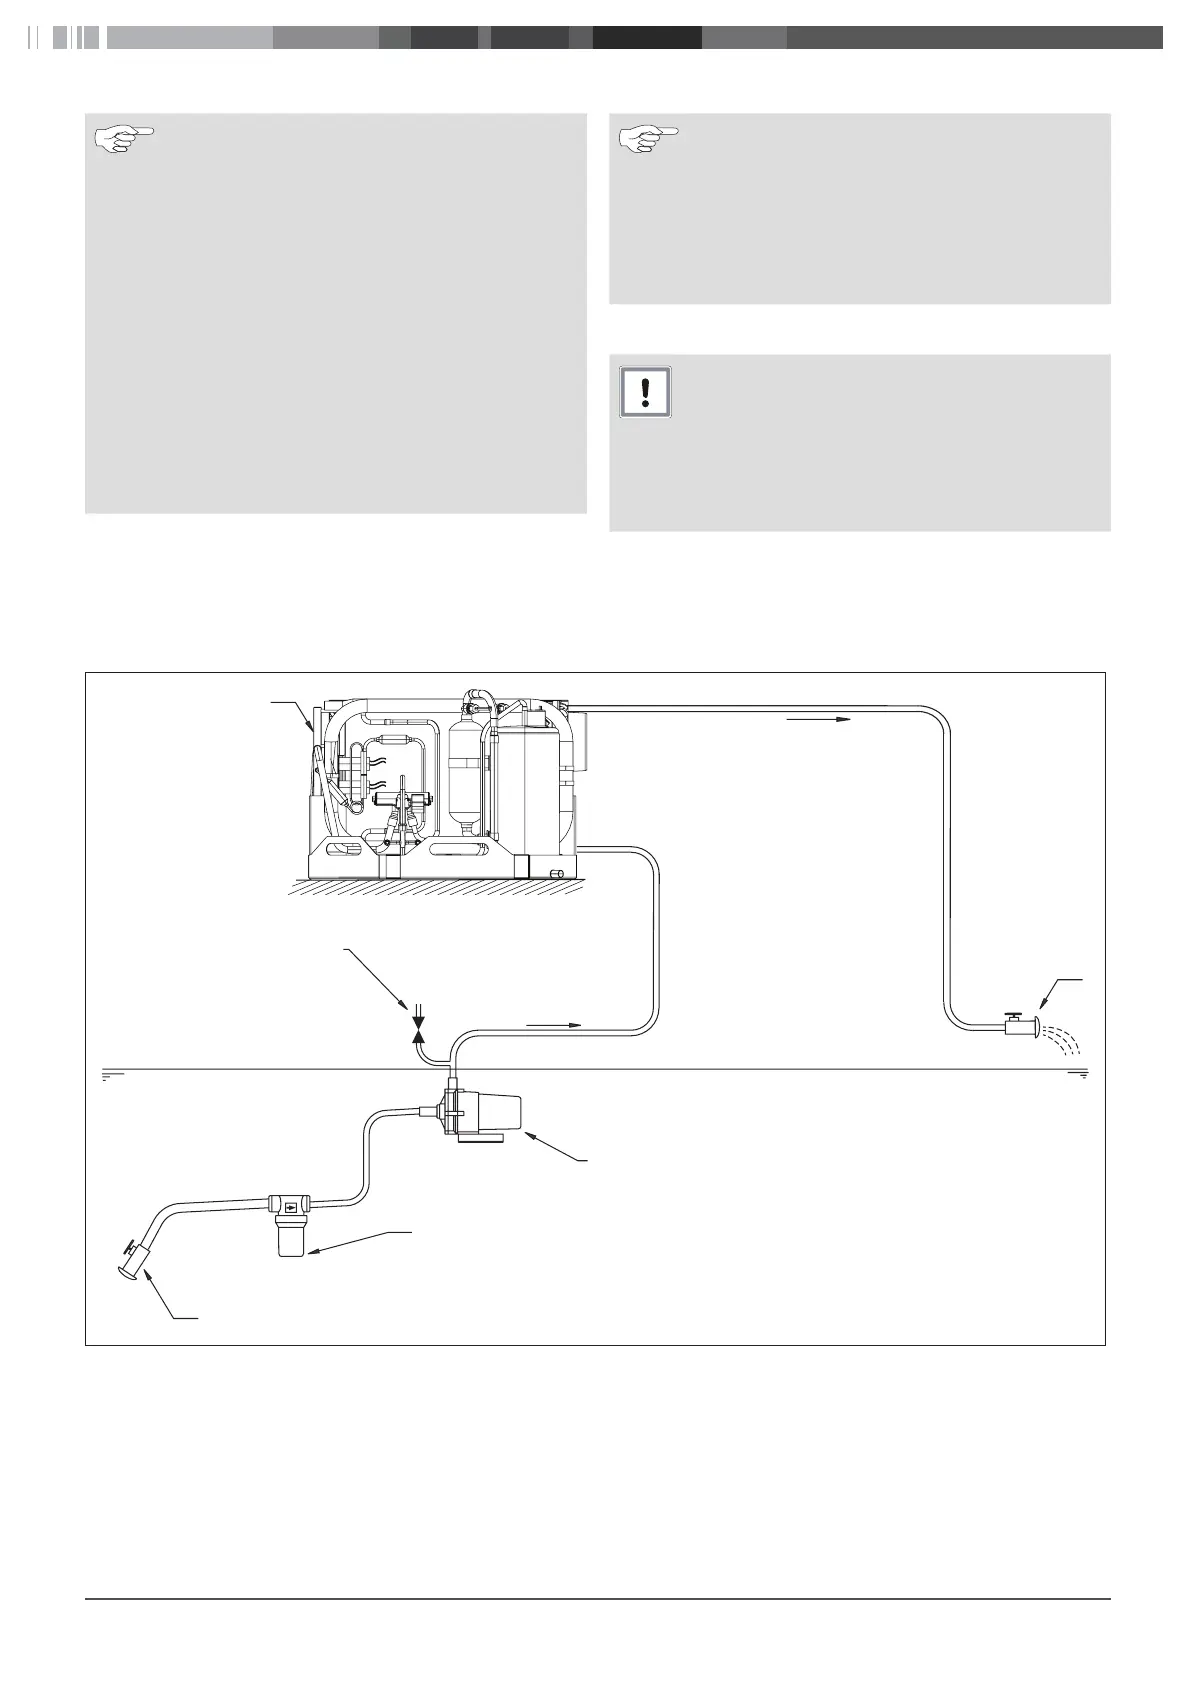
5.7 Installing the sea water circuit
5
4
1
2
3
6
Fig.7 Installation example
1 Through-hull fitting with sea valve
2 Sea water strainer
3 Sea water pump
4 Bleeding
5 BlueCool S-Series
6 Sea water outlet
Notes
The sea water components are installed continuously
ascending from the through-hull fitting via the strain-
er and pump up to the BlueCool S-Series. This ar-
rangement ensures that bubbles, which would other-
wise cause the pump to malfunction, cannot collect
in the sea water circuit.
5.7.1 Installing through-hull fitting for the sea water inlet
CAUTION
Sea water enters when installed incorrectly.
Boat can sink; danger of drowning.
Suitable measures must be taken to install the
through-hull fitting in order to prevent an unchecked
entry of sea water.
 Loading...