14 Repair information and repair instructions
6.2.2 Replacing the O-ring in the oxygen outlet
Tools required:
• Open-ended spanner SW 16 (only necessary if the oxygen outlet 7 is sealed with the cap 47).
1. If the oxygen outlet 7 is sealed with the
cap 47, remove the cap using the open-ended
spanner (SW 16).
2. Pull the O-ring 39 from the connection.
3. Wet a new O-ring using the oxygen lubricant
Belerub (WM 14902) and push it onto the
connection.
4. Using open-ended spanner SW 16, gently
tighten cap 47. Do not over-tighten!
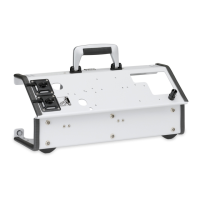
6.2.3 Dismantling the housing
Tools required:
• Crosstip screwdriver, size 1,
• Open-ended spanner SW 7,
• Open-ended spanner SW 19 (only with AGA coupling),
• Open-ended spanner SW 22,
• Guide pipes, for toggle switches (from Weinmann),
• Special locknut tool G 3/8 and special tool from Set WM 15348.
1. Twist the knob 45 as far as it will go to the left
so that you will have a reference point later on
when assembling.
2. Release the lid 46 from the knob 45.
3. Hold the knob steady using the special tool to
stop it from turning, and loosen the lock screw.
Note:
Do not unscrew the screw completely; otherwise,
the knob will be dismantled into its component
parts.
4. Pull off the knob 45.
5. If your Module is equipped with an AGA cou-
pling, loosen it with an open-ended spanner
(SW 19).
6. Unscrew union nut at inhalation
connection 11.
7. Screw the special locknut tool onto the inhala-
tion connection 11.
O
47
39
46
45