3-25
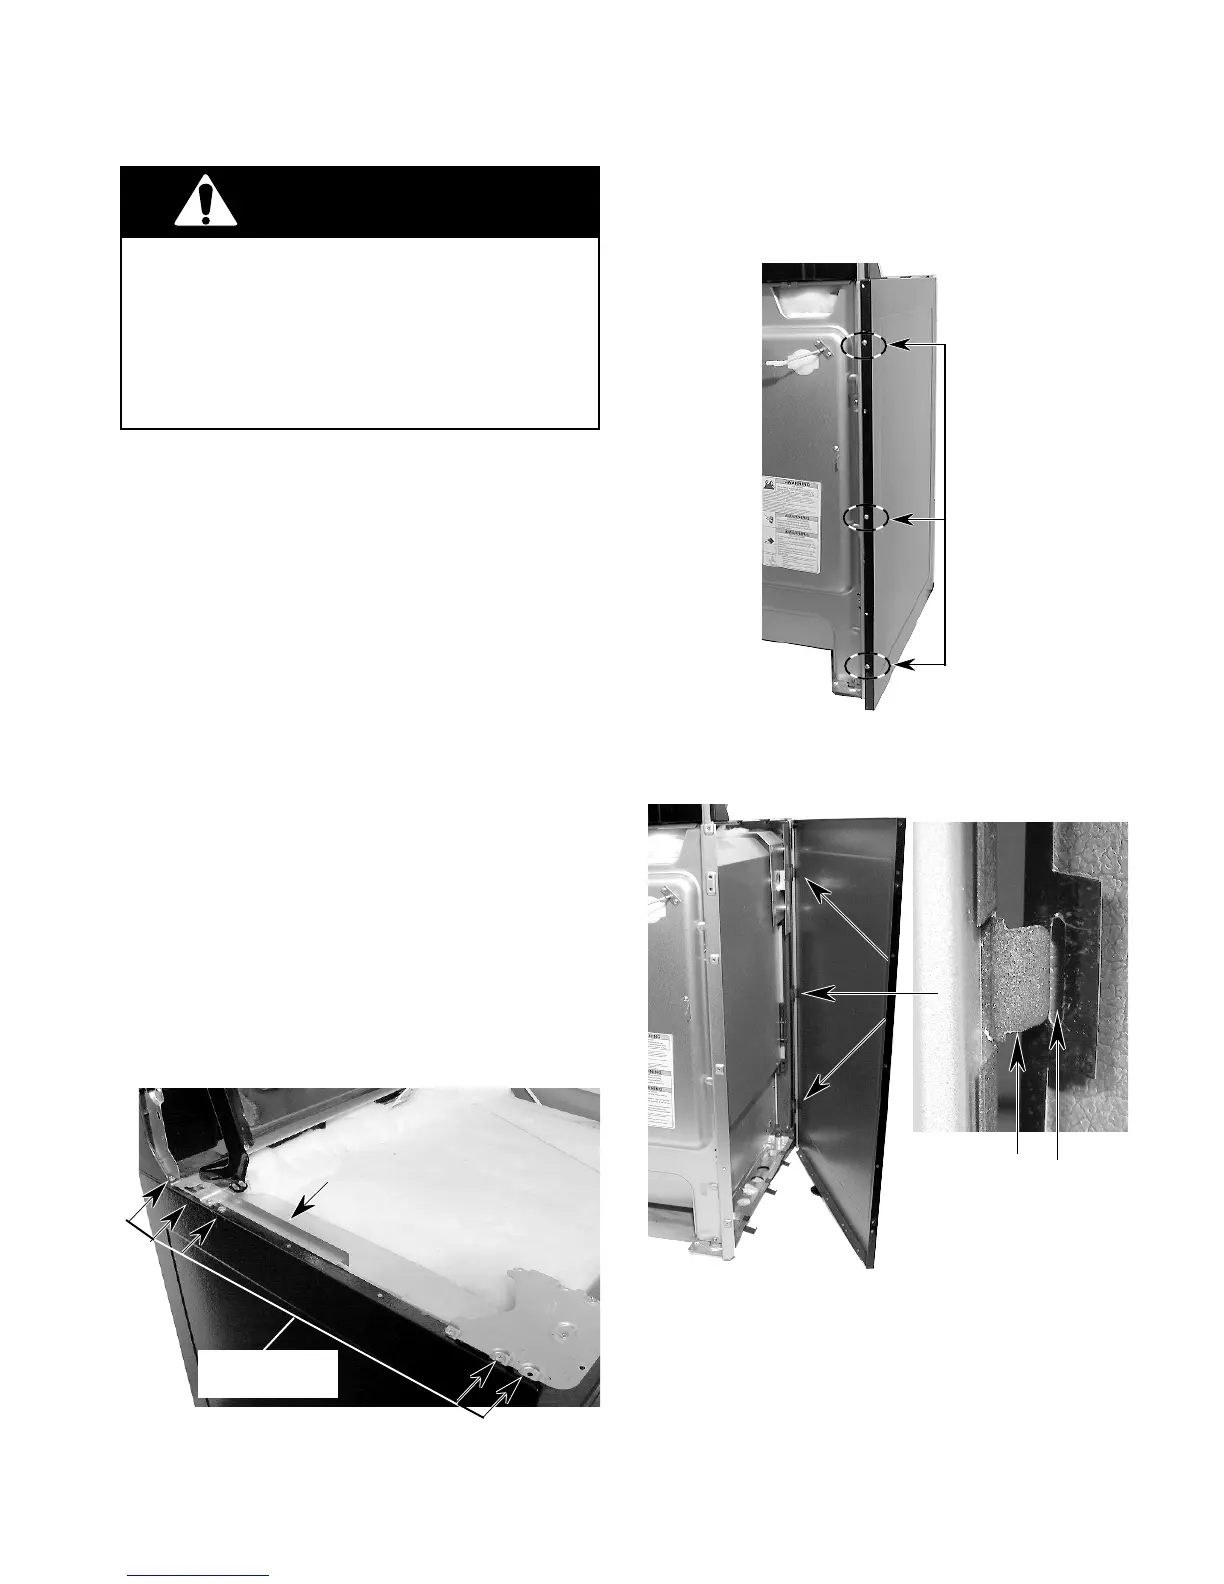
8 . Pull the back of the side panel out from the
range approximately 45˚.
9. Open the warming drawer several inches.
10. Push forward and unhook the three front
tabs from the chassis slots and remove
the side panel.
Unhook
3 Front Tabs
From Slots
REMOVING A SIDE PANEL
1. Turn off the electrical supply going to the
range.
2. Remove the oven door from the range
(see page 3-20 for the procedure).
3. Pull the range away from the wall so you
can access the back of the unit.
4. Remove the eight screws from the rear
panel and remove the panel (see step 4 on
page 3-2).
5. Raise the cooktop (see page 3-8 for the
procedure). NOTE: Position the side of
the cooktop so that it does not rest on the
side panel that you are removing.
6. Remove the five screws from the top of the
side panel. NOTE: Set the small support
bracket aside with the screws.
7. Remove the three screws from the left or
right side panel you are removing (the left
panel is shown below).
ELECTRICAL SHOCK HAZARD
Disconnect power before servicing the range.
Replace all panels before operating range.
Failure to do so can result in death or electri-
cal shock.
CAUTION: When you work on the electric
range, be careful when handling the sheet
metal parts. Sharp edges may be present, and
you can cut yourself if you are not careful.
WARNING
Bracket
3 Screws
Left Side
Panel Screws
 Loading...