en
40 WILO SE 2019-11
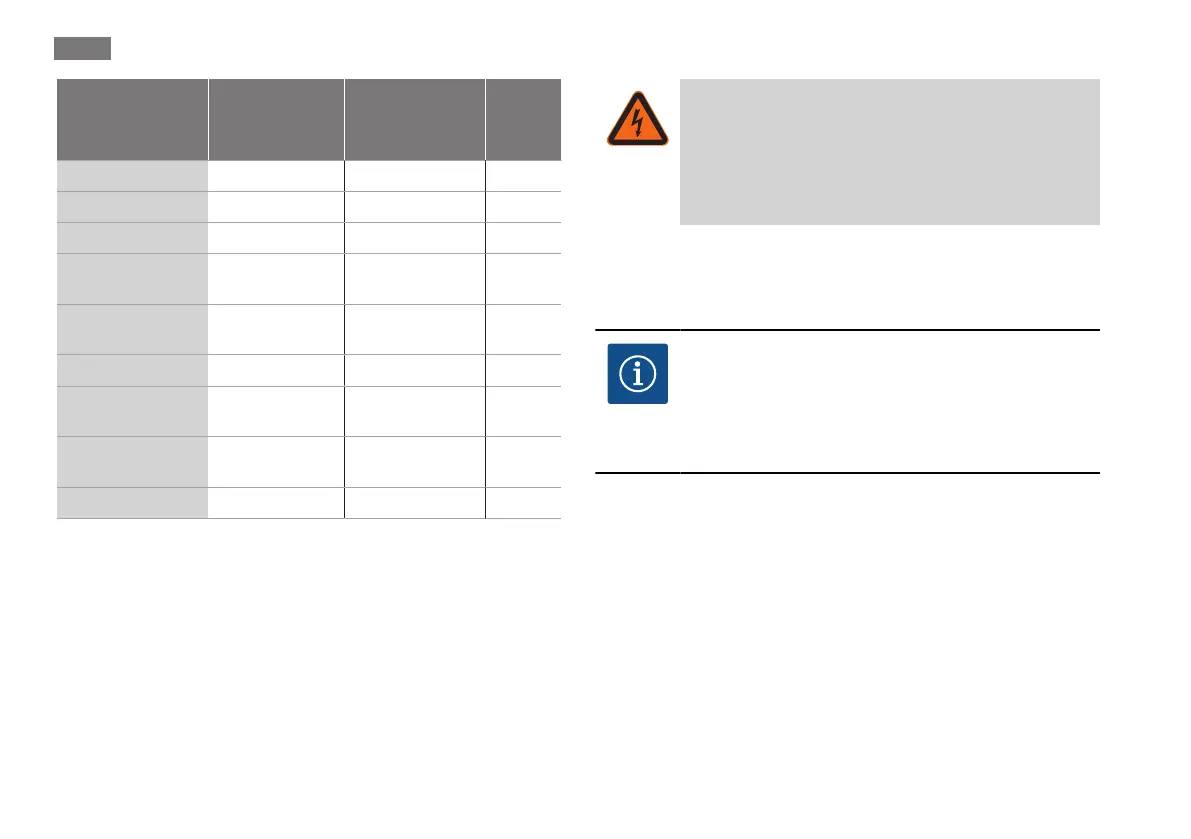
Connection Cable cross-
section in mm
2
Min.
Cable cross-
section in mm
2
Max.
Cable
Mains plug
3x1.5 3x2.5
SSM
2x0.2 2x1.5 (1.0**) *
SBM
2x0.2 2x1.5 (1.0**) *
Digital input1
(DI1)
2x0.2 2x1.5 (1.0**) *
Digital input2
(DI2)
2x0.2 2x1.5 (1.0**) *
+24V output
1x0.2 1x1.5 (1.0**) *
Analogue input1
(AI1)
2x0.2 2x1.5 (1.0**) *
Analogue input2
(AI2)
2x0.2 2x1.5 (1.0**) *
Wilo Net
3x0.2 3x1.5 (1.0**) shielded
Table6: Cable requirements
*Cable length ≥2m: Use shielded cables.
**When using ferrules, the maximum cross-section for communic-
ation interfaces is reduced to 1mm
2
. All combinations up to
2.5mm
2
are permissible in the Wilo-Connector.
DANGER
Electric shock!
When connecting SSM/SBM lines, care should be
taken to separate the SELV section, thus ensuring
SELV protection is maintained!
At cable cross-sections of 5–10mm, remove the internal sealing
ring from the threaded cable gland before installing the cable
➜Fig.24.
NOTICE
• Tighten the threaded cable connection M16x1.5
on the control module with a torque of 2.5Nm.
• Tighten nuts to a torque of 2.5Nm to ensure strain
relief.
6.3 Connection options
➜Fig.14
All communication interfaces in the terminal room (analogue inputs,
digital inputs, Wilo Net, SSM and SBM) comply with the SELV stand-
ard.
Follow the detailed instructions online for details on connecting the
shield clamp.
➜See QR code or www.wilo.com/stratos-maxo/om
Connecting the communication interfaces
Observe the warnings in the “Electrical Connection” section!
1. Loosen the screws of the module cover.
 Loading...