WARNING: Do not run the CMC without the blade cartridge
in place or damage to the blade cartridge release lever could
occur.
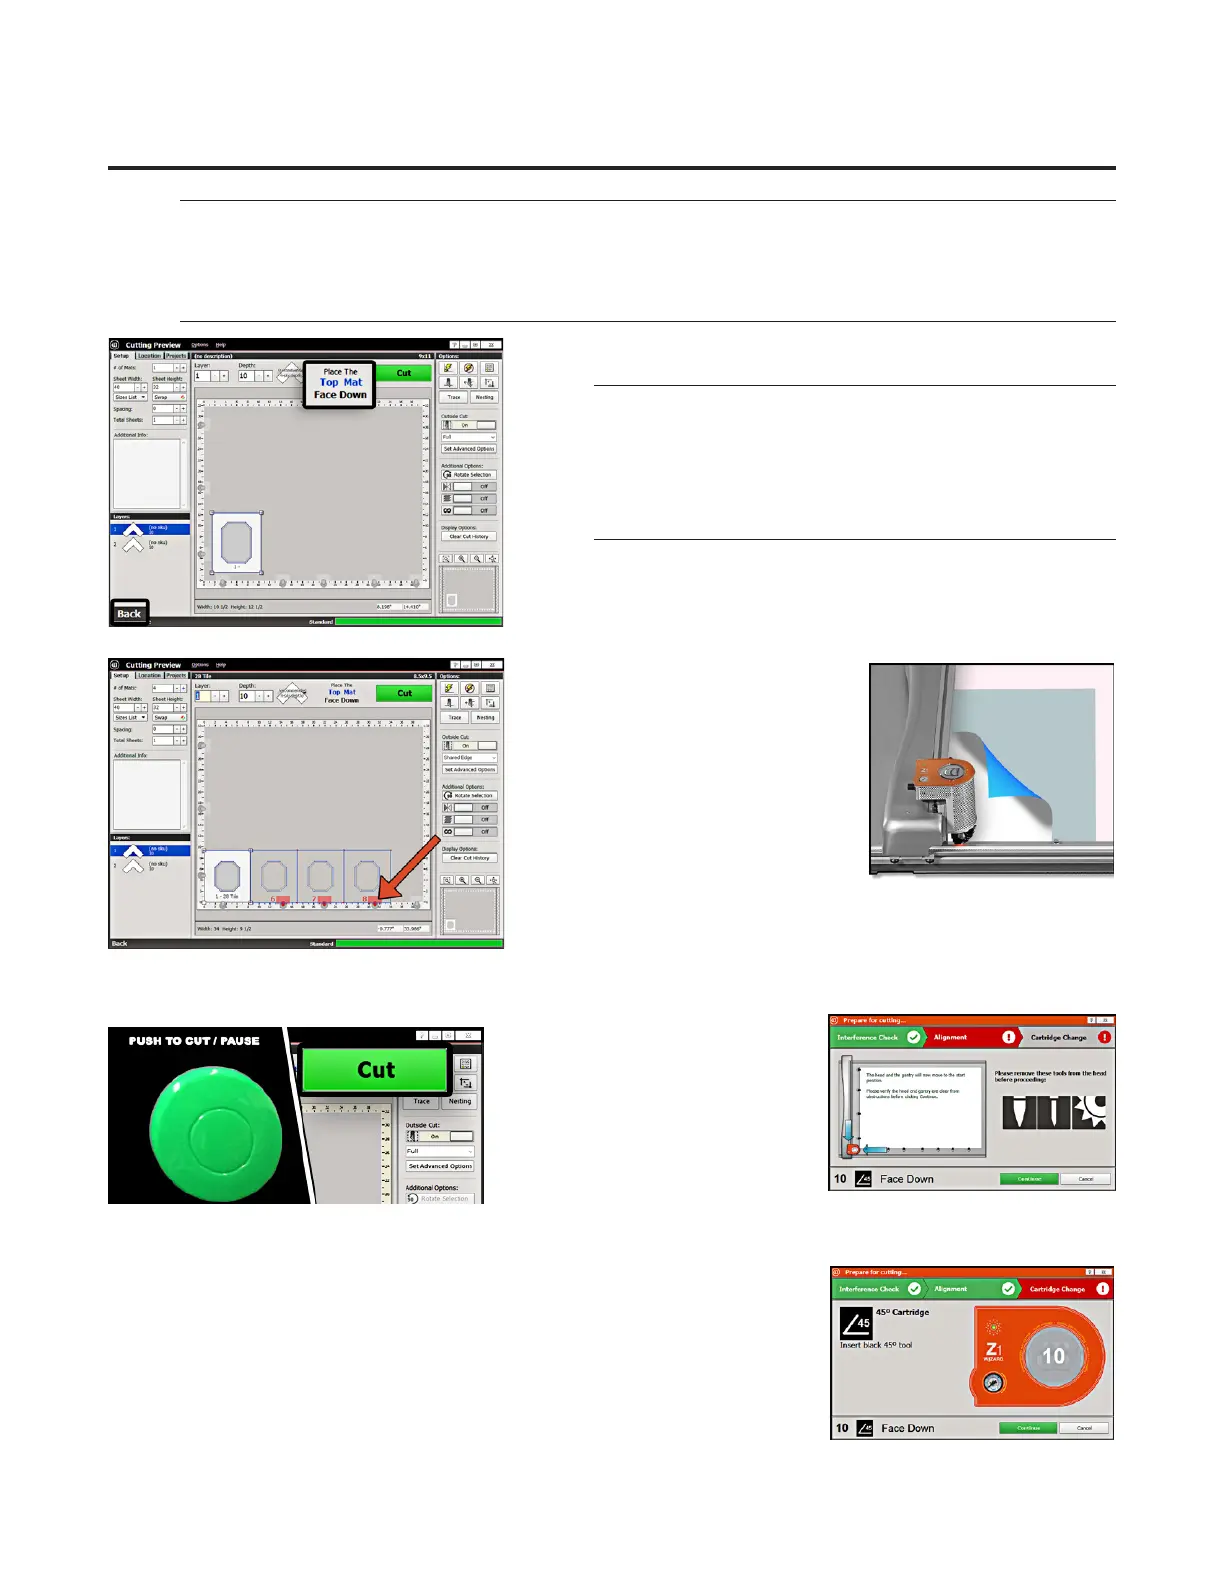
Prepare the Matboard
*Make sure there are two layers of
disposable slipsheets of adequate
size underneath the matboard to be
cut.*
1. The cut preview displays whether the current layer is to be cut 1. The cut preview displays whether the current layer is to be cut
from the front or from the back of the matboard. This determines from the front or from the back of the matboard. This determines
how to place the matboard into the CMC. how to place the matboard into the CMC.
2. When cutting from the back, 2. When cutting from the back,
place the matboard face down onto place the matboard face down onto
the CMC (facing away from the the CMC (facing away from the
operator). Make sure the matboard operator). Make sure the matboard
nestles tightly under the horizontal nestles tightly under the horizontal
and vertical clamps of the CMC. and vertical clamps of the CMC.
Since we’re not cutting the outside, Since we’re not cutting the outside,
place a pre-cut matboard of place a pre-cut matboard of
adequate size.adequate size.
3. If you are following these instructions and have entered a 3. If you are following these instructions and have entered a
dierent size mat and there are red indicators showing that any dierent size mat and there are red indicators showing that any
of the clamps are in the way of cutting, the clamps will need to be of the clamps are in the way of cutting, the clamps will need to be
rotated. rotated. See “Adjusting the SmartClamps™ for Zero Waste” on page 22See “Adjusting the SmartClamps™ for Zero Waste” on page 22..
Push/Click Cut
1. Push the green 1. Push the green CutCut button on button on
the control panel on the left side the control panel on the left side
of the board to cut the design. of the board to cut the design.
Optionally, you can click the Optionally, you can click the CutCut
button on the Cut Preview Screen. button on the Cut Preview Screen.
2. If the motors are disengaged, the 2. If the motors are disengaged, the
software will prompt to software will prompt to Align the Align the
HeadHead. When the motors are disengaged, the gantry can be moved . When the motors are disengaged, the gantry can be moved
easily back and forth and the head moves easily up and down on the gantry. easily back and forth and the head moves easily up and down on the gantry. See “Prepare to Cut” page See “Prepare to Cut” page
19 for instructions on how to Align the Head19 for instructions on how to Align the Head..
3. Make sure that the Pen, Vinyl and Crease cartridges are not currently 3. Make sure that the Pen, Vinyl and Crease cartridges are not currently
installed on the head.installed on the head.
4. If the head is aligned but a dierent cartridge or blade depth is needed, 4. If the head is aligned but a dierent cartridge or blade depth is needed,
the user will be prompted to change the blade cartridge and conrm the the user will be prompted to change the blade cartridge and conrm the
blade depth. blade depth. See “Cartridge Change and Depth Setting” page 19 for See “Cartridge Change and Depth Setting” page 19 for
more informationmore information..
18
Wizard™ International, Inc., 4600 116th St. SW, Mukilteo, WA 98275 888/855-3335 Wizard™ International, Inc., 4600 116th St. SW, Mukilteo, WA 98275 888/855-3335 wizardcutters.comwizardcutters.com
20-36070-1 GettingStartedManualZ1-70FrameShop
04/03/24
Wizard™ CMC Model Z1 Hardware and Software Getting Started Guide