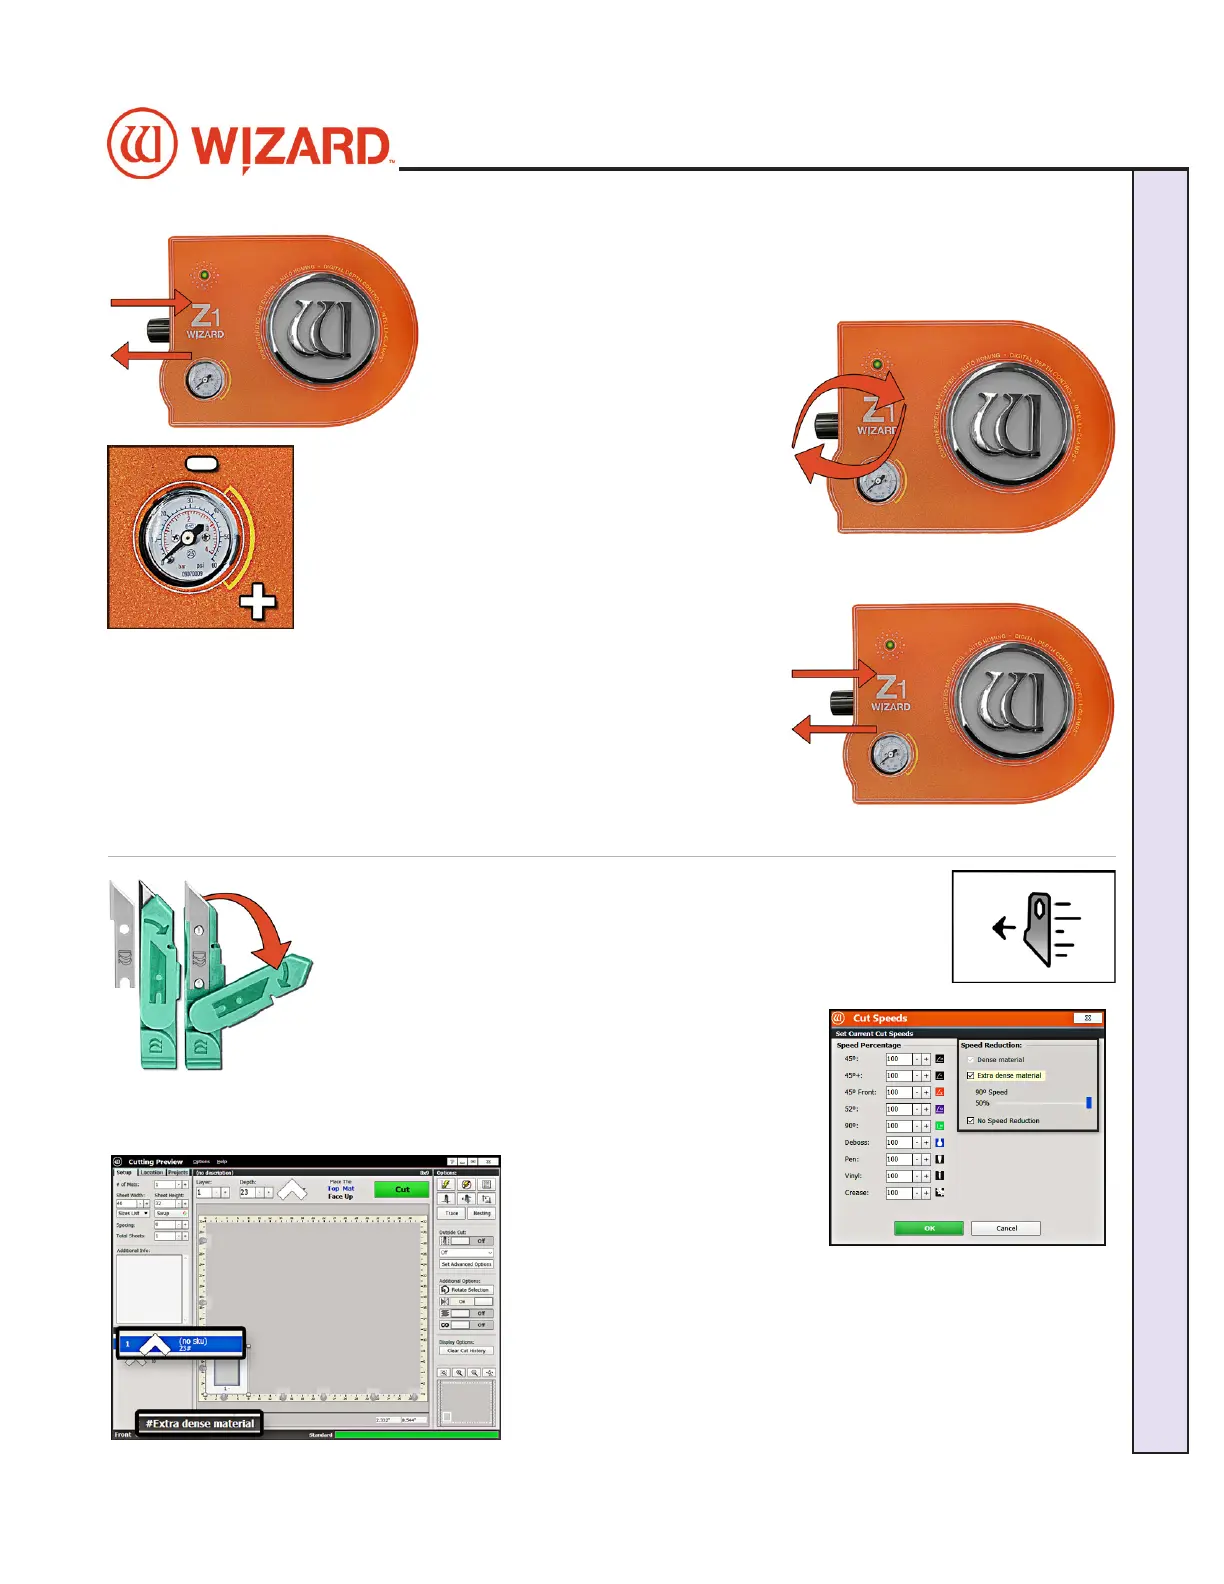
8. Pull out the air regulator pressure knob by pulling it to the left.
9. Adjust the air regulator.
• For High Setting: Turn the air
regulator pressure knob clockwise
until the marker on the gauge is at
the high setting. The maximum air The maximum air
pressure should be less than or pressure should be less than or
equal to 60 psi to avoid crushing the equal to 60 psi to avoid crushing the
matboardmatboard.
• For Low Setting: Turn the air regulator pressure
knob counter-clockwise until the marker on the
gauge is at the low setting. The minimum air The minimum air
pressure should be 35 psi, otherwise the blade may not cut through the matboardpressure should be 35 psi, otherwise the blade may not cut through the matboard.
10. The software will prompt for a head pressure 10. The software will prompt for a head pressure
change change onlyonly if the current mat is a dierent if the current mat is a dierent
setting than the previously cut mat. If the settings are the same as setting than the previously cut mat. If the settings are the same as
the previously cut mat, the CMC will skip this step and proceed to the the previously cut mat, the CMC will skip this step and proceed to the
Cartridge Change and Depth Setting screen.Cartridge Change and Depth Setting screen.
11. Set it by pushing the air regulator pressure knob back in.
12. Click OK to cut the mat with this setting.
Cutting an Extra Dense Layer with the 90°
Cartridge
This setting is only for the 90° Cartridge and will not take aect if
another cartridge is selected. This setting will allow the 90° Cartridge
to cut at a slower pace.
1. Select the desired layer on the Cut Preview.
2. Click the Cut Speeds button to open the Cut Speeds Screen.
3. Click the checkbox for Extra Dense Material.
4. Adjust the slidebar to the desired percentage of
cutting speed. For instance, 50% is 50% of the
standard cutting speed for the 90° Cartridge.
5. Click OK. The Cut Preview
displays the extra dense layer
with a pound sign and indicates
that this layer is extra dense.
6. If needed, click on the Blade Depth button to open the Blade
Depth screen to adjust the Blade Depth to the appropriate setting
for this matboard then click OK.
7. Click Cut to cut the mat and Align the Head if requested.
20-36070-1 GettingStartedManualZ1-70FrameShop
04/03/24
25
Wizard CMC Model Z1: Hardware and Software Getting Started Manual
Wizard™ CMC Model Z1 Hardware and Software Getting Started Guide