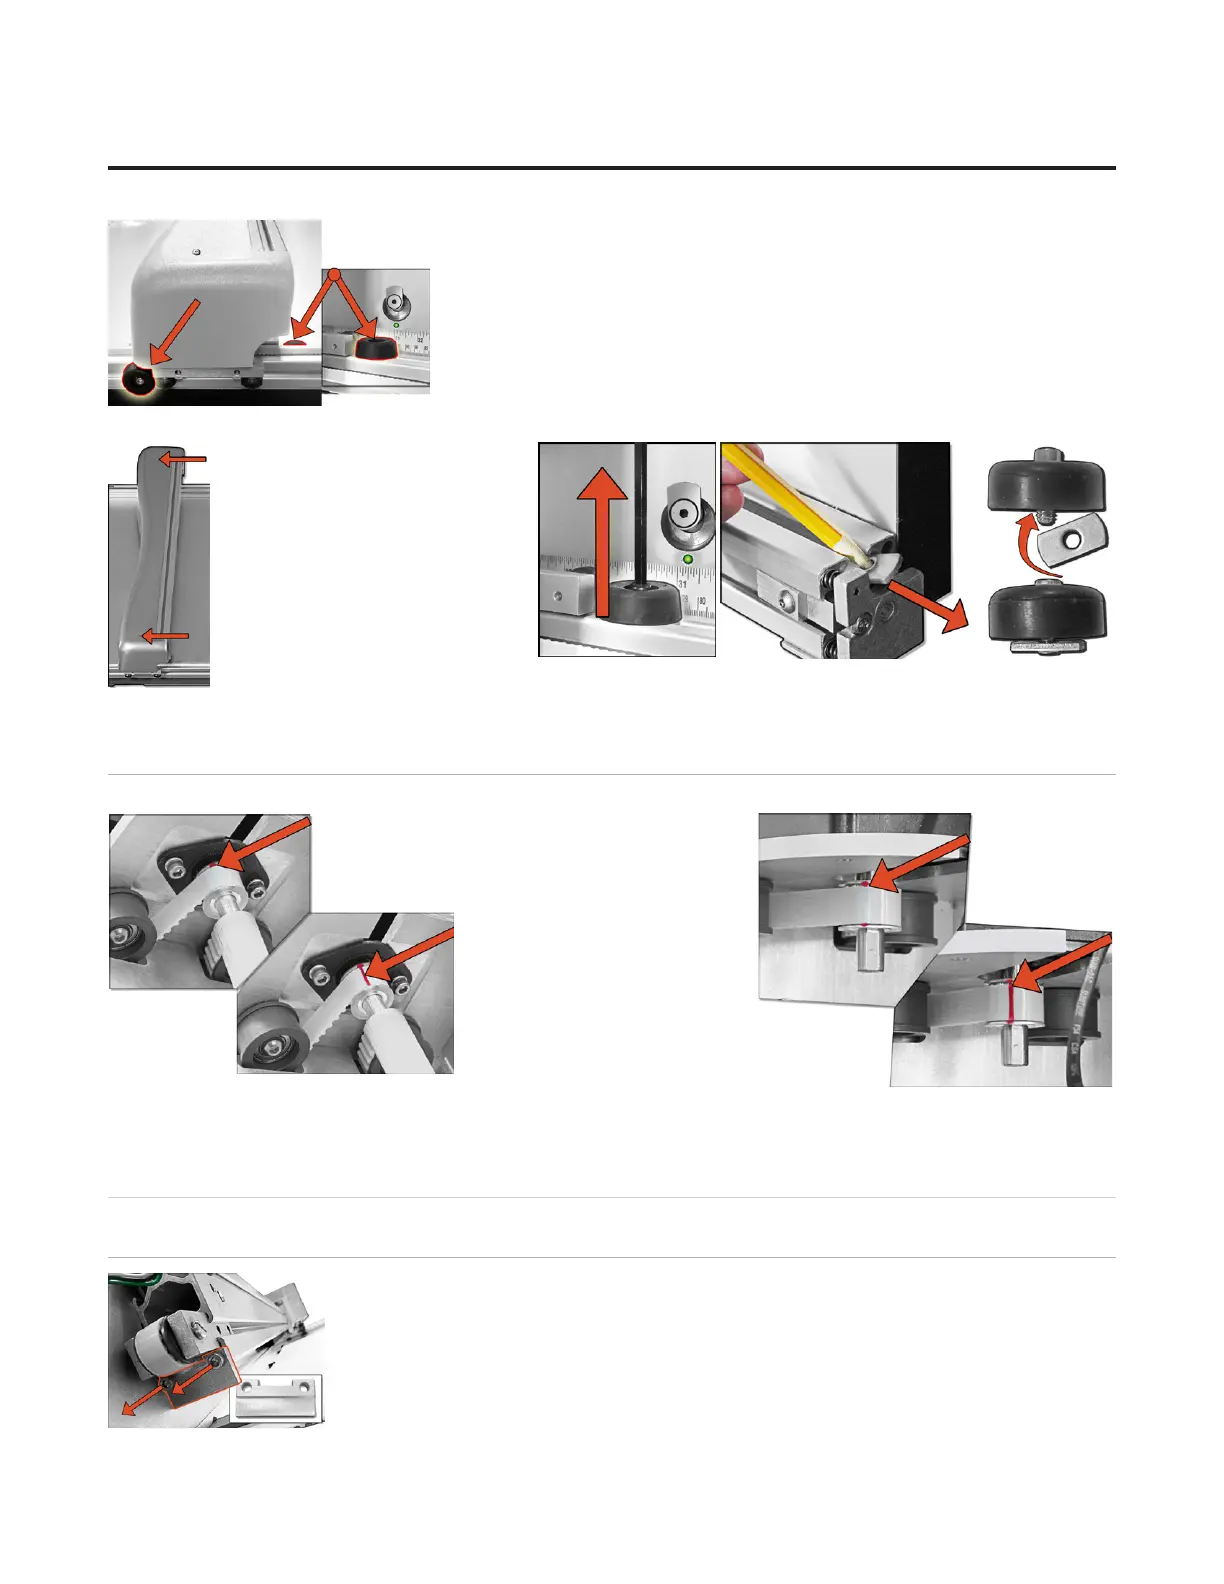
2. There are two shipping blocks on either side of the gantry on the bottom 2. There are two shipping blocks on either side of the gantry on the bottom
rail. One is to the left side of the gantry on the underside of the bottom rail. rail. One is to the left side of the gantry on the underside of the bottom rail.
The other is to the right of the gantry on the top of the bottom rail.The other is to the right of the gantry on the top of the bottom rail.
3. Remove the two screws 3. Remove the two screws
holding the gantry cover in place, holding the gantry cover in place,
and set the cover and screws and set the cover and screws
aside.aside.
4. Remove the shipping blocks 4. Remove the shipping blocks
by loosening the 3/16” Allen by loosening the 3/16” Allen
screw from the T-Nut. Slide the screw from the T-Nut. Slide the
T-Nuts to the right end of the rail; T-Nuts to the right end of the rail;
a pencil tip helps. Reattach the a pencil tip helps. Reattach the
T-Nuts to the shipping blocks and place them in the T-Nuts to the shipping blocks and place them in the
shipping box for storage.shipping box for storage.
Check Squareness
Check the Drive Belt Lines
1. Move the gantry all the way 1. Move the gantry all the way
to the left. Move the gantry to the left. Move the gantry
slowly toward the right until slowly toward the right until
a red mark is visible on the a red mark is visible on the
drive belt of the upper gantry. drive belt of the upper gantry.
Conrm that the red mark Conrm that the red mark
lines up with the red mark on lines up with the red mark on
the toothed pulley.the toothed pulley.
2. Without moving the gantry, 2. Without moving the gantry,
look at the lower drive belt of look at the lower drive belt of
the gantry and make sure the the gantry and make sure the
red mark lines up on the lower drive belt and the toothed pulley. If red mark lines up on the lower drive belt and the toothed pulley. If
they do not, call Wizard Technical Support.they do not, call Wizard Technical Support.
Head Installation
Install the Head onto the Gantry
1. Remove the Head Stop Plate at the bottom of the gantry under the belt tensioner. 1. Remove the Head Stop Plate at the bottom of the gantry under the belt tensioner.
Two screws hold it in place. Set plate and screws aside.Two screws hold it in place. Set plate and screws aside.
8
Wizard™ International, Inc., 4600 116th St. SW, Mukilteo, WA 98275 888/855-3335 Wizard™ International, Inc., 4600 116th St. SW, Mukilteo, WA 98275 888/855-3335 wizardcutters.comwizardcutters.com
20-36070-1 GettingStartedManualZ1-70FrameShop
04/03/24
Wizard™ CMC Model Z1 Hardware and Software Getting Started Guide