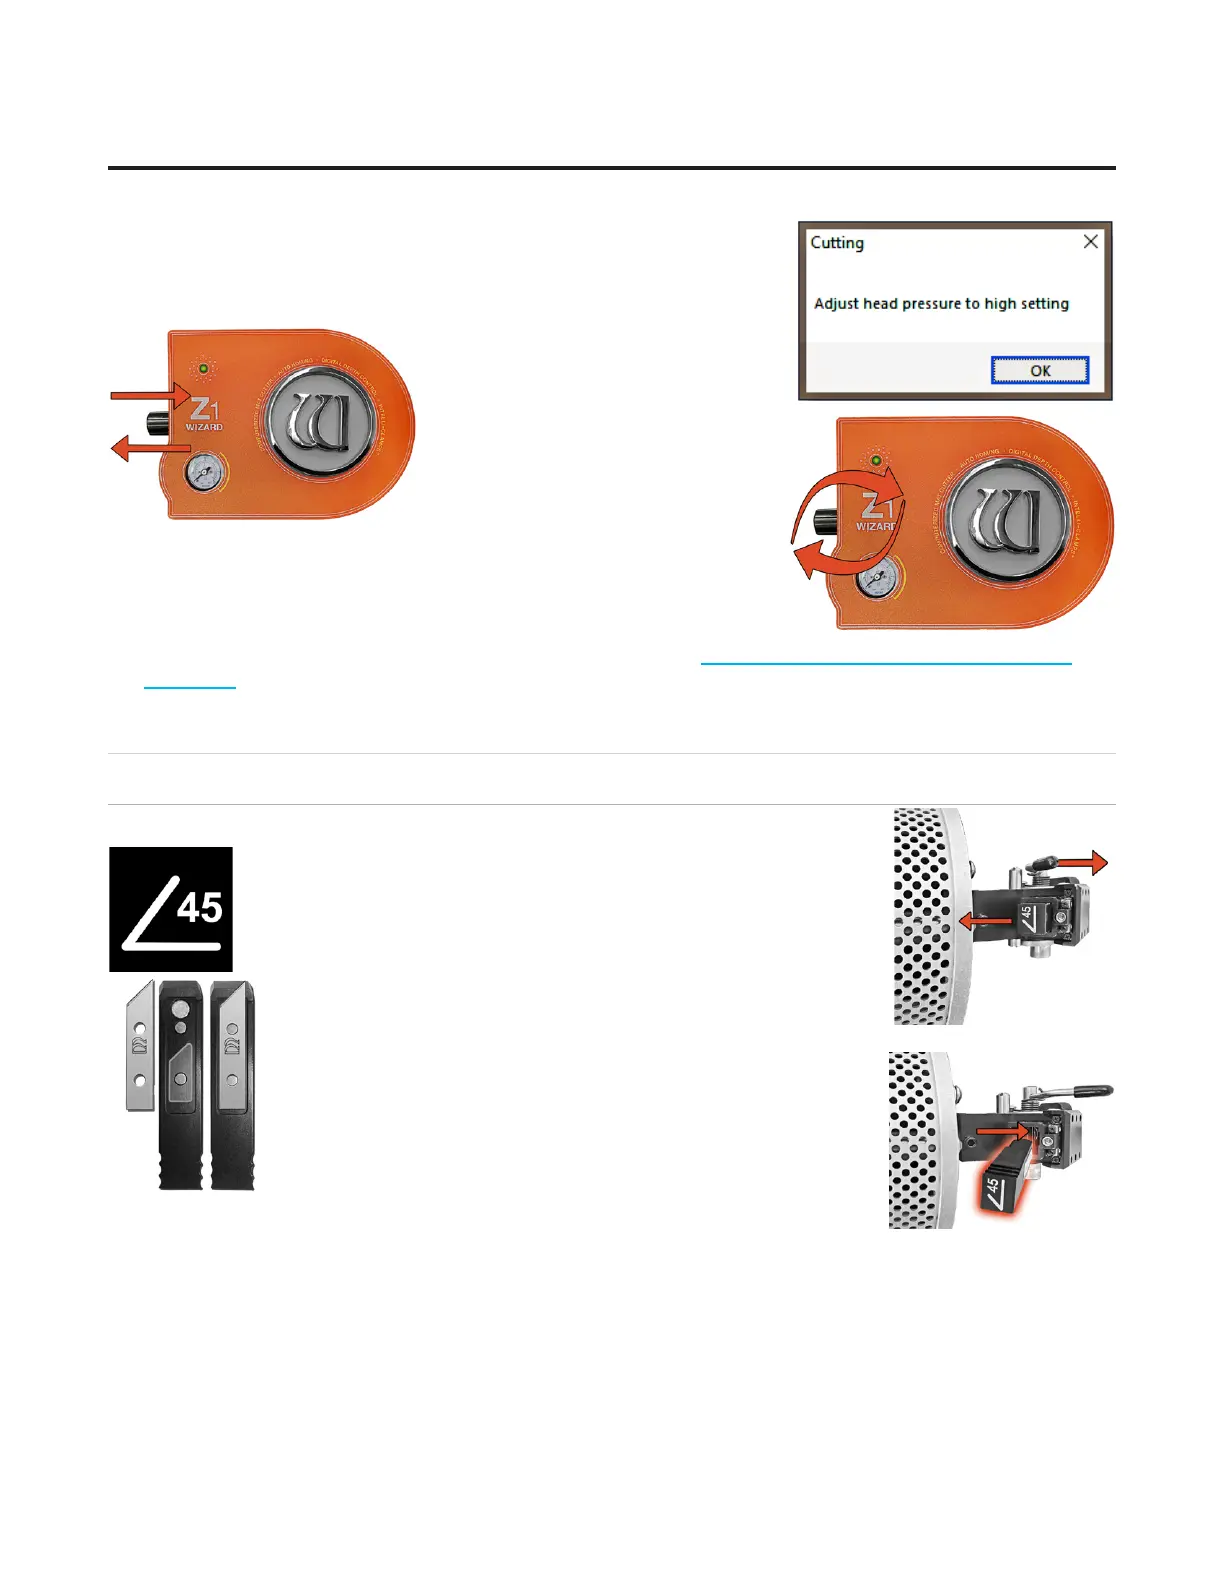
8. The Head plunges at the home position and applies the current
pressure. The software will prompt for a head pressure change only if
the current mat is a dierent setting than the previously cut mat. If the
settings are the same as the previously
cut mat, the CMC will skip this step.
9. Pull out the air regulator pressure
knob by pulling it to the left.
10. Turn the air regulator pressure
knob clockwise until the marker on the
gauge is at the high setting. Make sure
the gauge does not go above 60 psi.
11. Set it by pushing the air regulator pressure knob back in.
12. Click OK to cut the mat with this setting.
90° Cartridge
See the Knowledge Base topic on 90° Cartridge and Blades at See the Knowledge Base topic on 90° Cartridge and Blades at https://wizardcutters.atlassian.net/wiki/https://wizardcutters.atlassian.net/wiki/
x/7g4qYwx/7g4qYw to nd additional information on the 90° cartridge and changing the blades.to nd additional information on the 90° cartridge and changing the blades.
Changing the Blade
Using the 45º Cartridge
Changing the Blade
The 45° metal cartridge is labeled 45 on the end and is black.The 45° metal cartridge is labeled 45 on the end and is black.
1. Push the blade cartridge release down to eject the blade cartridge.1. Push the blade cartridge release down to eject the blade cartridge.
2. Remove the blade from blade cartridge.2. Remove the blade from blade cartridge.
3. The blade cartridge displays a diagram of the blade orientation 3. The blade cartridge displays a diagram of the blade orientation
(shown in contrast). Place new blade into cartridge with the (shown in contrast). Place new blade into cartridge with the
longest straight side to the right and the bevel face down lining longest straight side to the right and the bevel face down lining
up the holes of the blade over the pins in the cartridge. The blade up the holes of the blade over the pins in the cartridge. The blade
should t snugly into the recess space provided for it.should t snugly into the recess space provided for it.
4. Turn the cartridge over and reinsert into the head with the 4. Turn the cartridge over and reinsert into the head with the
blade facing the CMC board and the notch on the back of the blade facing the CMC board and the notch on the back of the
cartridge facing the head, until it clicks into place. It can only be cartridge facing the head, until it clicks into place. It can only be
inserted one way.inserted one way.
26
Wizard™ International, Inc., 4600 116th St. SW, Mukilteo, WA 98275 888/855-3335 Wizard™ International, Inc., 4600 116th St. SW, Mukilteo, WA 98275 888/855-3335 wizardcutters.comwizardcutters.com
20-36070-1 GettingStartedManualZ1-70FrameShop
04/03/24
Wizard™ CMC Model Z1 Hardware and Software Getting Started Guide