These interfering clamps must be physically rotated 180º so that they can be retracted prior to cutting in order These interfering clamps must be physically rotated 180º so that they can be retracted prior to cutting in order
to avoid a collision during the cutting operation. to avoid a collision during the cutting operation.
2. When you click 2. When you click CutCut, the Interference Screen will also indicate the clamps that need to be rotated out of the , the Interference Screen will also indicate the clamps that need to be rotated out of the
way. Rotate the indicated clamps out of the way as described and click Continue.way. Rotate the indicated clamps out of the way as described and click Continue.
The Z1’s unique IntelliClamps™ collision detection and avoidance system is designed to prevent accidental The Z1’s unique IntelliClamps™ collision detection and avoidance system is designed to prevent accidental
collisions between the cutting head and the clamps. The Z1 will not allow you to cut until there is no clamp collisions between the cutting head and the clamps. The Z1 will not allow you to cut until there is no clamp
interference detected.interference detected.
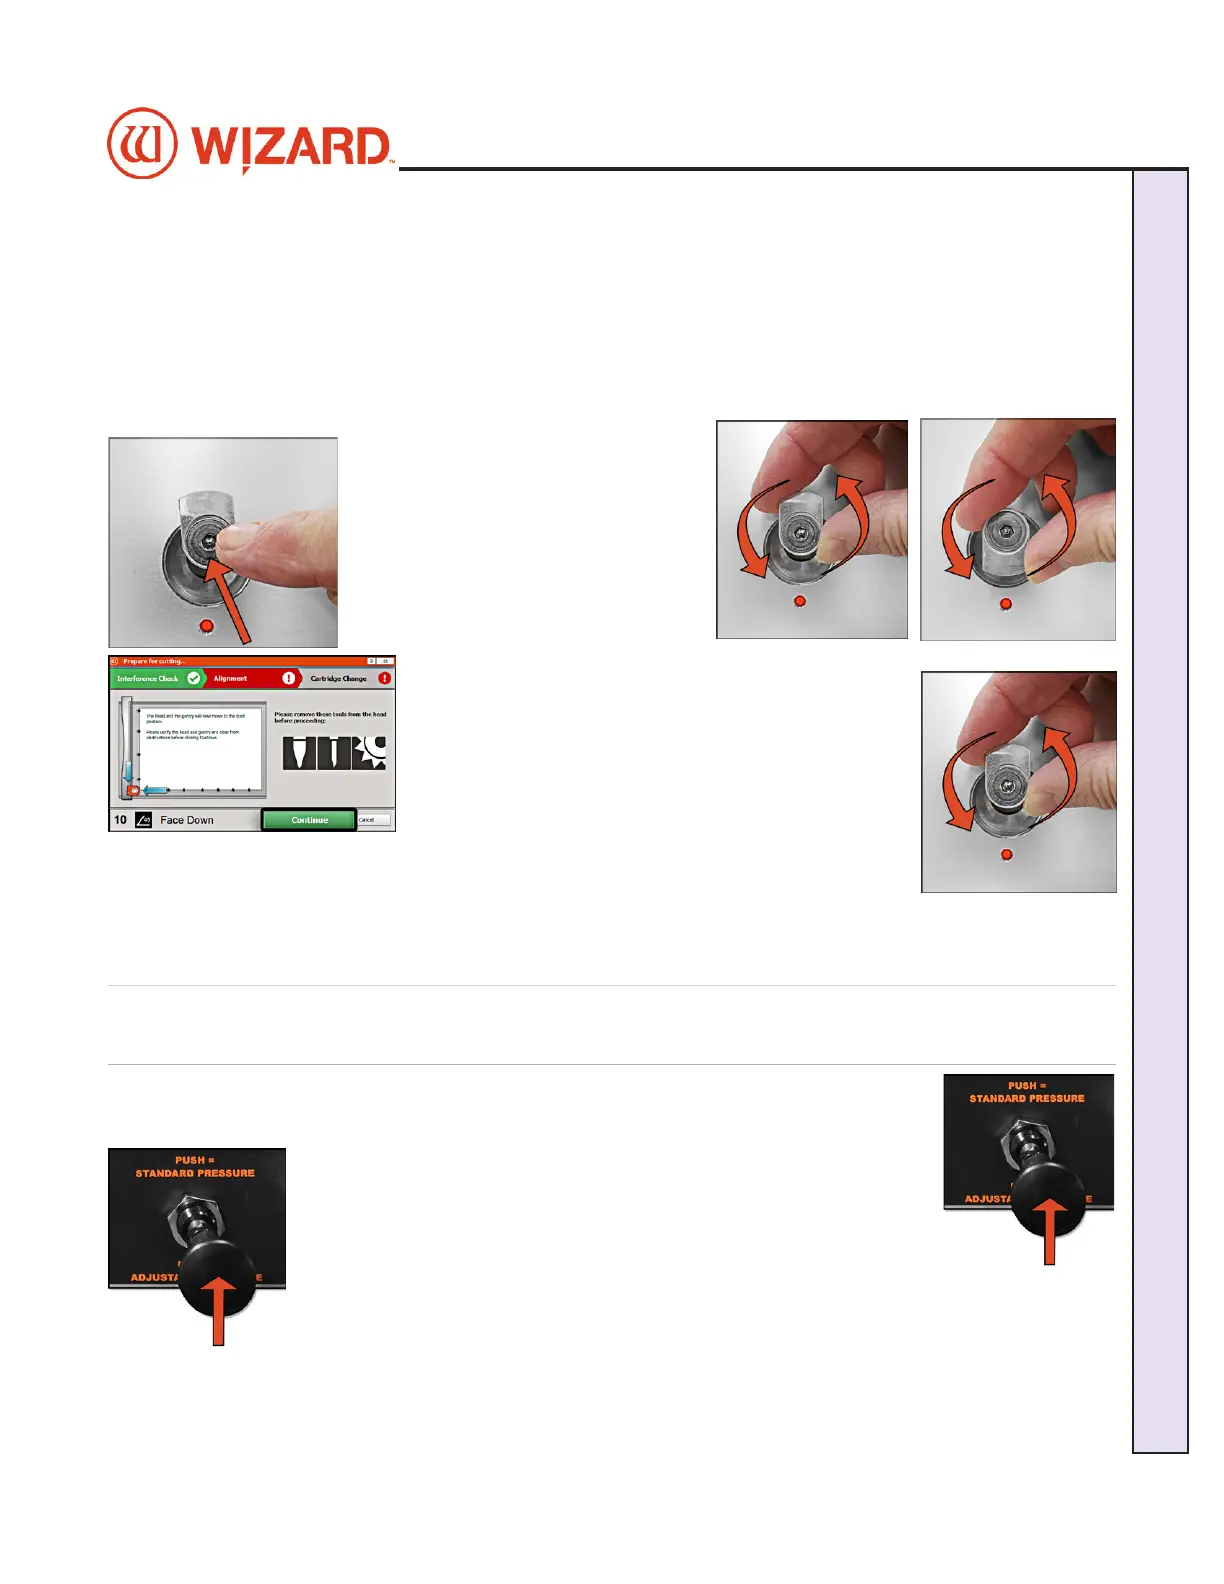
Clearing the Interfering Clamps
1. To rotate a clamp out of the way, 1. To rotate a clamp out of the way,
rst push it in toward the board to rst push it in toward the board to
release the air pressure. Then simply release the air pressure. Then simply
rotate the clamp 180º so that it may rotate the clamp 180º so that it may
retract into the board. When the retract into the board. When the
clamps are engaged, they will be clamps are engaged, they will be
retracted ush with the board.retracted ush with the board.
2. After rotating the interfering 2. After rotating the interfering
clamps and clicking Continue, the IntelliClamps™ clamps and clicking Continue, the IntelliClamps™
system will perform another interference check. If there system will perform another interference check. If there
is still an interfering clamp it will be identied on the is still an interfering clamp it will be identied on the
screen as well as with a red blinking LED light adjacent screen as well as with a red blinking LED light adjacent
to the clamp.to the clamp.
Simply rotate the clamp 180º as before and click Simply rotate the clamp 180º as before and click
Continue. Once the IntelliClamps™ system conrms Continue. Once the IntelliClamps™ system conrms
there is no interference, you will be allowed to proceed with cutting.there is no interference, you will be allowed to proceed with cutting.
3. For the next cutting job, the clamps should be rotated back toward the center of the 3. For the next cutting job, the clamps should be rotated back toward the center of the
board.board.
Mat SmartClamps™ Pressure
Setting the Mat SmartClamps™ Pressure
The zero-waste SmartClamps™ system featured by Wizard Z-Series cutters allows The zero-waste SmartClamps™ system featured by Wizard Z-Series cutters allows
you to cut all the way to the edges of the matboard—eliminating the edge waste that is you to cut all the way to the edges of the matboard—eliminating the edge waste that is
typical with bar style clamps. This is especially useful when tiling a design to cut multiple typical with bar style clamps. This is especially useful when tiling a design to cut multiple
mats at the same time out of a full sheet of matboard.mats at the same time out of a full sheet of matboard.
You can toggle the air pressure to the mat clamps between standard You can toggle the air pressure to the mat clamps between standard
and low pressure with the Mat Clamp Pressure Knob located on the and low pressure with the Mat Clamp Pressure Knob located on the
control panel on the left side of the board. This will allow you to cut control panel on the left side of the board. This will allow you to cut
delicate material such as foam core without crushing the material delicate material such as foam core without crushing the material
in the clamps. The amount of pressure can be adjusted with the in the clamps. The amount of pressure can be adjusted with the
regulator knob mounted under the control panel.regulator knob mounted under the control panel.
20-36070-1 GettingStartedManualZ1-70FrameShop
04/03/24
23
Wizard CMC Model Z1: Hardware and Software Getting Started Manual
Wizard™ CMC Model Z1 Hardware and Software Getting Started Guide